Introduzione
Follow this guide to remove and replace the daughterboard on the Moto E4 Plus. The daughterboard houses the charging port, a downward facing microphone, and the vibration motor.
Cosa ti serve
-
-
Insert the edge of the spudger into the notch on the bottom right corner of the phone.
-
Twist the spudger to start releasing the back cover from the phone.
-
Slide the spudger along the bottom edge to separate the back cover from the phone.
-
-
-
Remove the nineteen 3.2 mm long T3 screws securing the plastic midframe.
-
-
-
Insert the flat end of a spudger into the midframe seam at the bottom left corner of the phone (near the microphone hole).
-
Twist the spudger to release the plastic clip.
-
Repeat the process for the clip near the top right corner of the phone.
-
-
-
-
Lift the bottom edge of the plastic midframe upwards until the clips along the top edge release.
-
Remove the plastic midframe.
-
-
-
Use the point of a spudger to pry up and disconnect the battery connector from its motherboard socket.
-
-
-
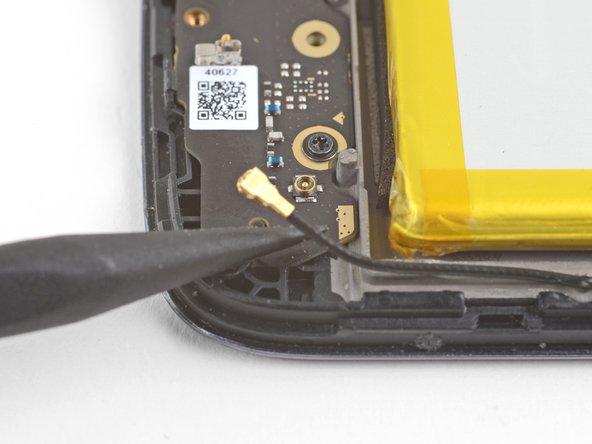
Use the point of a spudger to pry up and disconnect the antenna cable from its daughterboard socket.
-
-
-
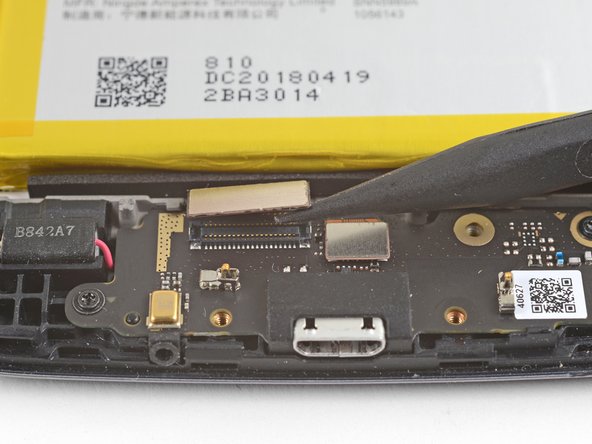
Use the point of a spudger to pry up and disconnect the interconnect cable from its daughterboard socket.
-
Pry up and disconnect the fingerprint sensor cable next to it from the daughterboard.
-
-
-
Remove the two 3.2 mm long T3 screws securing the daughterboard.
-
-
-
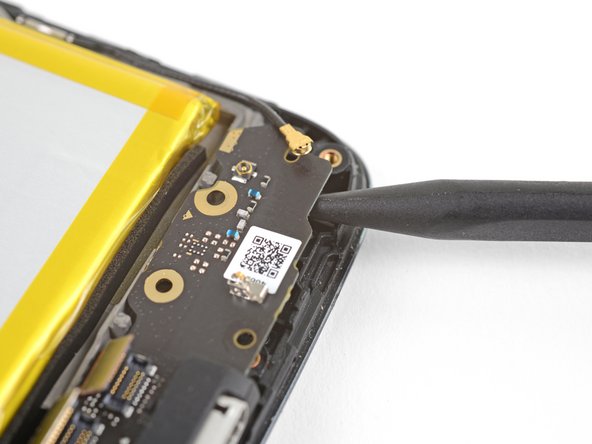
Insert the point of a spudger under the bottom right corner of the daughterboard and pry up to loosen the daughterboard.
-
-
-
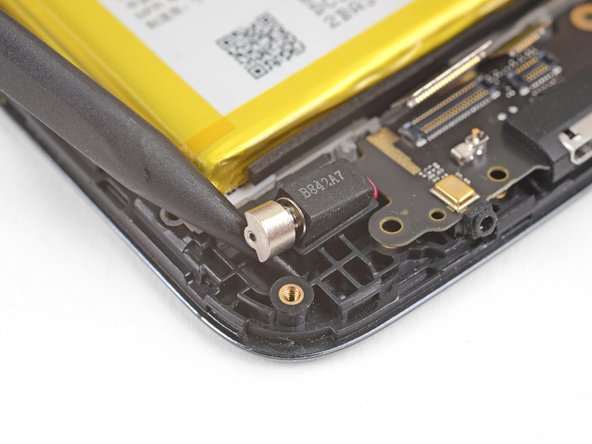
Insert the point of a spudger underneath the vibration motor and pry upwards to loosen it.
-
-
-
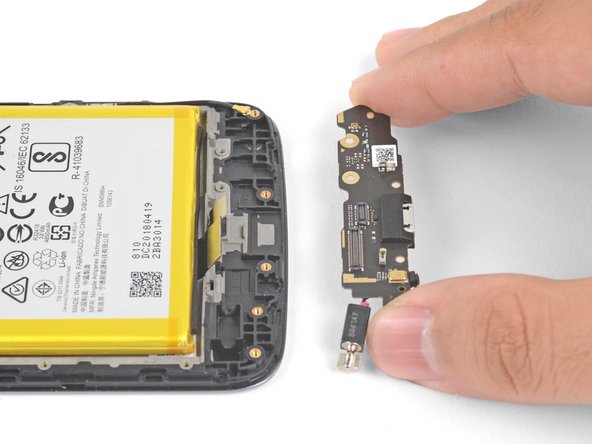
Grasp the daughterboard by the edges and lift it out of its recess.
-
Remove the daughterboard. The vibration motor will be attached to it.
-


To reassemble your device, follow these instructions in reverse order.
To reassemble your device, follow these instructions in reverse order.
Annulla: non ho completato questa guida.
Altre 2 persone hanno completato questa guida.

