Salta al contenuto principale

Questa guida ha delle modifiche più recenti. Passa all'ultima versione non verificata.

Motorola MC5590 LCD Screen Replacement

Cosa ti serve

  1. Motorola MC5590 LCD Screen Replacement, Battery: passo 1, immagine 1 di 1
    • Push in the battery release button.

  2. Motorola MC5590 LCD Screen Replacement: passo 2, immagine 1 di 1
    • Pull out battery.

  3. Motorola MC5590 LCD Screen Replacement, Keyboard: passo 3, immagine 1 di 2 Motorola MC5590 LCD Screen Replacement, Keyboard: passo 3, immagine 2 di 2
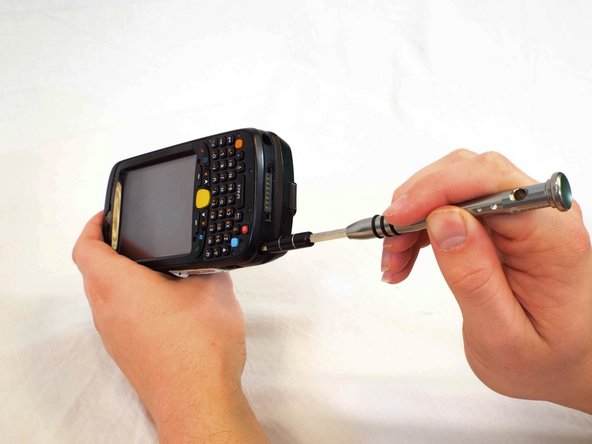
    • Remove the two rubber plugs on the top of the device by pushing them up and out of the phone.

  4. Motorola MC5590 LCD Screen Replacement: passo 4, immagine 1 di 3 Motorola MC5590 LCD Screen Replacement: passo 4, immagine 2 di 3 Motorola MC5590 LCD Screen Replacement: passo 4, immagine 3 di 3
    • Remove the four 1cm Phillips #0 screws from the top and bottom of the phone.

  5. Motorola MC5590 LCD Screen Replacement: passo 5, immagine 1 di 1
    • Use a plastic opening tool to remove the keyboard cover by prying up on its perimeter.

  6. Motorola MC5590 LCD Screen Replacement: passo 6, immagine 1 di 2 Motorola MC5590 LCD Screen Replacement: passo 6, immagine 2 di 2
    • Remove the eight 4mm Phillips #00 screws from the keyboard cover.

  7. Motorola MC5590 LCD Screen Replacement: passo 7, immagine 1 di 1
    • Remove the keyboard cover.

  8. Motorola MC5590 LCD Screen Replacement: passo 8, immagine 1 di 3 Motorola MC5590 LCD Screen Replacement: passo 8, immagine 2 di 3 Motorola MC5590 LCD Screen Replacement: passo 8, immagine 3 di 3
    • Use a spudger to flip up the retaining flap on the keyboard ribbon cable ZIF socket.

    • Pull the ribbon cable out of the socket.

  9. Motorola MC5590 LCD Screen Replacement: passo 9, immagine 1 di 2 Motorola MC5590 LCD Screen Replacement: passo 9, immagine 2 di 2
    • Use a spudger to flip up the retaining flap on the display ribbon cable ZIF socket.

    • Remove the keyboard from the device.

  10. Motorola MC5590 LCD Screen Replacement, Speaker: passo 10, immagine 1 di 2 Motorola MC5590 LCD Screen Replacement, Speaker: passo 10, immagine 2 di 2
    • Pull the black rubber tabs up gently and remove them.

  11. Motorola MC5590 LCD Screen Replacement: passo 11, immagine 1 di 2 Motorola MC5590 LCD Screen Replacement: passo 11, immagine 2 di 2
    • Using your finger, or spudger, push the motherboard out from the bottom.

  12. Motorola MC5590 LCD Screen Replacement: passo 12, immagine 1 di 2 Motorola MC5590 LCD Screen Replacement: passo 12, immagine 2 di 2
    • Remove the three Phillips #00 screws from the motherboard:

    • Two 3mm screws.

    • One 1mm screw.

  13. Motorola MC5590 LCD Screen Replacement: passo 13, immagine 1 di 2 Motorola MC5590 LCD Screen Replacement: passo 13, immagine 2 di 2
    • Disconnect the speaker from the motherboard.

  14. Motorola MC5590 LCD Screen Replacement, LCD Screen: passo 14, immagine 1 di 3 Motorola MC5590 LCD Screen Replacement, LCD Screen: passo 14, immagine 2 di 3 Motorola MC5590 LCD Screen Replacement, LCD Screen: passo 14, immagine 3 di 3
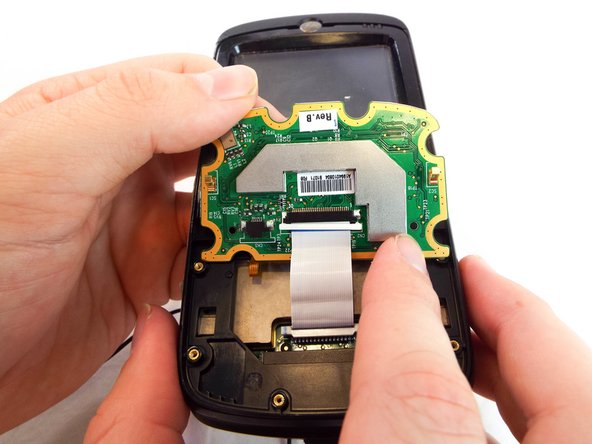
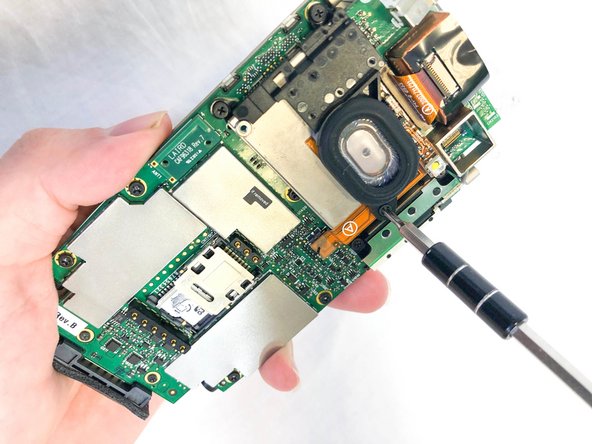
    • Remove the the 3mm Phillips #00 screws from the flex cable cover and antenna.
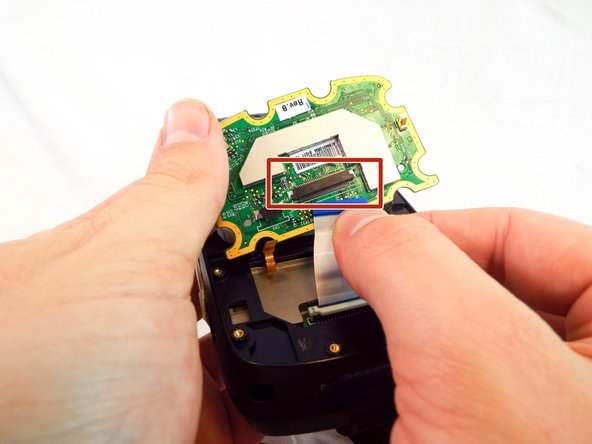
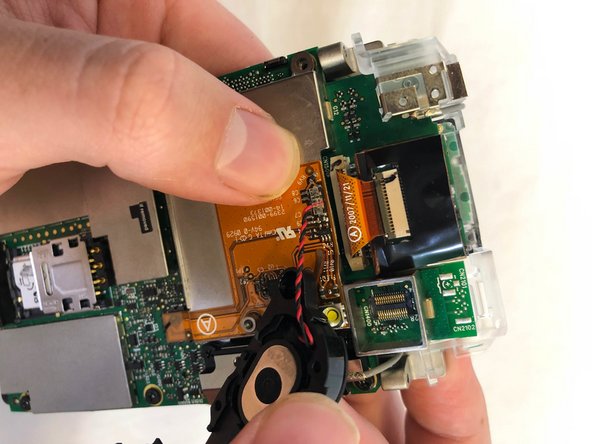
    • Remove the antenna.

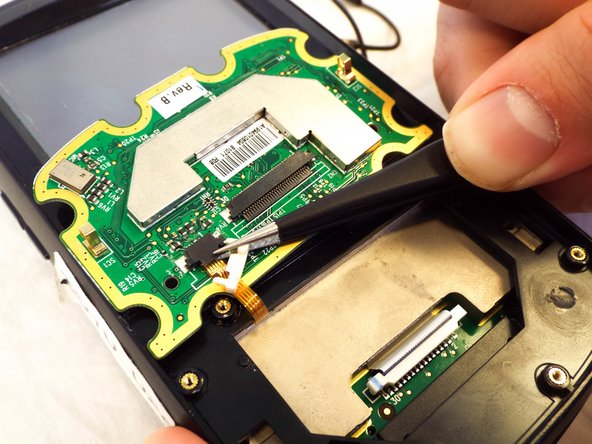
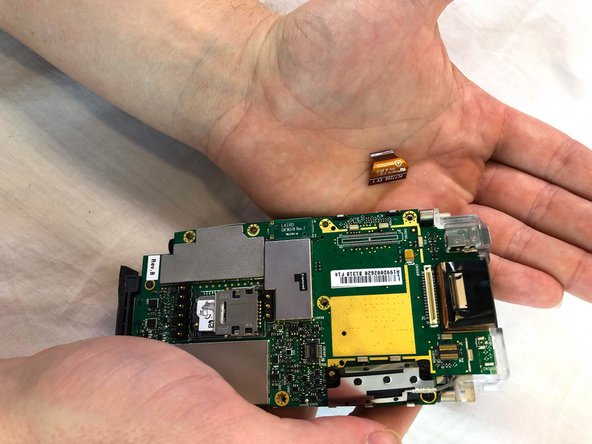
    • Remove the flex cable cover.

  15. Motorola MC5590 LCD Screen Replacement: passo 15, immagine 1 di 2 Motorola MC5590 LCD Screen Replacement: passo 15, immagine 2 di 2
    • Remove the five 3mm Phillips #00 screws from the motherboard.

  16. Motorola MC5590 LCD Screen Replacement: passo 16, immagine 1 di 2 Motorola MC5590 LCD Screen Replacement: passo 16, immagine 2 di 2
    • Remove the scanner ribbon cable by pulling straight up and out.

  17. Motorola MC5590 LCD Screen Replacement: passo 17, immagine 1 di 2 Motorola MC5590 LCD Screen Replacement: passo 17, immagine 2 di 2
    • Flip open the motherboard and the LCD screen.

    • Open the LCD connector and remove the cable.

    • Pull the LCD Screen and its metal bracket apart.

Conclusione

To reassemble your device, follow these instructions in reverse order.

Tyler Jean

Membro da: 02/22/18

555 Reputazione

5 Guide realizzate

Team

USF Tampa, Team S1-G6, Cagle Spring 2018 Membro di USF Tampa, Team S1-G6, Cagle Spring 2018

USFT-CAGLE-S18S1G6

4 Membri

6 Guide realizzate

0 Commenti

Aggiungi Commento

Visualizza Statistiche:

Ultime 24 Ore: 1

Ultimi 7 Giorni: 2

Ultimi 30 Giorni: 17

Tutti i Tempi: 688