Salta al contenuto principale

Questa guida ha delle modifiche più recenti. Passa all'ultima versione non verificata.

Motorola Droid Turbo 2 Rear Cover Adhesive Guide

Cosa ti serve

  1. Motorola Droid Turbo 2 Rear Cover Adhesive Guide, Motorola Droid Turbo 2 Rear Cover Adhesive Guide: passo 1, immagine 1 di 3 Motorola Droid Turbo 2 Rear Cover Adhesive Guide, Motorola Droid Turbo 2 Rear Cover Adhesive Guide: passo 1, immagine 2 di 3 Motorola Droid Turbo 2 Rear Cover Adhesive Guide, Motorola Droid Turbo 2 Rear Cover Adhesive Guide: passo 1, immagine 3 di 3
    • Prepare the phone frame surface by removing all traces of adhesive.

    • Use tweezers to pull adhesive chunks off. Use the opening tool to scrape residue off. You can use high concentration (over 90%) isopropyl alcohol to help dissolve residue.

    • Be careful not to damage the wireless charging coil when scraping around it.

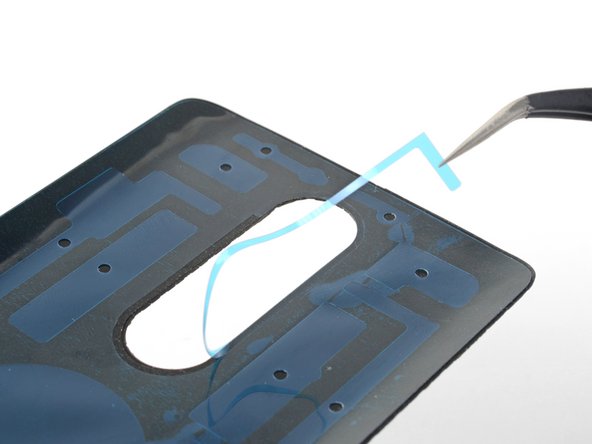
    • If you are re-using the rear cover, prepare the inner surface by removing all traces of adhesive from it.

    • Do not attempt to remove the rectangular plastic liner near the bottom of the cover, but do scrape off all adhesive on it.

  2. Motorola Droid Turbo 2 Rear Cover Adhesive Guide: passo 2, immagine 1 di 1
    • Use your finger and firmly press the metal rear camera plate from the outer side of the rear cover until you dislodge it from its recess.

    • Remove the rear camera plate.

    • Clean the perimeter of the rear camera plate and remove any adhesive residue.

  3. Motorola Droid Turbo 2 Rear Cover Adhesive Guide: passo 3, immagine 1 di 2 Motorola Droid Turbo 2 Rear Cover Adhesive Guide: passo 3, immagine 2 di 2
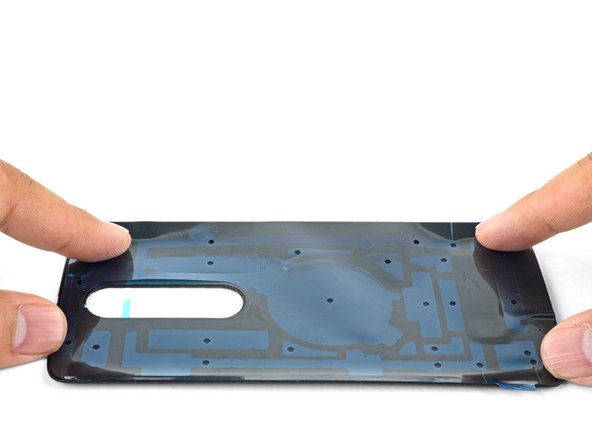
    • Set the pre-cut adhesive strip next to the rear cover so that it is properly oriented—the pull tabs should point to the bottom left corner of the cover.

    • Optionally, you can tape the pre-cut adhesive strip into position for easier application.

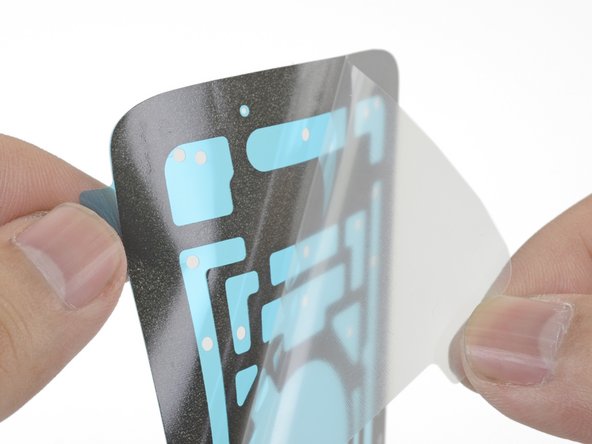
    • Lay the pre-cut adhesive strip over the rear cover, aligning it to the long edges.

    • Tape one long edge of the pre-cut adhesive strip to the rear cover, locking the alignment in place while allowing the strip to still swing.

  4. Motorola Droid Turbo 2 Rear Cover Adhesive Guide: passo 4, immagine 1 di 2 Motorola Droid Turbo 2 Rear Cover Adhesive Guide: passo 4, immagine 2 di 2
    • Peel and remove the clear plastic liner from the pre-cut adhesive strip.

    • This will expose adhesive facing the rear cover, so don't remove the liner until you are ready to begin placement.

  5. Motorola Droid Turbo 2 Rear Cover Adhesive Guide: passo 5, immagine 1 di 3 Motorola Droid Turbo 2 Rear Cover Adhesive Guide: passo 5, immagine 2 di 3 Motorola Droid Turbo 2 Rear Cover Adhesive Guide: passo 5, immagine 3 di 3
    • The exposed adhesive is very sticky and prone to adhering to surfaces unintentionally. Be careful while handling and aligning the adhesive.

    • Align the adhesive strip to a long edge of the rear cover.

    • If you have previously taped the adhesive strip to the rear cover, the strip should already be aligned.

    • Beginning from the alignment edge, use your fingers to press the adhesive strip onto the rear cover.

  6. Motorola Droid Turbo 2 Rear Cover Adhesive Guide: passo 6, immagine 1 di 2 Motorola Droid Turbo 2 Rear Cover Adhesive Guide: passo 6, immagine 2 di 2
    • Pull and remove the blue liner tab located in the rear cover's rear camera hole.

    • This will expose a ring of adhesive around the hole, which will hold the rear camera plate in place.

  7. Motorola Droid Turbo 2 Rear Cover Adhesive Guide: passo 7, immagine 1 di 3 Motorola Droid Turbo 2 Rear Cover Adhesive Guide: passo 7, immagine 2 di 3 Motorola Droid Turbo 2 Rear Cover Adhesive Guide: passo 7, immagine 3 di 3
    • Align the rear camera plate with the rear cover's camera hole and drop it in place.

    • Press the rear camera plate in place. You may need to squeeze from both sides to ensure that the adhesive bonds properly.

  8. Motorola Droid Turbo 2 Rear Cover Adhesive Guide: passo 8, immagine 1 di 1
    • Continue with phone re-assembly until you are ready to seal up the phone.

    • Be sure to test your phone's functionality before sealing your phone.

    • Peel and remove the blue liner from the rear cover, exposing the adhesive to stick onto the phone frame.

    • Align and press the rear cover onto the phone frame.

Conclusione

Repair didn’t go as planned? Check out our Motorola Droid Turbo 2 Answers community for troubleshooting help.

Altre 8 persone hanno completato questa guida.

Arthur Shi

Membro da: 01/03/18

252.687 Reputazione

526 Guide realizzate

Team

iFixit Membro di iFixit

Staff

135 Membri

16.816 Guide realizzate

0 Commenti

Aggiungi Commento

Visualizza Statistiche:

Ultime 24 Ore: 1

Ultimi 7 Giorni: 1

Ultimi 30 Giorni: 5

Tutti i Tempi: 1,403