Introduzione
This guide is a reference for users that need to replace a faulty or bad motor that is losing power.
Cosa ti serve
-
-
Use a phillips head screwdriver to unscrew the following 8 screws:
-
One 24mm Phillips screw
-
Six 16mm Phillips screws
-
One 9mm Phillips screw
-
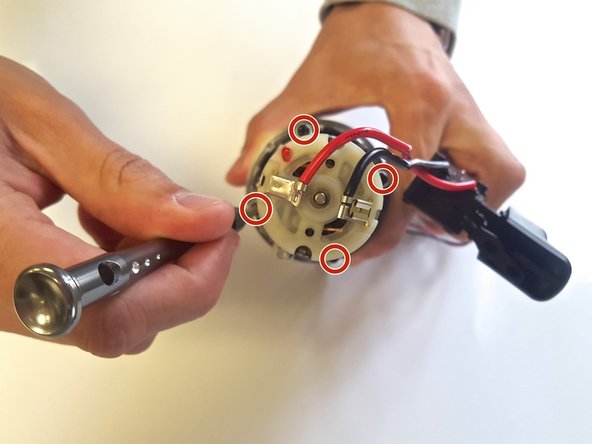
Turn the drill to the other side and unscrew the marked screw using the same phillips head screwdriver. Place it with the other removed screws.
-
-
-
-
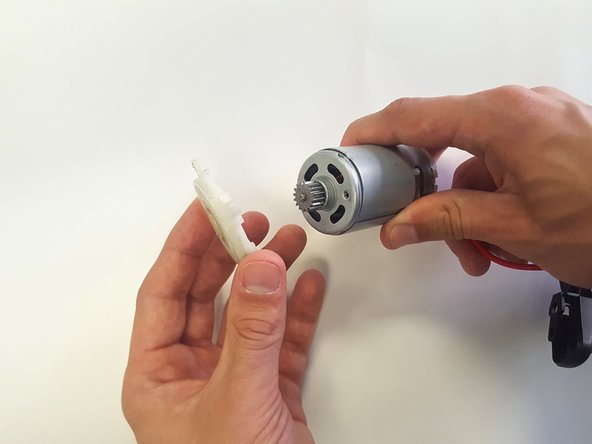
Unscrew the plastic attachment from the motor using a phillips head screwdriver. Keep the screws (7mm) after removal.
-
After the screws are removed, detach the plastic attachment from the motor and set aside.
-
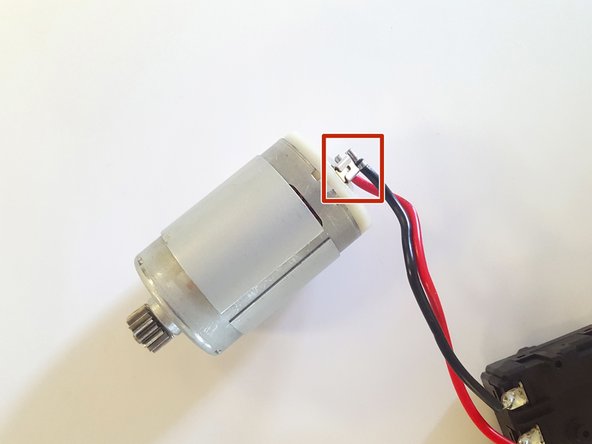
Finally, detach the wires from the motor to completely isolate the motor. The wires should wiggle off easily using ESD safe tweezers. It is now successfully removed from the drill and is ready to be replaced.
-


To reassemble your device, follow these instructions in reverse order.
To reassemble your device, follow these instructions in reverse order.
Team

University of Alabama, Team 1-8, Sydow campbell Spring 2016 Membro di University of Alabama, Team 1-8, Sydow campbell Spring 2016
UA-SYDOW CAMPBELL-S16S1G8
4 Membri
5 Guide realizzate
Un commento
Any chance you could upload a picture of the motor text without the box going through it, or add the info somewhere? I burnt out the switch and/or transistor in my ss12, so I decided to salvage the motor but the markings on my motor are different even though it looks identical and came from the same drill. I want to use it to build a radial fan for use in an air filter. It would be a huge help in getting the specs (or at least some info) on the motor. Thank you.