Salta al contenuto principale

Moto X Pure Edition Back Panel Removal

Guida Archiviata
Questa guida è mantenuta solo per scopi storici. Usa la versione aggiornata della guida per eseguire la riparazione.
Solo Prerequisita
Questa guida è destinata a essere usata solo come prerequisito per altre guide. Da sola è incompleta.

Cosa ti serve

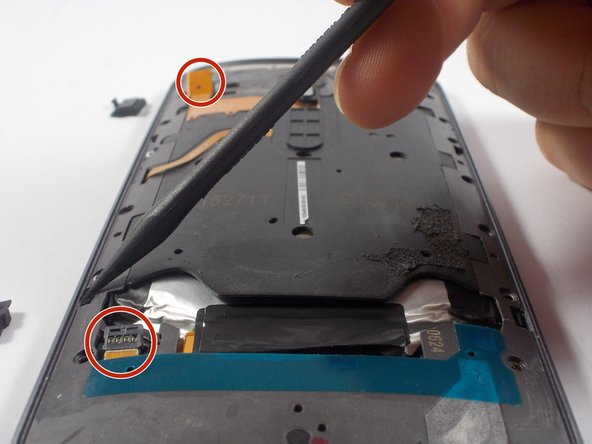
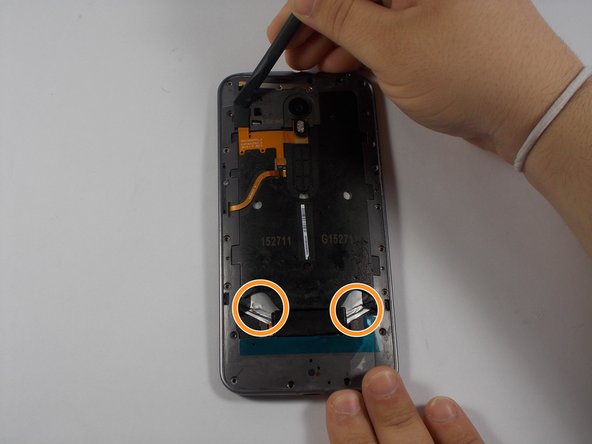
  1. Moto X Pure Edition Back Panel Removal, Back Panel: passo 1, immagine 1 di 3 Moto X Pure Edition Back Panel Removal, Back Panel: passo 1, immagine 2 di 3 Moto X Pure Edition Back Panel Removal, Back Panel: passo 1, immagine 3 di 3
    • Disconnect the two battery connections.

    • Remove the two parallel black tabs by pulling on them.

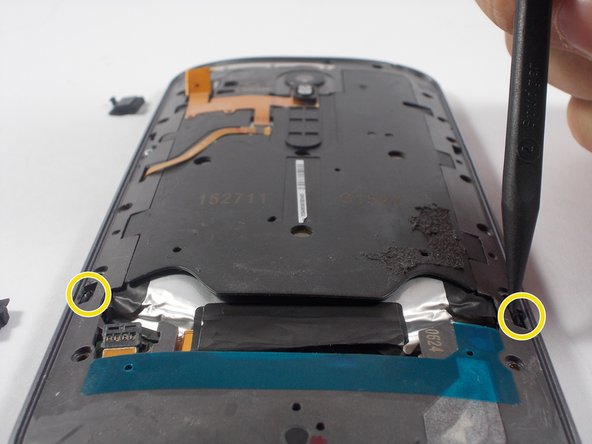
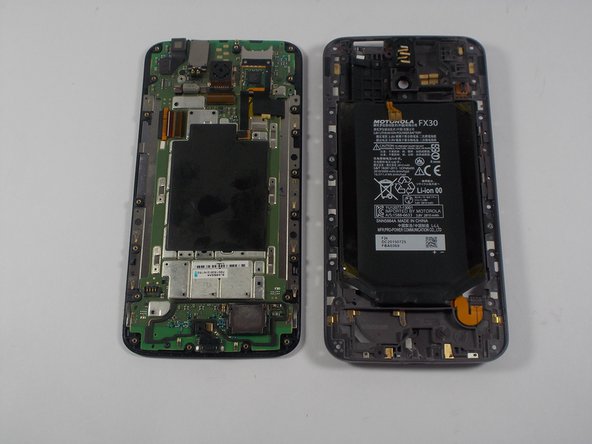
  2. Moto X Pure Edition Back Panel Removal: passo 2, immagine 1 di 3 Moto X Pure Edition Back Panel Removal: passo 2, immagine 2 di 3 Moto X Pure Edition Back Panel Removal: passo 2, immagine 3 di 3
    • All screw lengths are 2.5mm

    • Using the T3 screw driver, remove all 20 T3 screws.

    • Do NOT remove the silver screw circled in orange.

    • This holds in the Power/Volume buttons and is not necessary to remove. There are 2 very tiny springs behind the volume buttons that are easy to lose if you remove this screw.

    • Using the nylon spudger, remove the two clips holding the panel in place.

Conclusione

To reassemble your device, follow these instructions in reverse order.

Altre 2 persone hanno completato questa guida.

Team

0 Commenti

Aggiungi Commento

Visualizza Statistiche:

Ultime 24 Ore: 0

Ultimi 7 Giorni: 0

Ultimi 30 Giorni: 0

Tutti i Tempi: 148