Salta al contenuto principale

Moto C Daughterboard Cover Replacement

Solo Prerequisita
Questa guida è destinata a essere usata solo come prerequisito per altre guide. Da sola è incompleta.

Cosa ti serve

  1. Moto C Daughterboard Cover Replacement, Back Cover: passo 1, immagine 1 di 3 Moto C Daughterboard Cover Replacement, Back Cover: passo 1, immagine 2 di 3 Moto C Daughterboard Cover Replacement, Back Cover: passo 1, immagine 3 di 3
    • Power off your phone before beginning disassembly.

    • Insert a thumbnail, or spudger, into the notch on the bottom right corner to start separating the phone unit from the back cover.

    • Move it to the bottom left corner and pry the phone unit out of the back cover until you can get a good grip.

  2. Moto C Daughterboard Cover Replacement: passo 2, immagine 1 di 2 Moto C Daughterboard Cover Replacement: passo 2, immagine 2 di 2
    • Lift the phone out of the back cover.

  3. Moto C Daughterboard Cover Replacement, Battery: passo 3, immagine 1 di 3 Moto C Daughterboard Cover Replacement, Battery: passo 3, immagine 2 di 3 Moto C Daughterboard Cover Replacement, Battery: passo 3, immagine 3 di 3
    • Use a finger or spudger to lever the battery out of its recess and remove it.

  4. Moto C Daughterboard Cover Replacement, Daughterboard Cover: passo 4, immagine 1 di 1
    • Remove the four 3.5 mm long Torx T5 screws.

    • Some screws might be covered with stickers.

  5. Moto C Daughterboard Cover Replacement: passo 5, immagine 1 di 3 Moto C Daughterboard Cover Replacement: passo 5, immagine 2 di 3 Moto C Daughterboard Cover Replacement: passo 5, immagine 3 di 3
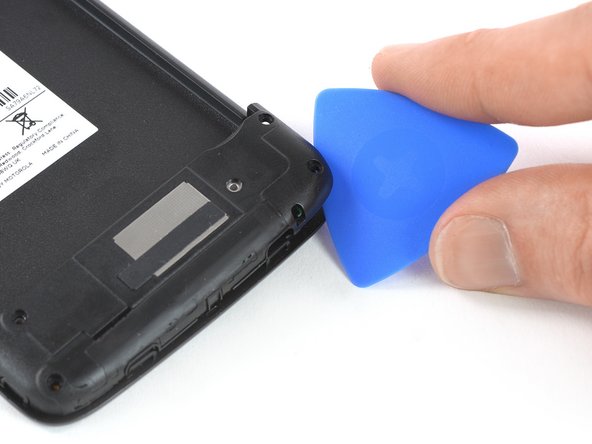
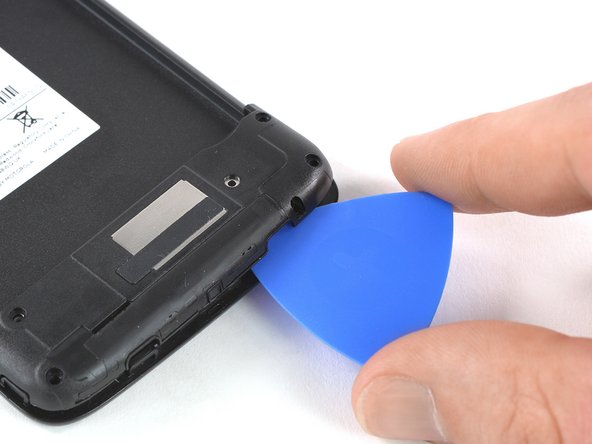
    • Apply the edge of an opening pick to the bottom right corner under the daughterboard cover.

    • Twist the opening pick to open the plastic clamps of the daughterboard cover.

    • Slide the opening pick to the left and pry it upwards until you can get a good grip on the daughterboard cover.

  6. Moto C Daughterboard Cover Replacement: passo 6, immagine 1 di 1
    • Remove the daughterboard cover.

Conclusione

To reassemble your device, follow these instructions in reverse order.

Team

iFixit Membro di iFixit

Staff

135 Membri

17.198 Guide realizzate

0 Commenti

Aggiungi Commento

Visualizza Statistiche:

Ultime 24 Ore: 0

Ultimi 7 Giorni: 2

Ultimi 30 Giorni: 2

Tutti i Tempi: 10