Salta al contenuto principale
Unisciti alla Community delle riparazioni - Crea un account

Motion Computing LE1600 Bluetooth Module Replacement

Cosa ti serve

  1. Motion Computing LE1600 Bluetooth Module Replacement, Battery: passo 1, immagine 1 di 1
    • Turn the device so the screen is facing down.

    Chiedi a FixBot

    Aggiungi Commento

  2. Motion Computing LE1600 Bluetooth Module Replacement: passo 2, immagine 1 di 2 Motion Computing LE1600 Bluetooth Module Replacement: passo 2, immagine 2 di 2
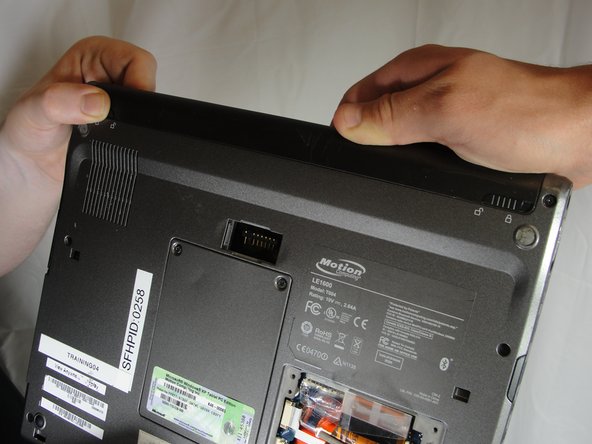
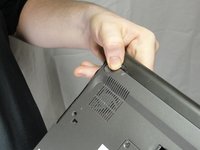
    • Slide the battery lock switch next to the power slider to the unlocked position.

    Chiedi a FixBot

    Aggiungi Commento

  3. Motion Computing LE1600 Bluetooth Module Replacement: passo 3, immagine 1 di 3 Motion Computing LE1600 Bluetooth Module Replacement: passo 3, immagine 2 di 3 Motion Computing LE1600 Bluetooth Module Replacement: passo 3, immagine 3 di 3
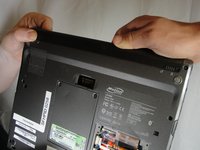
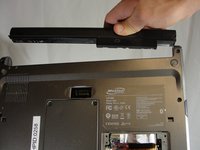
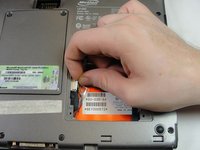
    • Slide and hold the switch by the fan vent to the unlocked position. Firmly grasp the battery and pull away from tablet.

    • When replacing the battery, place the end near the fan vent in first. Make sure to keep the other switch in the unlocked position while pushing the battery into place.

    Chiedi a FixBot

    Aggiungi Commento

  4. Motion Computing LE1600 Bluetooth Module Replacement, Bluetooth Module: passo 4, immagine 1 di 1
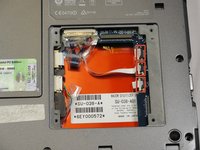
    • Unscrew hard drive panel using a Phillips head #1 screwdriver.

    • (Our device was not given to us with a hard drive or a hard drive panel)

    Chiedi a FixBot

    Aggiungi Commento

  5. Motion Computing LE1600 Bluetooth Module Replacement: passo 5, immagine 1 di 3 Motion Computing LE1600 Bluetooth Module Replacement: passo 5, immagine 2 di 3 Motion Computing LE1600 Bluetooth Module Replacement: passo 5, immagine 3 di 3
    • Pull clear plastic tab to detach hard drive from tablet.

    Chiedi a FixBot

    Aggiungi Commento

  6. Motion Computing LE1600 Bluetooth Module Replacement: passo 6, immagine 1 di 2 Motion Computing LE1600 Bluetooth Module Replacement: passo 6, immagine 2 di 2
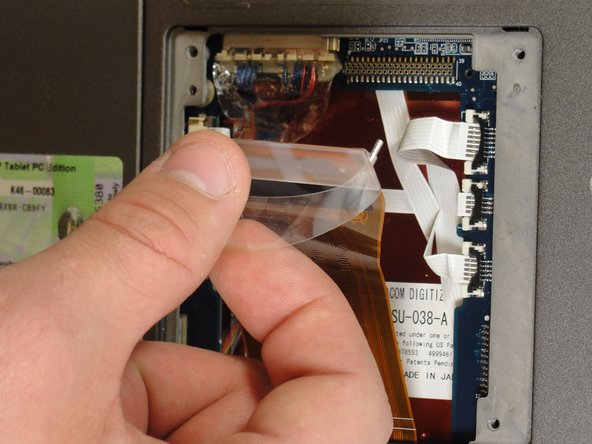
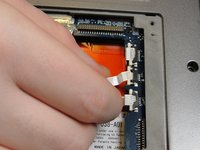
    • To disconnect the three white ribbon cables on the side closest to the hard drive connector, pull the white plastic tabs.

    Chiedi a FixBot

    Aggiungi Commento

  7. Motion Computing LE1600 Bluetooth Module Replacement: passo 7, immagine 1 di 1
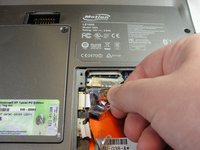
    • Pull the brown tabs to disconnect the white ribbon cable on the other side.

    Chiedi a FixBot

    Aggiungi Commento

  8. Motion Computing LE1600 Bluetooth Module Replacement: passo 8, immagine 1 di 2 Motion Computing LE1600 Bluetooth Module Replacement: passo 8, immagine 2 di 2
    • Caution: do not pull on the wires, instead pull from the plastic connectors.

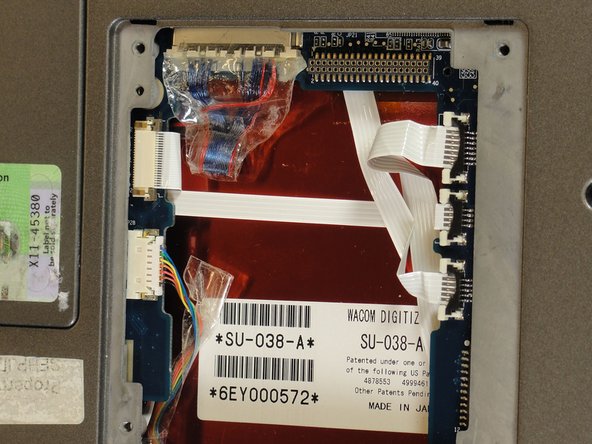
    • To disconnect the remaining ribbon cables, pull the plastic connectors away from their connections.

    Chiedi a FixBot

    Aggiungi Commento

  9. Motion Computing LE1600 Bluetooth Module Replacement: passo 9, immagine 1 di 1
    • With a Phillips #1 screwdriver, Unscrew the nine 10mm screws holding the case together.

    Chiedi a FixBot

    Aggiungi Commento

  10. Motion Computing LE1600 Bluetooth Module Replacement: passo 10, immagine 1 di 1
    • Using a spudger, press in the five tabs on the side where the battery was.

    • This should separate the two halves of the device. Carefully set the side with the display off to the side.

    Chiedi a FixBot

    Aggiungi Commento

  11. Motion Computing LE1600 Bluetooth Module Replacement: passo 11, immagine 1 di 3 Motion Computing LE1600 Bluetooth Module Replacement: passo 11, immagine 2 di 3 Motion Computing LE1600 Bluetooth Module Replacement: passo 11, immagine 3 di 3
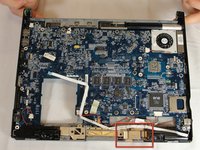
    • Locate the Bluetooth board.

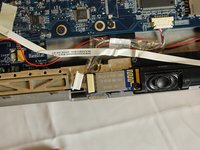
    • Disconnect the ribbon cable by pulling on the plastic connector.

    Chiedi a FixBot

    Aggiungi Commento

  12. Motion Computing LE1600 Bluetooth Module Replacement: passo 12, immagine 1 di 2 Motion Computing LE1600 Bluetooth Module Replacement: passo 12, immagine 2 di 2
    • Unscrew the 4mm screw holding the board onto the tablet.

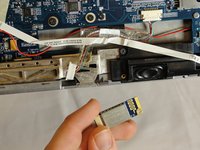
    • Lift the board out of the tablet and carefully set it aside.

    Chiedi a FixBot

    Aggiungi Commento

Conclusione

To reassemble your device, follow these instructions in reverse order.

Annulla: non ho completato questa guida.

Un'altra persona ha completato questa guida.

Team

Cal Poly, Team 15-14, Forte Spring 2012 Membro di Cal Poly, Team 15-14, Forte Spring 2012

CPSU-FORTE-S12S15G14

5 Membri

5 guide realizzate

1Commento della guida

thanks for the help

Lawrence V Lang - Rispondi Condividi

Aggiungi Commento

Visualizza statistiche:

Ultime 24 ore: 1

Ultimi 7 giorni: 8

Ultimi 30 giorni: 38

Tutti i Tempi: 2,797