Salta al contenuto principale

Montgomery Ward GEN-39500 Antenna Replacement

Cosa ti serve

  1. Montgomery Ward GEN-39500 Antenna Replacement, Back Cover: passo 1, immagine 1 di 1
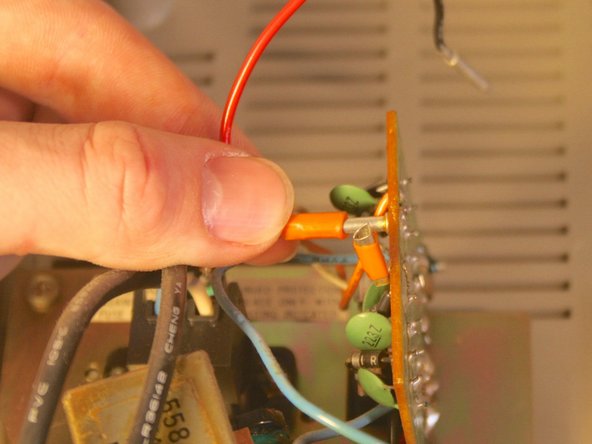
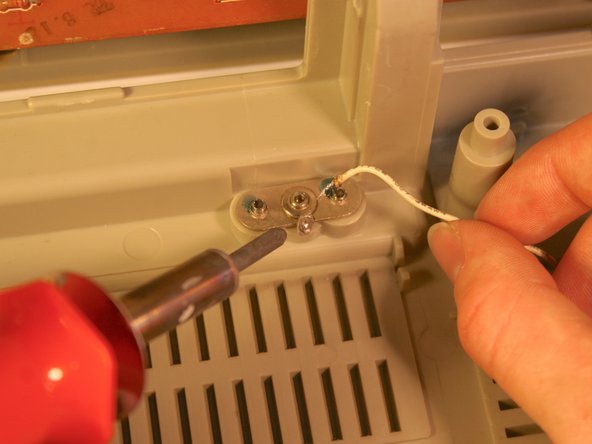
    • Remove the nine 35 mm Phillips screws securing the back cover of the case.

  2. Montgomery Ward GEN-39500 Antenna Replacement: passo 2, immagine 1 di 1
    • Carefully remove the back cover.

    • Soldered wires connect electronics on the back cover to the internal electronics. Be careful not to break any connections.

  3. Montgomery Ward GEN-39500 Antenna Replacement: passo 3, immagine 1 di 2 Montgomery Ward GEN-39500 Antenna Replacement: passo 3, immagine 2 di 2
    • Unplug the black and yellow wires connecting the power supply unit to the rest of the electronics:

    • This is not necessarily required. This step is to allow the back cover more movement as you work on the inside of the unit.

  4. Montgomery Ward GEN-39500 Antenna Replacement, Antenna: passo 4, immagine 1 di 2 Montgomery Ward GEN-39500 Antenna Replacement, Antenna: passo 4, immagine 2 di 2
    • Unsolder the wire connecting the antenna to the radio.

  5. Montgomery Ward GEN-39500 Antenna Replacement: passo 5, immagine 1 di 1
    • Tilt the back cover up and remove the two 7.5 mm Phillips screws holding the antenna in place.

  6. Montgomery Ward GEN-39500 Antenna Replacement: passo 6, immagine 1 di 1
    • Remove the antenna.

Conclusione

To reassemble your device, follow these instructions in reverse order.

Team

Cal Poly, Team 12-5, Lancaster Spring 2015 Membro di Cal Poly, Team 12-5, Lancaster Spring 2015

CPSU-LANCASTER-S15S12G5

4 Membri

13 Guide realizzate

0 Commenti

Aggiungi Commento

Visualizza Statistiche:

Ultime 24 Ore: 1

Ultimi 7 Giorni: 3

Ultimi 30 Giorni: 4

Tutti i Tempi: 125