Salta al contenuto principale

Monster Soundstage S2 Speaker Grille Replacement

Cosa ti serve

  1. Monster Soundstage S2 Speaker Grille Replacement, Speaker Grille: passo 1, immagine 1 di 2 Monster Soundstage S2 Speaker Grille Replacement, Speaker Grille: passo 1, immagine 2 di 2
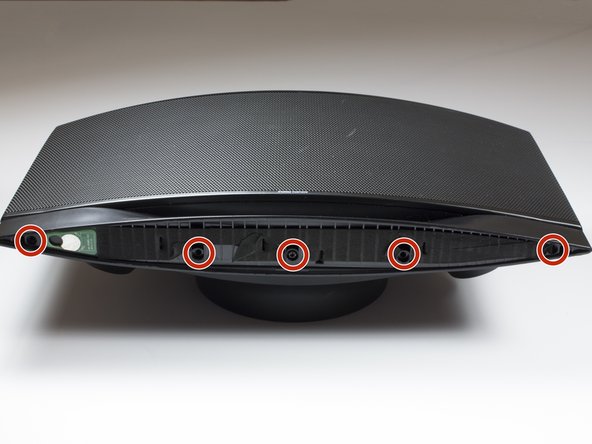
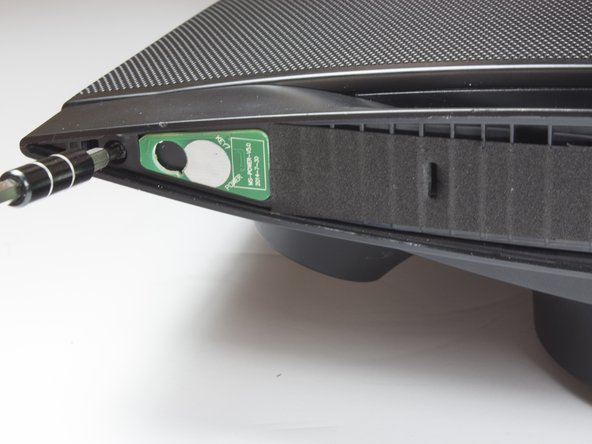
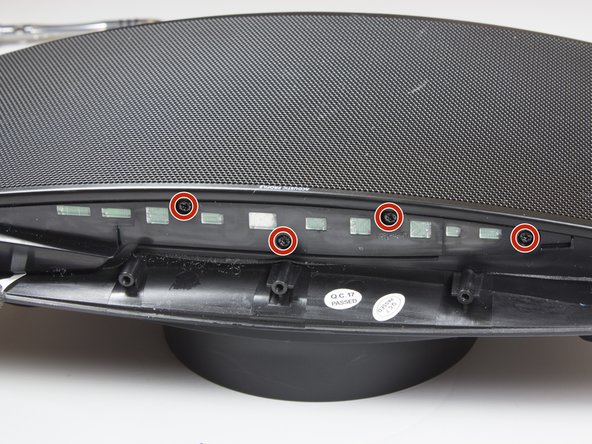
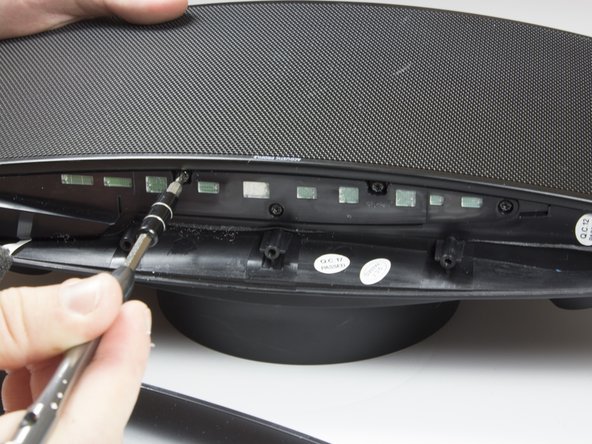
    • Use a spudger or your fingers to pry off and remove the rubber pad on the bottom of the speaker.

  2. Monster Soundstage S2 Speaker Grille Replacement: passo 2, immagine 1 di 3 Monster Soundstage S2 Speaker Grille Replacement: passo 2, immagine 2 di 3 Monster Soundstage S2 Speaker Grille Replacement: passo 2, immagine 3 di 3
    • Remove the five 10mm screws with a TR 10 screwdriver.

    • Use a spudger to break the remaining adhesive holding the grille to the speaker body.

    • Be sure you don't bend the grille; it is not free from the speaker yet.

  3. Monster Soundstage S2 Speaker Grille Replacement: passo 3, immagine 1 di 1
    • Flip speaker around and use a plastic opening tool to remove the top panel from the speaker.

  4. Monster Soundstage S2 Speaker Grille Replacement: passo 4, immagine 1 di 3 Monster Soundstage S2 Speaker Grille Replacement: passo 4, immagine 2 di 3 Monster Soundstage S2 Speaker Grille Replacement: passo 4, immagine 3 di 3
    • Use a plastic opening tool to remove the foam and uncover four more screws.

    • Use a TR 10 screwdriver to remove the five 10mm screws on the top of the speaker.

  5. Monster Soundstage S2 Speaker Grille Replacement: passo 5, immagine 1 di 2 Monster Soundstage S2 Speaker Grille Replacement: passo 5, immagine 2 di 2
    • Carefully remove the top cover.

    • Be careful not to tear or stress the cable that provides power to the power LED.

  6. Monster Soundstage S2 Speaker Grille Replacement: passo 6, immagine 1 di 2 Monster Soundstage S2 Speaker Grille Replacement: passo 6, immagine 2 di 2
    • Use a TR 10 screwdriver to remove two of the 10mm screws that secure the speaker grille.

    • Do not attempt to remove the grille just yet.

  7. Monster Soundstage S2 Speaker Grille Replacement: passo 7, immagine 1 di 3 Monster Soundstage S2 Speaker Grille Replacement: passo 7, immagine 2 di 3 Monster Soundstage S2 Speaker Grille Replacement: passo 7, immagine 3 di 3
    • With the top panel removed, use a spudger to remove the display panel.

    • The clips on the display panel are quite fragile. Pry up both edges of the display before attempting removal.

    • Use a TR 10 screwdriver to remove the four final 10mm screws securing the speaker grille.

  8. Monster Soundstage S2 Speaker Grille Replacement: passo 8, immagine 1 di 1
    • Remove the front speaker grille.

Conclusione

To reassemble your device, follow these instructions in reverse order.

Altre 3 persone hanno completato questa guida.

Shaw Hughes

Membro da: 01/30/17

831 Reputazione

5 Guide realizzate

Team

Cal Poly, Team 21-5, Maness Winter 2017 Membro di Cal Poly, Team 21-5, Maness Winter 2017

CPSU-MANESS-W17S21G5

4 Membri

12 Guide realizzate

0 Commenti

Aggiungi Commento

Visualizza Statistiche:

Ultime 24 Ore: 0

Ultimi 7 Giorni: 1

Ultimi 30 Giorni: 4

Tutti i Tempi: 423