Salta al contenuto principale

Mobvoi TicWatch C2 Battery Replacement

  1. Mobvoi TicWatch C2 Battery Replacement, Remove the plastic shell: passo 1, immagine 1 di 3 Mobvoi TicWatch C2 Battery Replacement, Remove the plastic shell: passo 1, immagine 2 di 3 Mobvoi TicWatch C2 Battery Replacement, Remove the plastic shell: passo 1, immagine 3 di 3
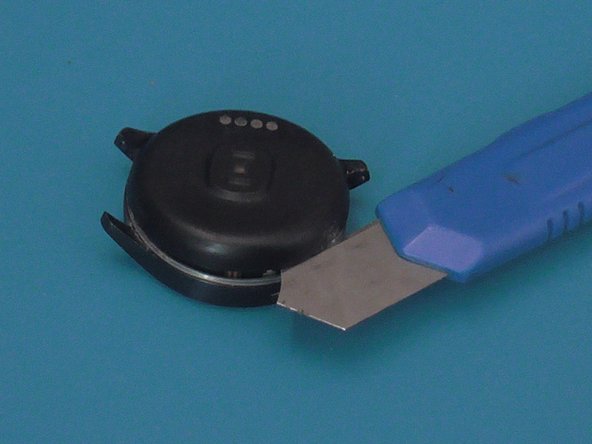
    • With a sharp and thin object, press and open the plastic shell, equipped with the charging connectors, upwards. It is attached with glue , to facilitate , it can also be heated. Do not completely remove the shell but lift it because the connector is attached to the mainboard.

  2. Mobvoi TicWatch C2 Battery Replacement, Open and disconnect charging connector: passo 2, immagine 1 di 3 Mobvoi TicWatch C2 Battery Replacement, Open and disconnect charging connector: passo 2, immagine 2 di 3 Mobvoi TicWatch C2 Battery Replacement, Open and disconnect charging connector: passo 2, immagine 3 di 3
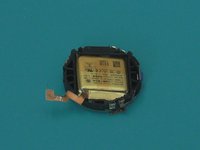
    • Lift the plastic cover and disconnect the charging connector from the mainboard.

  3. Mobvoi TicWatch C2 Battery Replacement, Disconnect other peripherals: passo 3, immagine 1 di 1
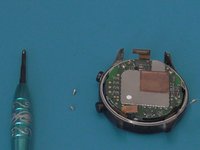
    • Disconnect the other 4 connectors that remain to remove the battery and mainboard block.

  4. Mobvoi TicWatch C2 Battery Replacement, Remove Mainboard and batteri block from front housing: passo 4, immagine 1 di 1
    • Remove mainboard and battery block from display front housing

  5. Mobvoi TicWatch C2 Battery Replacement, Remove Mainboard and battery from plastic shell: passo 5, immagine 1 di 3 Mobvoi TicWatch C2 Battery Replacement, Remove Mainboard and battery from plastic shell: passo 5, immagine 2 di 3 Mobvoi TicWatch C2 Battery Replacement, Remove Mainboard and battery from plastic shell: passo 5, immagine 3 di 3
    • With a philips screwdriver remove the two screws that hold the mainboard and the battery to the plastic shell.

  6. Mobvoi TicWatch C2 Battery Replacement, Final remove battery: passo 6, immagine 1 di 1
    • The battery is held on the mainboard with little glue.Easy to remove

Conclusione

To reassemble your device, follow these instructions in reverse order.

Un'altra persona ha completato questa guida.

Wow Store

Membro da: 10/27/22

133 Reputazione

1 Guida realizzata

0Commenti sulla guida

Aggiungi Commento

Visualizza Statistiche:

Ultime 24 Ore: 1

Ultimi 7 Giorni: 10

Ultimi 30 Giorni: 31

Tutti i Tempi: 796