Salta al contenuto principale

Questa guida ha delle modifiche più recenti. Passa all'ultima versione non verificata.

Mk Diamond Wet Saws MK660 2010 Blade Replacement

Cosa ti serve

  1. Mk Diamond Wet Saws MK660 2010 Blade Replacement, Blade Cover: passo 1, immagine 1 di 3 Mk Diamond Wet Saws MK660 2010 Blade Replacement, Blade Cover: passo 1, immagine 2 di 3 Mk Diamond Wet Saws MK660 2010 Blade Replacement, Blade Cover: passo 1, immagine 3 di 3
    • Before you begin, make sure to power off and unplug the device from the outlet.

    • If the clear water pump hose is connected, remove it now.

    • Loosen the plastic knob holding the saw's cutting head in place.

    • Lower the cutting head while keeping it steady.

  2. Mk Diamond Wet Saws MK660 2010 Blade Replacement: passo 2, immagine 1 di 2 Mk Diamond Wet Saws MK660 2010 Blade Replacement: passo 2, immagine 2 di 2
    • Unscrew the knob.

    • Remove it from the cutting head.

  3. Mk Diamond Wet Saws MK660 2010 Blade Replacement: passo 3, immagine 1 di 2 Mk Diamond Wet Saws MK660 2010 Blade Replacement: passo 3, immagine 2 di 2
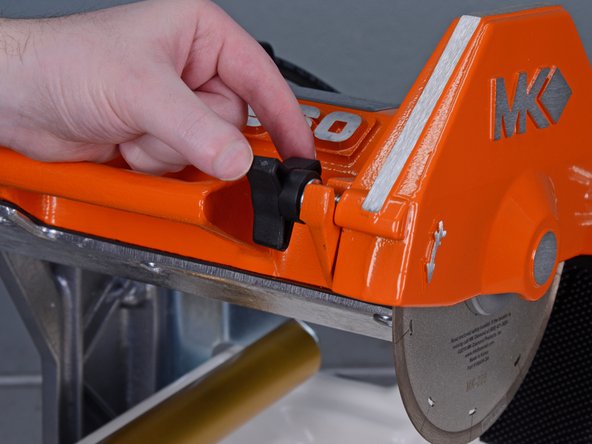
    • Loosen the plastic knob holding the blade cover in place.

  4. Mk Diamond Wet Saws MK660 2010 Blade Replacement: passo 4, immagine 1 di 3 Mk Diamond Wet Saws MK660 2010 Blade Replacement: passo 4, immagine 2 di 3 Mk Diamond Wet Saws MK660 2010 Blade Replacement: passo 4, immagine 3 di 3
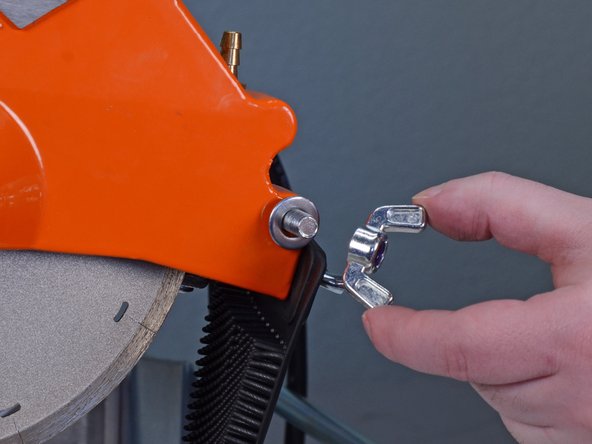
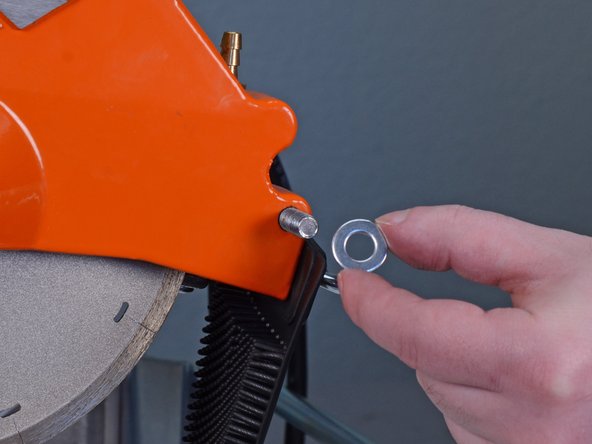
    • Loosen the wing nut on the blade cover pivot shaft.

    • Remove the wing nut and accompanying washer.

  5. Mk Diamond Wet Saws MK660 2010 Blade Replacement: passo 5, immagine 1 di 2 Mk Diamond Wet Saws MK660 2010 Blade Replacement: passo 5, immagine 2 di 2
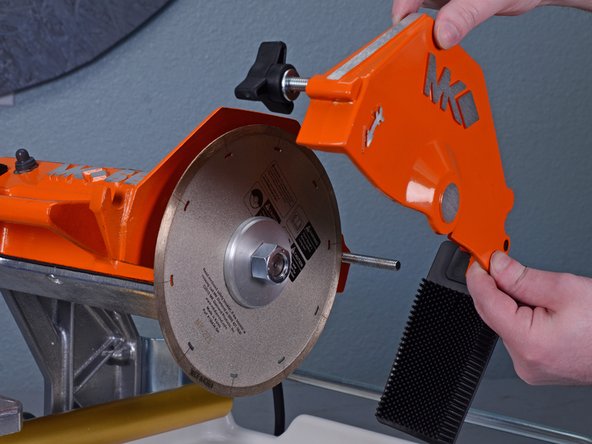
    • Pivot the blade cover up and pull it off the shaft.

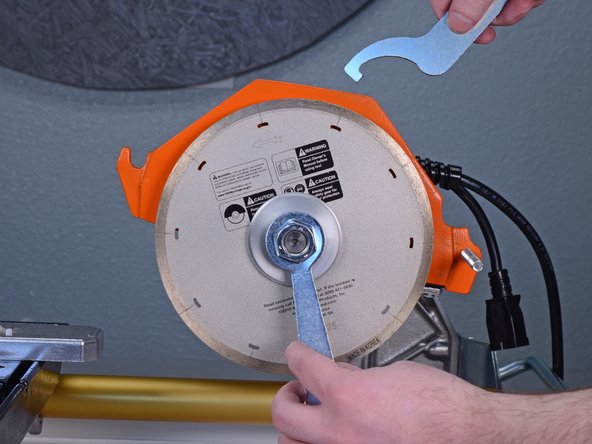
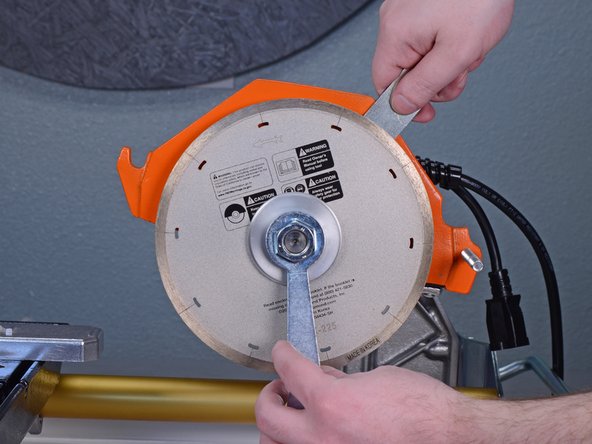
  6. Mk Diamond Wet Saws MK660 2010 Blade Replacement, Blade: passo 6, immagine 1 di 3 Mk Diamond Wet Saws MK660 2010 Blade Replacement, Blade: passo 6, immagine 2 di 3 Mk Diamond Wet Saws MK660 2010 Blade Replacement, Blade: passo 6, immagine 3 di 3
    • Insert the provided spanner wrench into one of the four tightening holes on the inner flange behind the blade.

    • Use the the provided nut wrench to loosen the hex nut while providing counterforce with the spanner wrench.

  7. Mk Diamond Wet Saws MK660 2010 Blade Replacement: passo 7, immagine 1 di 2 Mk Diamond Wet Saws MK660 2010 Blade Replacement: passo 7, immagine 2 di 2
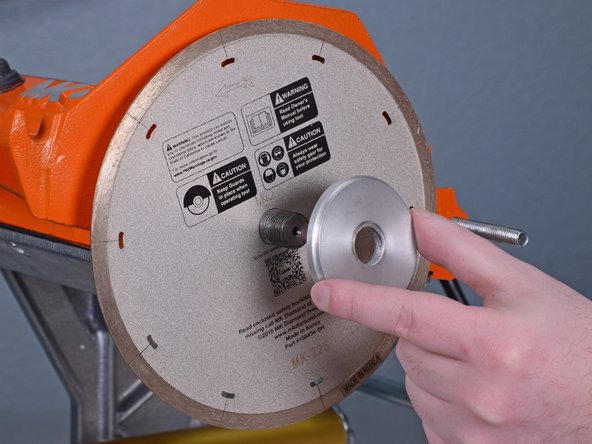
    • Remove the hex nut.

    • Remove the outer flange.

  8. Mk Diamond Wet Saws MK660 2010 Blade Replacement: passo 8, immagine 1 di 2 Mk Diamond Wet Saws MK660 2010 Blade Replacement: passo 8, immagine 2 di 2
    • Remove the cutting blade.

    • The blade can be sharp, so handle with care.

Conclusione

To reassemble your device, follow these instructions in reverse order.

Carsten Frauenheim

Membro da: 03/10/20

113.672 Reputazione

338 Guide realizzate

Team

iFixit Membro di iFixit

Staff

135 Membri

16.817 Guide realizzate

0 Commenti

Aggiungi Commento

Visualizza Statistiche:

Ultime 24 Ore: 1

Ultimi 7 Giorni: 1

Ultimi 30 Giorni: 13

Tutti i Tempi: 810