Salta al contenuto principale

Microsoft Natural Multimedia Keyboard disassembly and cleaning

Cosa ti serve

  1. Microsoft Natural Multimedia Keyboard disassembly and cleaning, Microsoft Natural Multimedia Keyboard disassembly and cleaning: passo 1, immagine 1 di 3 Microsoft Natural Multimedia Keyboard disassembly and cleaning, Microsoft Natural Multimedia Keyboard disassembly and cleaning: passo 1, immagine 2 di 3 Microsoft Natural Multimedia Keyboard disassembly and cleaning, Microsoft Natural Multimedia Keyboard disassembly and cleaning: passo 1, immagine 3 di 3
    • A guide showing how to disassemble and clean a Microsoft Natural Multimedia Keyboard.

    • You will need a spudger to remove the keys. An IC mounting tool can be helpful in replacing them.

  2. Microsoft Natural Multimedia Keyboard disassembly and cleaning: passo 2, immagine 1 di 3 Microsoft Natural Multimedia Keyboard disassembly and cleaning: passo 2, immagine 2 di 3 Microsoft Natural Multimedia Keyboard disassembly and cleaning: passo 2, immagine 3 di 3
    • Use the flat end of a spudger to pop the keys off the keyboard.

  3. Microsoft Natural Multimedia Keyboard disassembly and cleaning: passo 3, immagine 1 di 3 Microsoft Natural Multimedia Keyboard disassembly and cleaning: passo 3, immagine 2 di 3 Microsoft Natural Multimedia Keyboard disassembly and cleaning: passo 3, immagine 3 di 3
    • Wider keys will have a retaining bar, take note of how they come off to make reassembly easier.

    • Continue removing keys.

  4. Microsoft Natural Multimedia Keyboard disassembly and cleaning: passo 4, immagine 1 di 3 Microsoft Natural Multimedia Keyboard disassembly and cleaning: passo 4, immagine 2 di 3 Microsoft Natural Multimedia Keyboard disassembly and cleaning: passo 4, immagine 3 di 3
    • Remove the 10 screws from the bottom of the keyboard.

    • Remove the upper button assembly.

  5. Microsoft Natural Multimedia Keyboard disassembly and cleaning: passo 5, immagine 1 di 3 Microsoft Natural Multimedia Keyboard disassembly and cleaning: passo 5, immagine 2 di 3 Microsoft Natural Multimedia Keyboard disassembly and cleaning: passo 5, immagine 3 di 3
    • Use the tip of a spudger to push the upper button assembly buttons out from the back.

  6. Microsoft Natural Multimedia Keyboard disassembly and cleaning: passo 6, immagine 1 di 3 Microsoft Natural Multimedia Keyboard disassembly and cleaning: passo 6, immagine 2 di 3 Microsoft Natural Multimedia Keyboard disassembly and cleaning: passo 6, immagine 3 di 3
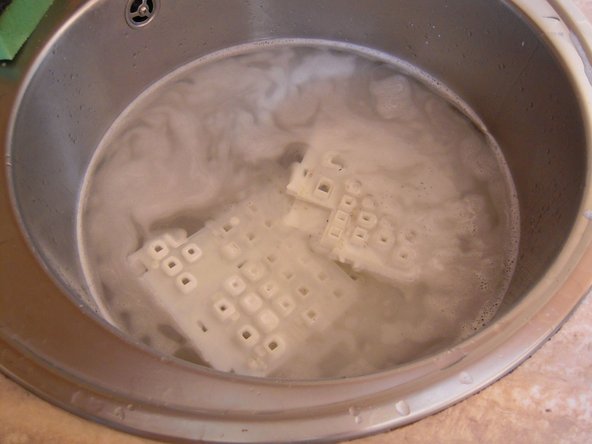
    • Remove the flexible keypad from the key caddy assembly.

    • The key caddies can be washed in the sink.

  7. Microsoft Natural Multimedia Keyboard disassembly and cleaning: passo 7, immagine 1 di 1
    • The keys can also be washed.

    • Remove the metal retaining clips before washing to prevent rust.

Conclusione

To reassemble your device, follow these instructions in reverse order.

Altre 9 persone hanno completato questa guida.

asvnix

Membro da: 11/18/12

274 Reputazione

1 Guida realizzata

3 Commenti

Thank you so much! I had never done this before and was very confused by the retaining bar.

Des Blackoak - Replica

I’ve had this keyboard since it was released and it just recently started having key sticking issues, so I opted to follow this guide and was pleasantly surprised at how well it worked. Thank you for this and I hope to get another 15 years out of it.

Suggestions:

1) Instead of manually cleaning, put the keys into a clear mesh bag and into the dish washer or washing machine.

2) Spray metal retainer bars with WD-40 and wipe off to help further prevent rust.

3) Let the keys and caddies sun dry for the day to ensure they do not retain any water after cleaning.

Thomas K - Replica

Aggiungi Commento

Visualizza Statistiche:

Ultime 24 Ore: 2

Ultimi 7 Giorni: 22

Ultimi 30 Giorni: 49

Tutti i Tempi: 12,920