Salta al contenuto principale

Microsoft Natural Multimedia Keyboard disassembly and cleaning

Cosa ti serve

  1. Microsoft Natural Multimedia Keyboard disassembly and cleaning, Microsoft Natural Multimedia Keyboard disassembly and cleaning: passo 1, immagine 1 di 3 Microsoft Natural Multimedia Keyboard disassembly and cleaning, Microsoft Natural Multimedia Keyboard disassembly and cleaning: passo 1, immagine 2 di 3 Microsoft Natural Multimedia Keyboard disassembly and cleaning, Microsoft Natural Multimedia Keyboard disassembly and cleaning: passo 1, immagine 3 di 3
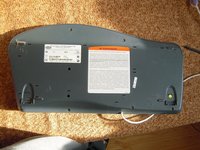
    • A guide showing how to disassemble and clean a Microsoft Natural Multimedia Keyboard.

    • You will need a spudger to remove the keys. An IC mounting tool can be helpful in replacing them.

  2. Microsoft Natural Multimedia Keyboard disassembly and cleaning: passo 2, immagine 1 di 3 Microsoft Natural Multimedia Keyboard disassembly and cleaning: passo 2, immagine 2 di 3 Microsoft Natural Multimedia Keyboard disassembly and cleaning: passo 2, immagine 3 di 3
    • Use the flat end of a spudger to pop the keys off the keyboard.

  3. Microsoft Natural Multimedia Keyboard disassembly and cleaning: passo 3, immagine 1 di 3 Microsoft Natural Multimedia Keyboard disassembly and cleaning: passo 3, immagine 2 di 3 Microsoft Natural Multimedia Keyboard disassembly and cleaning: passo 3, immagine 3 di 3
    • Wider keys will have a retaining bar, take note of how they come off to make reassembly easier.

    • Continue removing keys.

  4. Microsoft Natural Multimedia Keyboard disassembly and cleaning: passo 4, immagine 1 di 3 Microsoft Natural Multimedia Keyboard disassembly and cleaning: passo 4, immagine 2 di 3 Microsoft Natural Multimedia Keyboard disassembly and cleaning: passo 4, immagine 3 di 3
    • Remove the 10 screws from the bottom of the keyboard.

    • Remove the upper button assembly.

  5. Microsoft Natural Multimedia Keyboard disassembly and cleaning: passo 5, immagine 1 di 3 Microsoft Natural Multimedia Keyboard disassembly and cleaning: passo 5, immagine 2 di 3 Microsoft Natural Multimedia Keyboard disassembly and cleaning: passo 5, immagine 3 di 3
    • Use the tip of a spudger to push the upper button assembly buttons out from the back.

  6. Microsoft Natural Multimedia Keyboard disassembly and cleaning: passo 6, immagine 1 di 3 Microsoft Natural Multimedia Keyboard disassembly and cleaning: passo 6, immagine 2 di 3 Microsoft Natural Multimedia Keyboard disassembly and cleaning: passo 6, immagine 3 di 3
    • Remove the flexible keypad from the key caddy assembly.

    • The key caddies can be washed in the sink.

  7. Microsoft Natural Multimedia Keyboard disassembly and cleaning: passo 7, immagine 1 di 1
    • The keys can also be washed.

    • Remove the metal retaining clips before washing to prevent rust.

Conclusione

To reassemble your device, follow these instructions in reverse order.

Altre 10 persone hanno completato questa guida.

asvnix

Membro da: 11/18/12

292 Reputazione

1 Guida realizzata

3Commenti sulla guida

Thank you so much! I had never done this before and was very confused by the retaining bar.

Des Blackoak - Replica

I’ve had this keyboard since it was released and it just recently started having key sticking issues, so I opted to follow this guide and was pleasantly surprised at how well it worked. Thank you for this and I hope to get another 15 years out of it.

Suggestions:

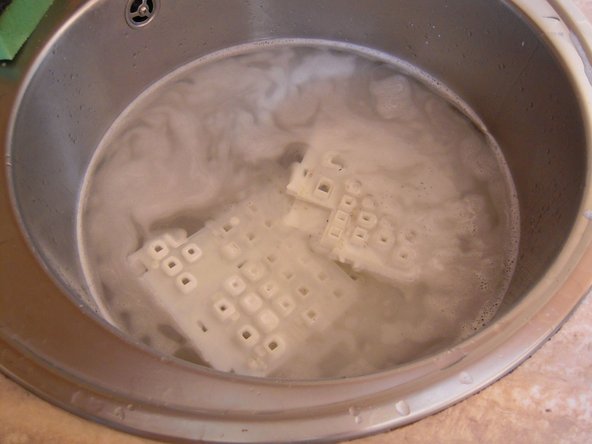
1) Instead of manually cleaning, put the keys into a clear mesh bag and into the dish washer or washing machine.

2) Spray metal retainer bars with WD-40 and wipe off to help further prevent rust.

3) Let the keys and caddies sun dry for the day to ensure they do not retain any water after cleaning.

Thomas K - Replica

Aggiungi Commento

Visualizza Statistiche:

Ultime 24 Ore: 1

Ultimi 7 Giorni: 12

Ultimi 30 Giorni: 35

Tutti i Tempi: 13,996