Questa versione può contenere modifiche errate. Passa all'ultima istantanea verificata.
Cosa ti serve
-
Questo passaggio è privo di traduzione. Aiuta a tradurlo
-
Insert the plastic opening tool in between the charging port and the back case of the device. Slowly move the tool to the left of the until you come the top by the power button.
-
Using a paper clip or pointed edge spudger push in the pin located in the bottom right had corner of the back of the phone.
-
-
Questo passaggio è privo di traduzione. Aiuta a tradurlo
-
Using one of the small Phillips screwdriver bits provided unscrew the 11 screws present on the protective plastic plate under the device case.
-
-
-
Questo passaggio è privo di traduzione. Aiuta a tradurlo
-
After the 11 screws are loosened use the plastic opening tool and gently pry the protective plate from the back of the device.
-
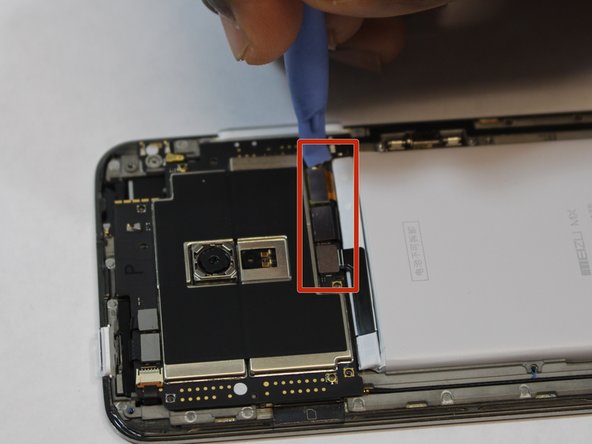
Once the plate is off, use the same tool to gently remove the 3 ribbon cables located directly above the battery.
-
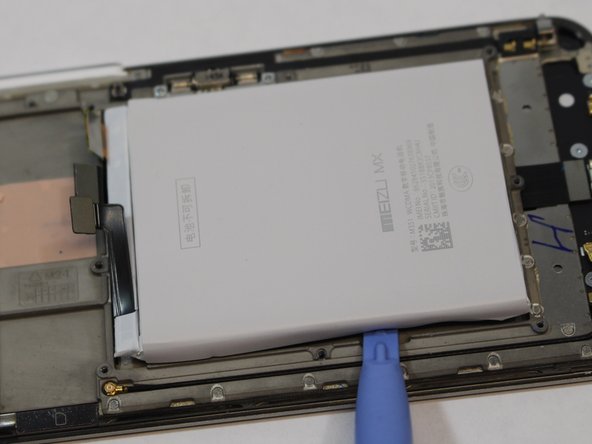
On the left side of the battery on the phone case, there is a groove where the plastic opening tool can be inserted to pry the battery up and out. The battery might be glued to the phone so exercise caution.
-
-
Questo passaggio è privo di traduzione. Aiuta a tradurlo
-
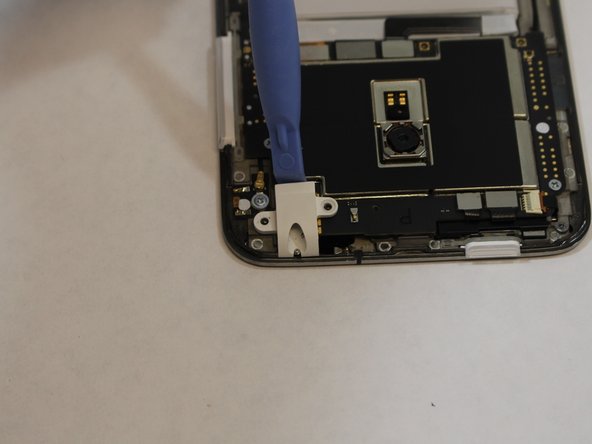
To finish removing the headphone jack the screw in the purple circle fastening the headphone jack to the motherboard will need to be removed.
-
Once slackened, the headphone jack can be pried up using the plastic opening tool, as seen in the picture.
-


Annulla: non ho completato questa guida.
Altre 3 persone hanno completato questa guida.
Team

USF Tampa, Team 15-2, Remmell Fall 2014 Membro di USF Tampa, Team 15-2, Remmell Fall 2014
USFT-REMMELL-F14S15G2
4 Membri
15 Guide realizzate
Un commento
The battery cover of my mx3 had 9 screws visibles. The last 2, the top and bottom middle screws, were hidden under a layer of paint and didn't look like screws. Just push the screw driver in and break the paint layer. I would guess that this is the equivalent of a warranty seal, so if your phone is still under warranty think carefully before you do them.