Salta al contenuto principale

Magellan RoadMate 5120-LMTX Motherboard Replacement

Cosa ti serve

  1. Magellan RoadMate 5120-LMTX Motherboard Replacement, Back Cover: passo 1, immagine 1 di 3 Magellan RoadMate 5120-LMTX Motherboard Replacement, Back Cover: passo 1, immagine 2 di 3 Magellan RoadMate 5120-LMTX Motherboard Replacement, Back Cover: passo 1, immagine 3 di 3
    • Power off the Magellan RoadMate before beginning.

    • Remove the six 5mm Phillips #00 screws from the back of device.

  2. Magellan RoadMate 5120-LMTX Motherboard Replacement: passo 2, immagine 1 di 3 Magellan RoadMate 5120-LMTX Motherboard Replacement: passo 2, immagine 2 di 3 Magellan RoadMate 5120-LMTX Motherboard Replacement: passo 2, immagine 3 di 3
    • Pry back cover off with a plastic opening tool just enough to see where the speaker is attached to the motherboard.

    • Do not fully open the back cover or you risk damaging the speaker wire.

    • Use a spudger to disconnect the speaker connection from the motherboard.

  3. Magellan RoadMate 5120-LMTX Motherboard Replacement, Motherboard: passo 3, immagine 1 di 3 Magellan RoadMate 5120-LMTX Motherboard Replacement, Motherboard: passo 3, immagine 2 di 3 Magellan RoadMate 5120-LMTX Motherboard Replacement, Motherboard: passo 3, immagine 3 di 3
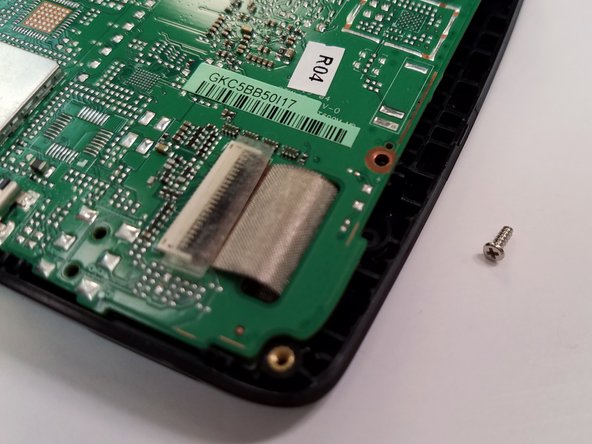
    • There will be two 5mm Phillips #00 screws that need to be removed from the motherboard.

  4. Magellan RoadMate 5120-LMTX Motherboard Replacement: passo 4, immagine 1 di 3 Magellan RoadMate 5120-LMTX Motherboard Replacement: passo 4, immagine 2 di 3 Magellan RoadMate 5120-LMTX Motherboard Replacement: passo 4, immagine 3 di 3
    • Some devices may have a piece of tape or plastic over the ribbon cable latch. If your device has this, remove it before continuing.

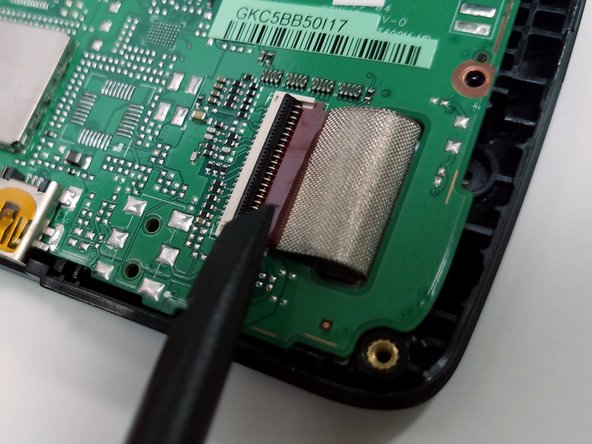
    • Carefully lift the black ribbon cable latch upwards with a spudger or other similar tool.

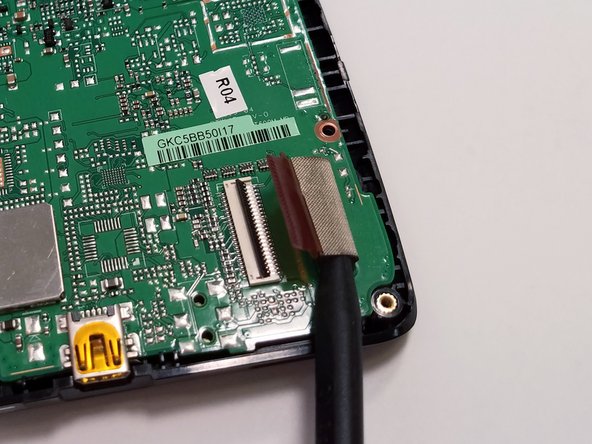
    • Once the ribbon cable latch is opened, insert the pointed end of the spudger, or other similar tool, underneath the ribbon cable.

    • Slowly pull out the ribbon cable in a straight, flat motion with respect to the latch.

  5. Magellan RoadMate 5120-LMTX Motherboard Replacement: passo 5, immagine 1 di 2 Magellan RoadMate 5120-LMTX Motherboard Replacement: passo 5, immagine 2 di 2
    • Be careful not to touch any of the electrical components on the motherboard as damage may ensue.

    • Carefully lift the motherboard out of the plastic housing by the edges while guiding the ribbon cable through the slot.

    • Store the motherboard on a safe non-conductive surface, preferably an anti-static mat.

Conclusione

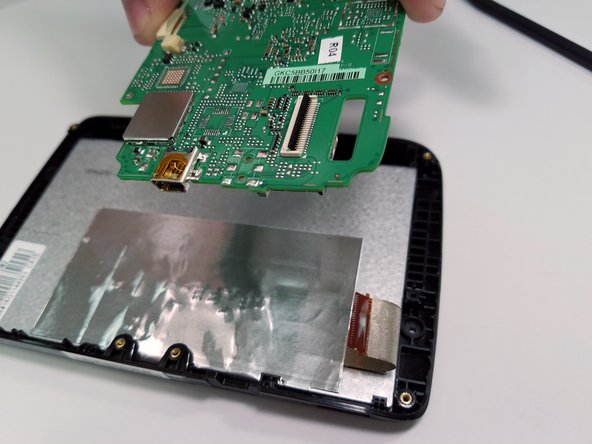
To reassemble your device, follow these instructions in reverse order.

Andrew Bading

Membro da: 10/08/16

132 Reputazione

1 Guida realizzata

Team

IUPUI, Team 4-4, Wilson Fall 2016 Membro di IUPUI, Team 4-4, Wilson Fall 2016

IUPUI-WILSON-F16S4G4

4 Membri

6 Guide realizzate

0 Commenti

Aggiungi Commento

Visualizza Statistiche:

Ultime 24 Ore: 0

Ultimi 7 Giorni: 0

Ultimi 30 Giorni: 0

Tutti i Tempi: 302