Introduzione
Replacing the front display bezel requires removal of nearly every component in your display assembly.
Cosa ti serve
-
-
Use your fingers to push both battery release tabs away from the battery and lift the battery out of the computer.
-
-
-
Remove the four identical Phillips 3.4 mm screws from the memory door. These screws have 4 mm diameter heads rather than the 3 mm heads on the body screws.
-
-
-
Remove the three Phillips screws in the battery compartment near the latch. Apple was nice enough to tilt these screws at a slight angle to make them easier to remove. On the A1261 these screws have 4 mm diameter heads rather than the 3 mm heads on the body screws.
-
-
-
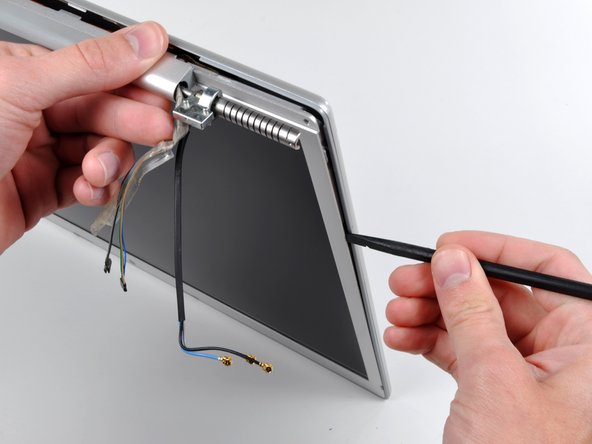
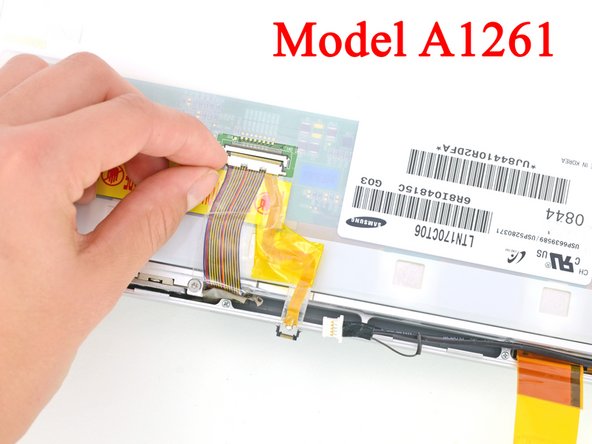
Disconnect the two antenna cables from the AirPort Extreme card, the iSight and inverter cables from the left side of the logic board, and the display data cable from the right side of the logic board. Be careful to slide the connectors as they may become damaged otherwise.
-
Carefully peel the iSight and inverter cables off the top of the left fan and de-route the AirPort antenna cables from the channel in the left speaker.
-
-
-
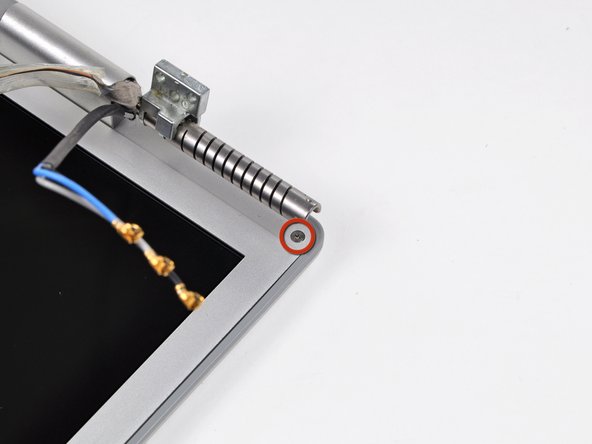
Remove the Phillips screws from the lower left and right corners of the display (two screws total).
-
-
-
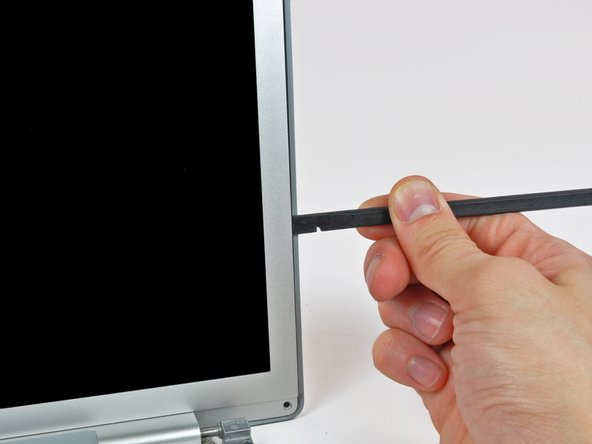
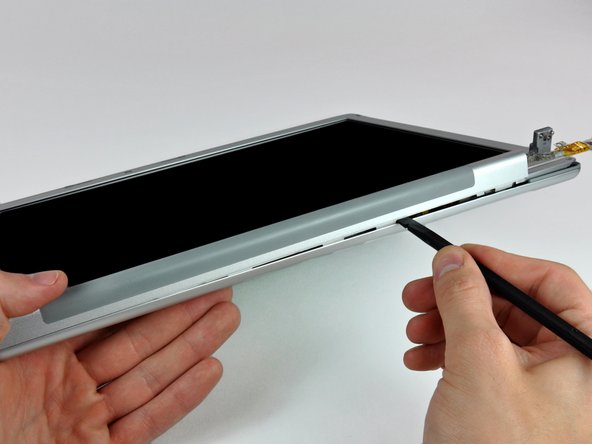
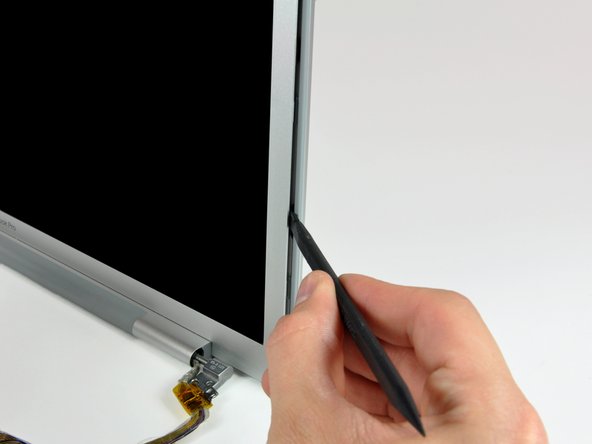
Insert the flat end of a spudger perpendicular to the face of the display between the plastic strip attached to the rear bezel and the front bezel.
-
With the spudger still inserted, rotate it away from the display to separate the front and rear bezels.
-
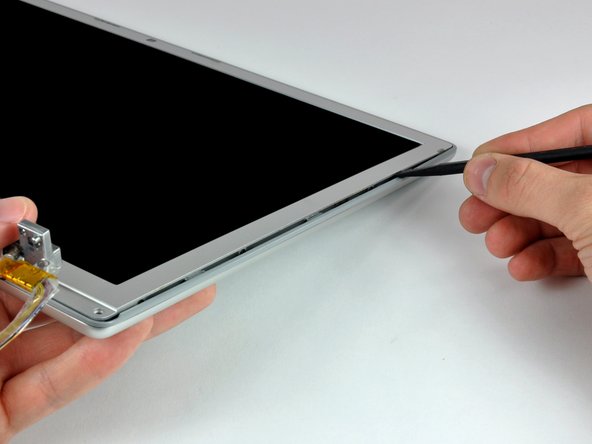
Work along the right edge of the display until the rear bezel is evenly separated from the front bezel.
-
-
-
-
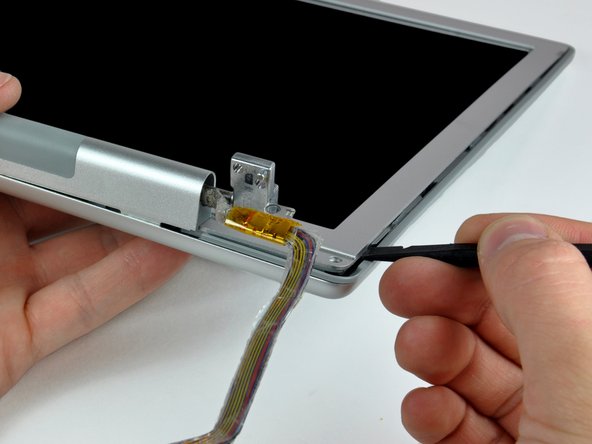
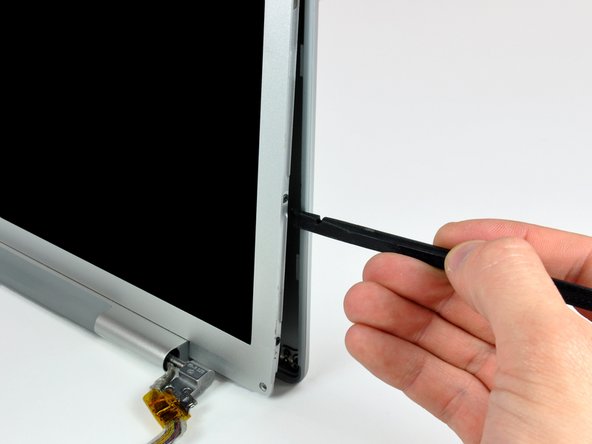
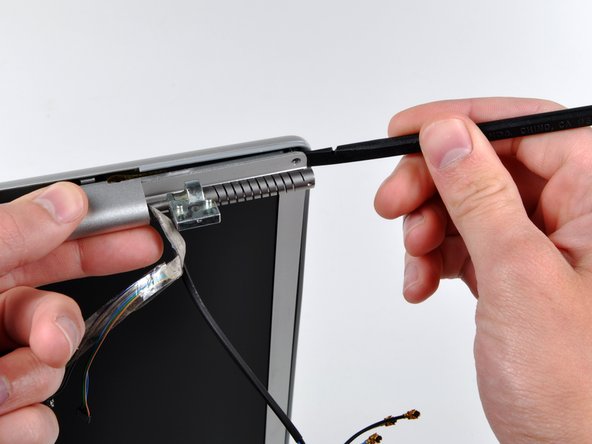
Insert the flat end of a spudger into the gap between the rear display bezel and the clutch cover.
-
Twist the spudger to separate the lower edge of the rear display bezel from the clutch cover.
-
Work along the lower edge of the rear bezel until it is evenly separated from the clutch cover.
-
-
-
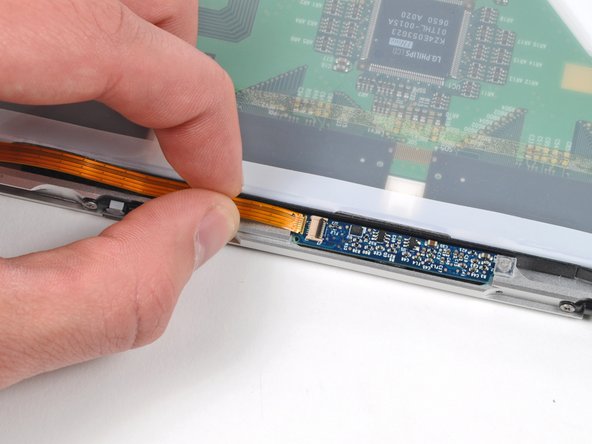
Remove the piece of tape securing the backlight cables to the front display bezel.
-
-
-
Use the flat end of a spudger to carefully peel off the three antenna straps stuck to the lower edge of the LCD.
-
-
-
While pulling the clutch assembly away from the clutch hinge with one hand, insert an iPod opening tool between the clutch cover and the front display bezel to lift the clutch cover over the retaining pin on the front display bezel.
-
Pull the clutch assembly away from the front display bezel.
-
-
-
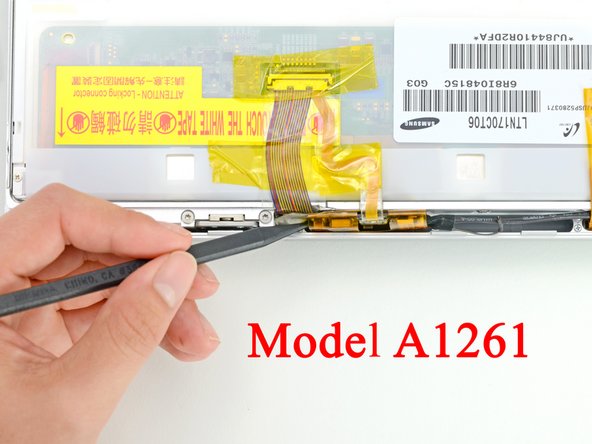
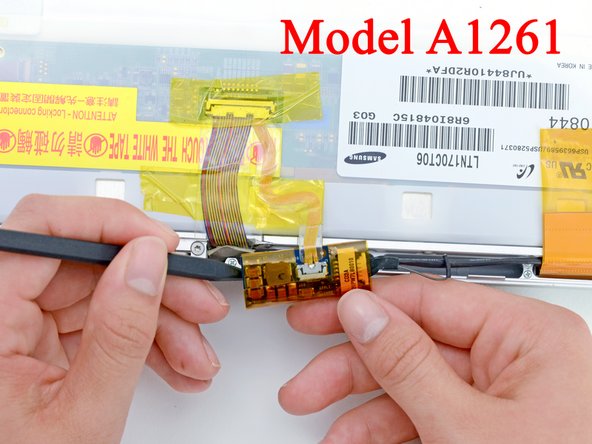
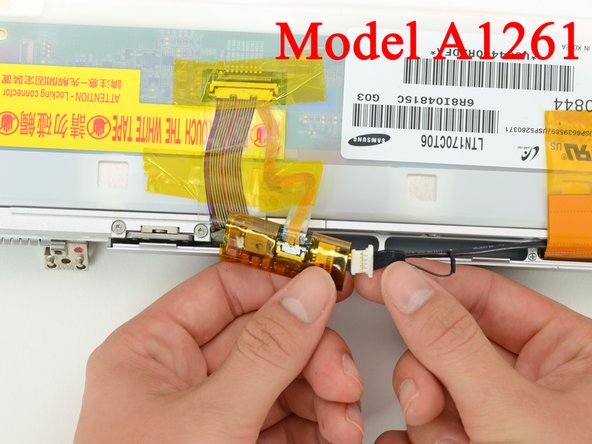
Remove the three pieces of tape securing the camera cable to the display assembly.
-
-
-
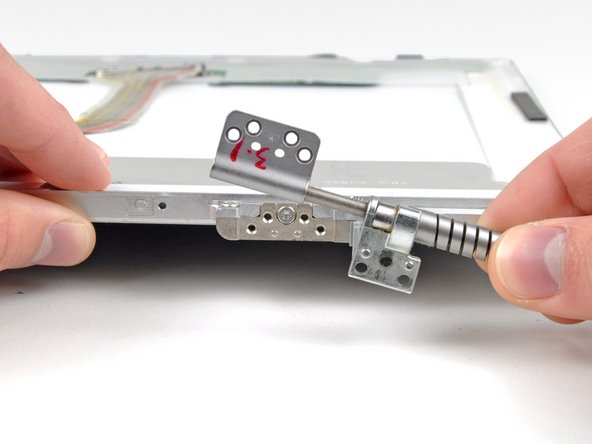
Remove the four 3.5 mm T6 Torx screws securing the left clutch hinge to the front display bezel.
-
Remove the left clutch hinge from the front display bezel.
-


To reassemble your device, follow these instructions in reverse order.
To reassemble your device, follow these instructions in reverse order.
Annulla: non ho completato questa guida.
Altre 10 persone hanno completato questa guida.

5 Commenti
Are the bezels on the A1151 A1212 A1229 and A1261 all interchangeable? (can the front bezel from any of those models go on my a1229?)
They are very similar but a search on the internet shows three different part numbers.
Seriously consider using a screw sorter when doing this guide. I actually use a fishing tackle organizer. They have lids you can close, thus preventing any accidental screw spillage. I actually use two sorters, one for the case screws, and one for whatever parts inside I am repairing.
Thanks, my MacBook Pro is now getting full use once more. This guide was very helpful. It was a smooth process.
Check out a time lapse of this whole process.