Questa versione può contenere modifiche errate. Passa all'ultima istantanea verificata.
Cosa ti serve
-
Questo passaggio è privo di traduzione. Aiuta a tradurlo
-
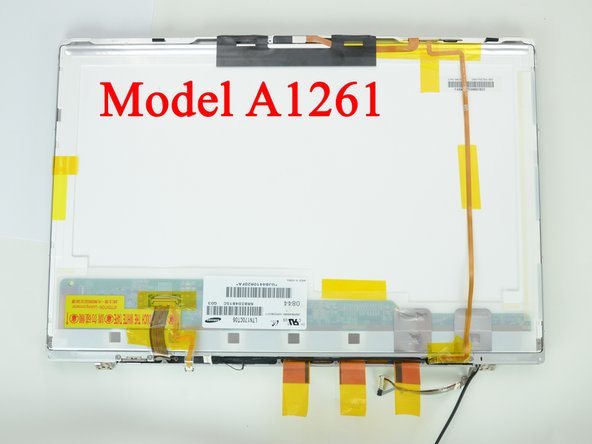
Use the flat end of a spudger to carefully peel off the three antenna straps stuck to the lower edge of the LCD.
-
-
Questo passaggio è privo di traduzione. Aiuta a tradurlo
-
Remove the five Phillips screws securing the clutch cover to the bottom edge of the front display bezel.
-
-
Questo passaggio è privo di traduzione. Aiuta a tradurlo
-
Remove the two pieces of tape securing the display data cable to the LCD.
-
-
-
Questo passaggio è privo di traduzione. Aiuta a tradurlo
-
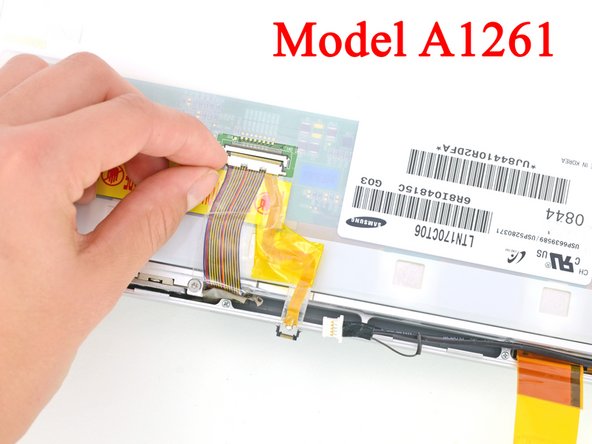
Disconnect the display data cable from the LCD by pulling it toward the bottom edge of the display.
-
-
Questo passaggio è privo di traduzione. Aiuta a tradurlo
-
Move the display data cable out of the way to remove the Phillips screw hidden underneath.
-
-
Questo passaggio è privo di traduzione. Aiuta a tradurlo
-
While pulling the clutch assembly away from the clutch hinge with one hand, insert an iPod opening tool between the clutch cover and the front display bezel to lift the clutch cover over the retaining pin on the front display bezel.
-
Pull the clutch assembly away from the front display bezel.
-
-
Questo passaggio è privo di traduzione. Aiuta a tradurlo
-
Repeat the process covered in the previous step to free the other side of the clutch assembly from the front display bezel.
-
-
Questo passaggio è privo di traduzione. Aiuta a tradurlo
-
Remove the clutch assembly from the front display bezel, minding any cables that may get caught.
-