Introduzione
Questa guida rappresenta un prerequisito interno e non deve essere pubblicata.
Cosa ti serve
-
-
Trattenere l'estremità del fermacavo con un dito, mentre si utilizza la punta di un inseritore per sollevare leggermente l'altra estremità e ruotarla lontano dal connettore del cavo della fotocamera.
-
-
-
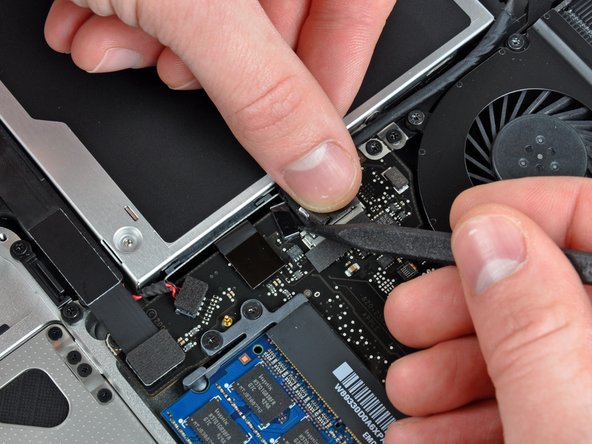
Scollegare il cavo della fotocamera, estraendo l'estremità maschio direttamente dal connettore femmina.
I would recommend leaving the camera cable plugged into the motherboard, and simply sliding the optical drive out from underneath it carefully. If you mistakenly life this connector straight up (as I did) you can damage either the cable connector or the motherboard socket. I damaged the connector on the cable and now the wifi antenna doesn't work. Replacing this damaged cable is about 10X more of a pain (in time and money) than the effort to slide the optical drive out from beneath this cable instead of disconnecting it.
Totally agree here, my wifi card is no longer recognized by the computer. Not sure what to do now.
-
-
-
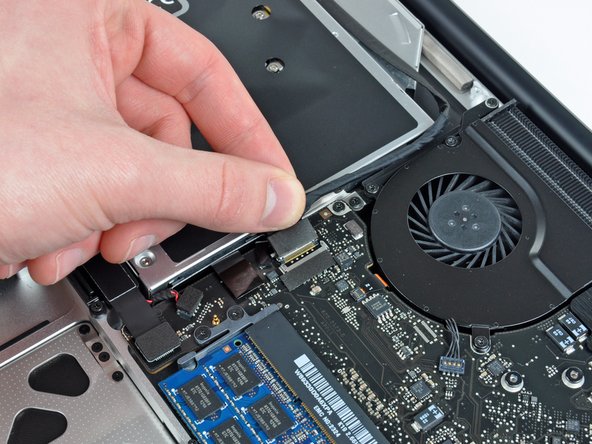
Rimuovere il cavo della fotocamera dall'adesivo che lo fissa all'unità ottica.
When reassembling, which adhesive should be used to reattach the camera cable?
-
-
-
-
Scollegare il cavo del Bluetooth, estraendo l'estremità maschio direttamente dal connettore femmina.
-
Utilizzare l'estremità piatta di un inseritore per scollegare il cavo dell'antenna Bluetooth dal connettore femmina sulla scheda logica.
How can I determine if I have an antiglare display?
Thanks!
Dan
If you have the part in step 10, you do. If you don’t, you don’t (looks like pic in step 9).
As already pointed out in a comment to step 8, it is possible to slide carefully out the drive from underneath the bluetooth board without touching it, and to insert the replacement drive in the same way, avoiding to perform this step and the next one.
-
-
-
Rimuovere le due viti con testa a croce da 3,5 mm che fissano la parte esterna dell'unità ottica al case superiore.
When installing the HD bay, the screws here will not go back. Not sure if the bracket/holes are somehow different. After completing the install, everything seems secure. Does anyone think not having these screws is critical beyond securing the drive?
-


Per riassemblare il dispositivo, seguire queste istruzioni in ordine inverso.
Per riassemblare il dispositivo, seguire queste istruzioni in ordine inverso.
Un ringraziamento speciale a questi traduttori:
100%
Oriane Petit ci sta aiutando ad aggiustare il mondo! Vuoi partecipare?
Inizia a tradurre ›

I found it quite easy to carefully remove the drive from under the camera cable without disconnecting it, and guide the new drive back in under. It saved time and the danger of damaging those fragile connectors.
Glenn Richards - Replica