Questa versione può contenere modifiche errate. Passa all'ultima istantanea verificata.
Cosa ti serve
-
-
Rimuovi le dieci viti seguenti, che fissano il case inferiore a quello superiore:
-
Tre viti con testa a croce Phillips da 13,5 (14,1) mm.
-
Sette viti con testa a croce da 3 mm.
-
-
-
Usa l'estremità di uno spudger per rimuovere il connettore della batteria dal suo zoccolo sulla scheda logica.
-
-
-
-
Rimuovere le due viti con testa a croce che fissano la staffa del disco rigido al case superiore.
-
-
Questo passaggio è privo di traduzione. Aiuta a tradurlo
-
Use the flat end of a spudger to pry the hard drive cable connector up off the logic board.
-
-
Questo passaggio è privo di traduzione. Aiuta a tradurlo
-
Remove the following four screws securing the hard drive and IR sensor cable to the upper case:
-
Two 1.5 mm Phillips screws.
-
Two 4 mm Phillips screws.
-
-
Questo passaggio è privo di traduzione. Aiuta a tradurlo
-
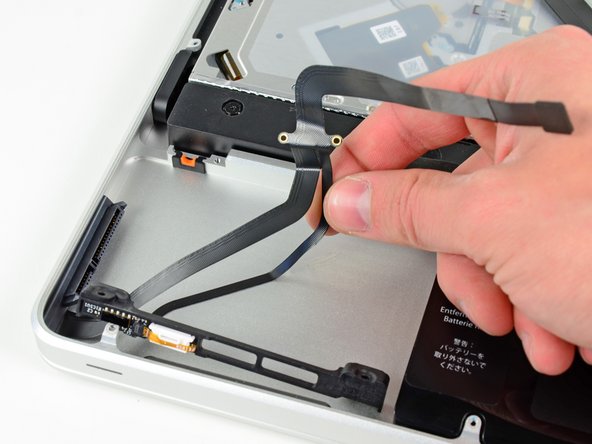
Slide the hard drive and IR sensor bracket away from the edge of the upper case.
-
Carefully peel the hard drive and IR sensor cable from the upper case.
-
Lift the hard drive and IR sensor assembly out of the upper case.
-
-
Questo passaggio è privo di traduzione. Aiuta a tradurlo
-
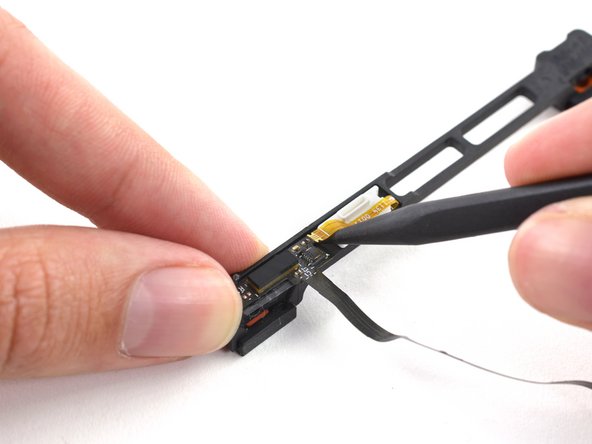
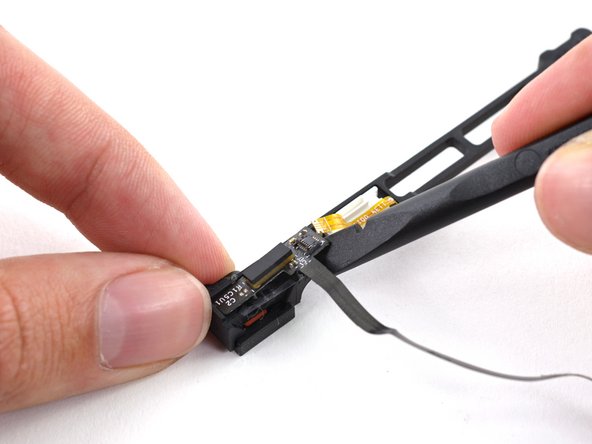
Use the tip of a spudger to flip the ZIF connector on the hard drive cable.
-
Gently pull the sensor bracket cable out of the ZIF connector.
-
Use the flat end of a spudger to pry the hard drive cable up off the sensor bracket.
-


Annulla: non ho completato questa guida.
Altre 14 persone hanno completato questa guida.

3 Commenti
Followed these instructions and completed the changeover, probably took half hour. The final step with the ZIF connector I was unable to see exactly how it worked but managed with a bit of trial and error and things are now working. Perhaps a closer photo or perhaps a diagram as to how the connector works? But all in all things worked. Thanks
Is there any way to fix failed graphics card on MacBook Pro 2011. At this stage it’s looking like I have to trash the thing?