Questa versione può contenere modifiche errate. Passa all'ultima istantanea verificata.
Cosa ti serve
-
-
Rimuovi le dieci viti seguenti, che fissano il case inferiore a quello superiore:
-
Tre viti con testa a croce Phillips da 13,5 (14,1) mm.
-
Sette viti con testa a croce da 3 mm.
-
-
-
Usa l'estremità di uno spudger per rimuovere il connettore della batteria dal suo zoccolo sulla scheda logica.
-
-
-
-
Rimuovere le due viti con testa a croce che fissano la staffa del disco rigido al case superiore.
-
-
Questo passaggio è privo di traduzione. Aiuta a tradurlo
-
Use the flat end of a spudger to pry the hard drive cable connector up off the logic board.
-
-
Questo passaggio è privo di traduzione. Aiuta a tradurlo
-
Remove the following four screws securing the hard drive and IR sensor cable to the upper case:
-
Two 1.5 mm Phillips screws.
-
Two 4 mm Phillips screws.
-
-
Questo passaggio è privo di traduzione. Aiuta a tradurlo
-
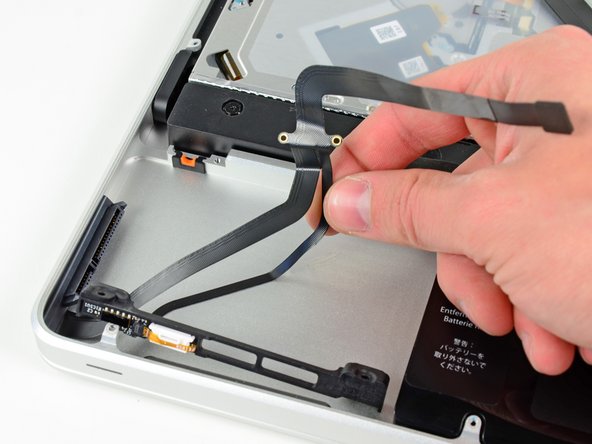
Slide the hard drive and IR sensor bracket away from the edge of the upper case.
-
Carefully peel the hard drive and IR sensor cable from the upper case.
-
Lift the hard drive and IR sensor assembly out of the upper case.
-
-
Questo passaggio è privo di traduzione. Aiuta a tradurlo
-
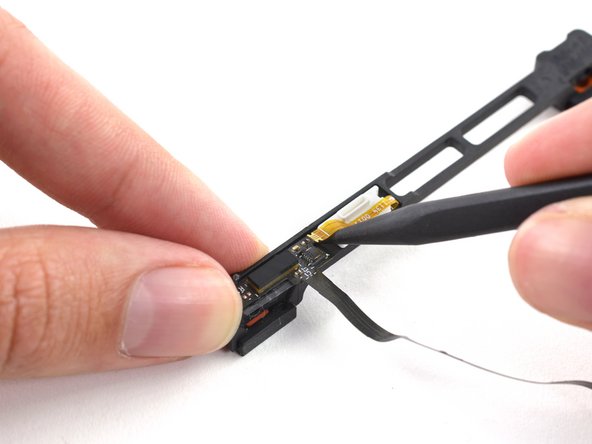
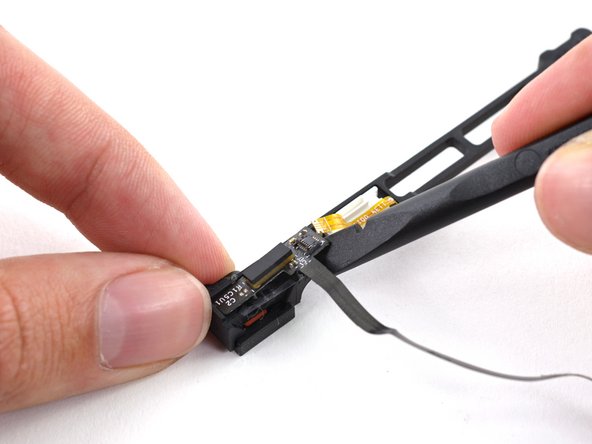
Use the tip of a spudger to flip the ZIF connector on the hard drive cable.
-
Gently pull the sensor bracket cable out of the ZIF connector.
-
Use the flat end of a spudger to pry the hard drive cable up off the sensor bracket.
-


Annulla: non ho completato questa guida.
Altre 13 persone hanno completato questa guida.

8 Commenti
Any recommendations on a known supported 512gb for MBP A1286. I've been looking at the Crucial m4. Seems legit. More options welcome. Thanks. http://www.amazon.com/Crucial-512GB-2-5-...
I have a macbook pro with a blue screen showing up. I am wondering if the symptoms I'm seeing on this computers might be related to this problem. i"ve read it's fairly common for these macs to have issues with those cables.
Worked for me, after my MacBook stopped working I first just replaced the harddisk for a SDD one only. But the re-install did not work, I lost the file system and managed to partially install the new drive. I realised this might be caused by the faulty SATA cable and was proven right.
I also taped some electrical isolation tape on the alu cover to protect the SATA cable.
hello mr Walter
I need bit help when I put my MacBook Pro to sleep, after the taking lid back to normal,
the screen stays black. the keyboard does not wake up the screen. the not even power button, I have to power on and off 3 to 4 times to make a normal boot. do you think something wrong with sleep sensor, ?
if i change this part, it will resolve the problem
many thanks
Many Thanks!
By the way, I cannot recommend Experimac for any Mac repairs. They are NOT Apple certified, you should know this up front. They took my 15” MacBook Pro to repair a keyboard/backlight/power button issue. Said it would be finished by the following weekend. No phone call to tell me it was repaired the following weekend, when I called, I was told the part had not been ordered, it WOULD be ordered the coming week, would be repaired by the following weekend. I called on Saturday (now 2 weeks later) in the morning when I didn’t hear from them. Was told I would get a call back from the manager/owner later. No call. I went there on Monday, and at noon, all lights in the store where off and the door locked…at NOON. Was told the “repair failed”. I was given my MBP back, unrepaired. Took it to Apple, they complained that all the screws ( many were missing) were STRIPPED on the grid that fastens the keyboard to the backlight unit. Thanks Experimac. You suck, and I’ll tell everyone who’ll listen to never visit your store.