Salta al contenuto principale

MacBook Pro 15" Core 2 Duo Models A1226 and A1260 Clutch Assembly Replacement

Solo Prerequisita
Questa guida รจ destinata a essere usata solo come prerequisito per altre guide. Da sola รจ incompleta.

Cosa ti serve

  1. MacBook Pro 15" Core 2 Duo Models A1226 and A1260 Clutch Assembly Replacement, Clutch Assembly: passo 1, immagine 1 di 2 MacBook Pro 15" Core 2 Duo Models A1226 and A1260 Clutch Assembly Replacement, Clutch Assembly: passo 1, immagine 2 di 2
    • Remove the two pieces of kapton tape covering the display data cable.

    • Remove the strip of tape securing the iSight cable to the LCD.

    • Peel the three antenna straps off the lower edge of the LCD.

  2. MacBook Pro 15" Core 2 Duo Models A1226 and A1260 Clutch Assembly Replacement: passo 2, immagine 1 di 1
    • Disconnect the display data cable by pulling its connector toward the bottom edge of the display, away from the socket on the LCD.

  3. MacBook Pro 15" Core 2 Duo Models A1226 and A1260 Clutch Assembly Replacement: passo 3, immagine 1 di 1
    • Remove the two Phillips screws securing the ground straps for the display data cable and LED driver board cable to the clutch cover.

  4. MacBook Pro 15" Core 2 Duo Models A1226 and A1260 Clutch Assembly Replacement: passo 4, immagine 1 di 1
    • Remove the Phillips screw hidden behind the display data cable.

  5. MacBook Pro 15" Core 2 Duo Models A1226 and A1260 Clutch Assembly Replacement: passo 5, immagine 1 di 1
    • Remove the three Phillips screws behind antenna straps along the bottom edge of the display.

  6. MacBook Pro 15" Core 2 Duo Models A1226 and A1260 Clutch Assembly Replacement: passo 6, immagine 1 di 1
    • To remove the clutch assembly, first insert the flat end of a spudger into the gap between the clutch hinge and the clutch cover where the cables exit.

    • While prying the clutch assembly away from the clutch hinge with your spudger, use a plastic opening tool to increase the gap between the clutch cover and the front display bezel.

    • Work your way along the length of the clutch cover to fully separate the adhesive.

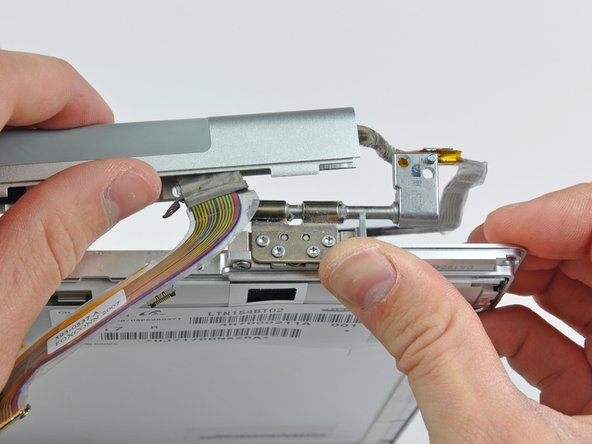
  7. MacBook Pro 15" Core 2 Duo Models A1226 and A1260 Clutch Assembly Replacement: passo 7, immagine 1 di 2 MacBook Pro 15" Core 2 Duo Models A1226 and A1260 Clutch Assembly Replacement: passo 7, immagine 2 di 2
    • Push the clutch assembly off each of the clutch hinges and remove it from the display.

Conclusione

To reassemble your device, follow these instructions in reverse order.

Un'altra persona ha completato questa guida.

0 Commenti

Aggiungi Commento

Visualizza Statistiche:

Ultime 24 Ore: 0

Ultimi 7 Giorni: 0

Ultimi 30 Giorni: 0

Tutti i Tempi: 1,092