Questa versione può contenere modifiche errate. Passa all'ultima istantanea verificata.
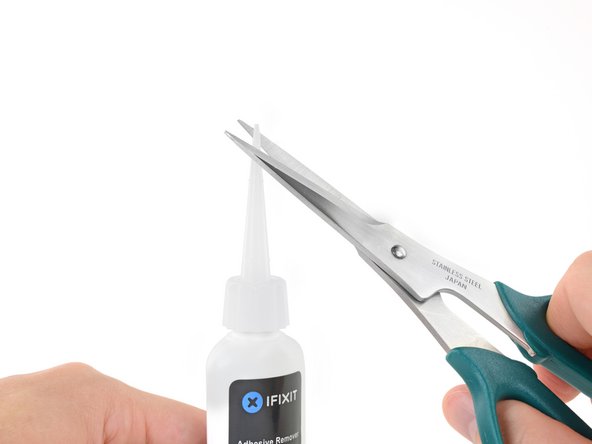
Cosa ti serve
-
-
Rimuovi le 10 viti seguenti che fissano il coperchio inferiore al case superiore:
-
Due viti Pentalobe da 2,3 mm
-
Otto viti Pentalobe da 3,0 mm
-
-
-
Rimuovi la copertura in plastica attaccata alla scheda dei contatti della batteria.
-
-
-
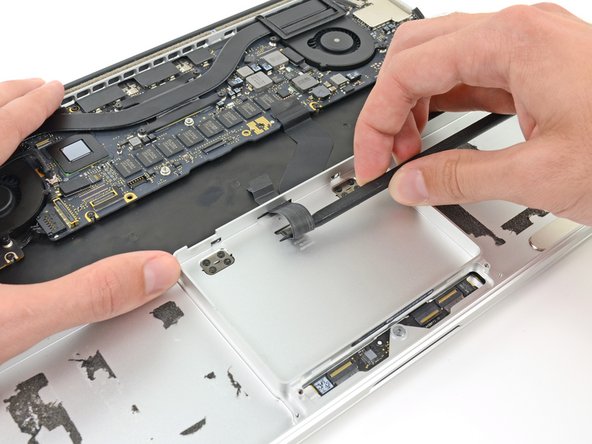
Afferra con delle pinzette l'interposer.
-
Solleval'interposer dalla scheda logica e rimuovilo.
-
-
-
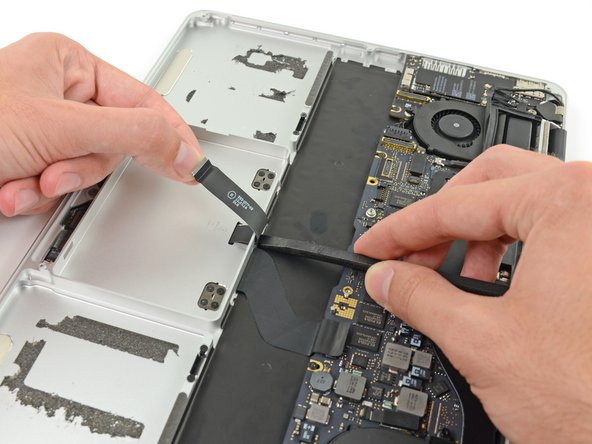
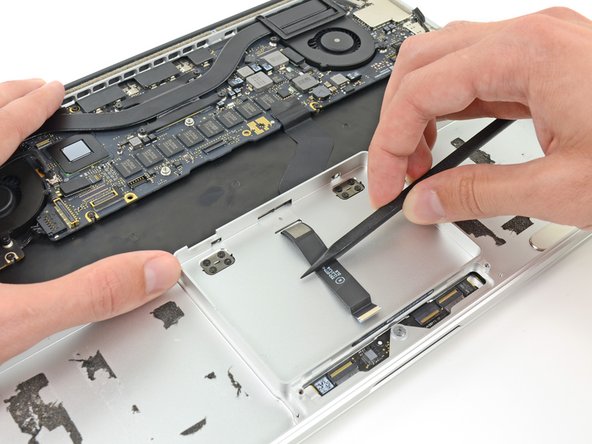
Usa l'estremità piatta di uno spudger per staccare il lato destro del connettore del cavo dati della scheda I/O dal suo zoccolo sulla scheda I/O.
-
-
-
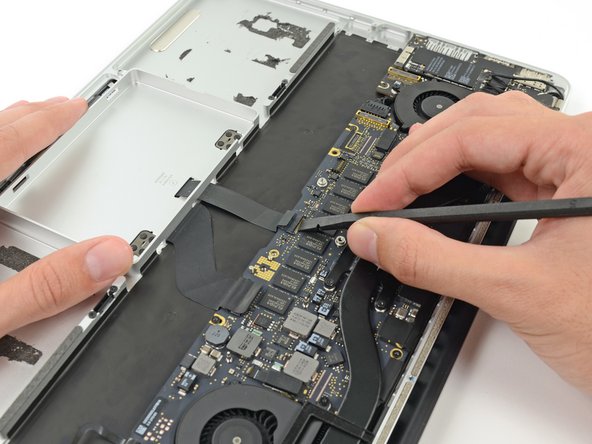
Usa l'estremità piatta di uno spudger per staccare il connettore del cavo dell'SSD dal suo zoccolo sulla scheda logica.
-
Sposta il connettore del cavo dell'SSD dove non dia fastidio.
-
-
-
-
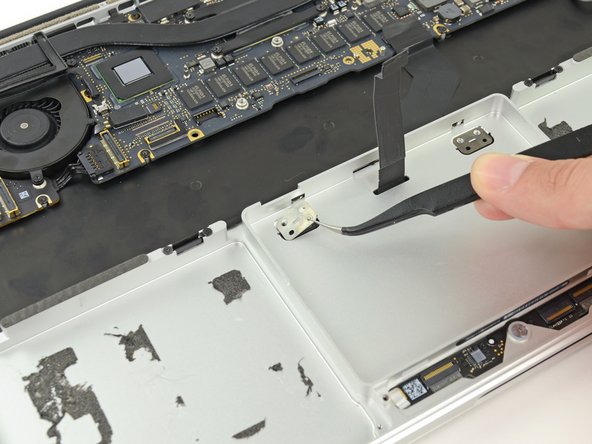
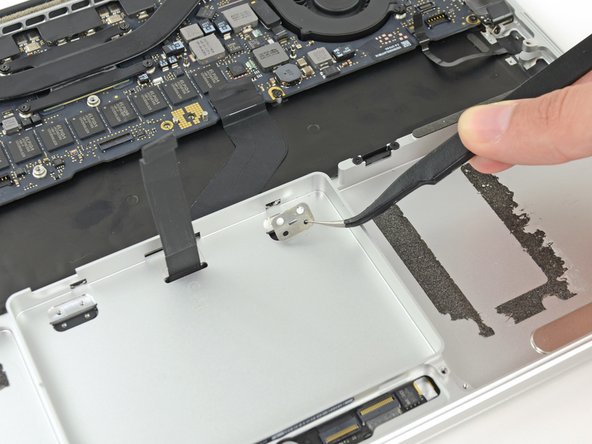
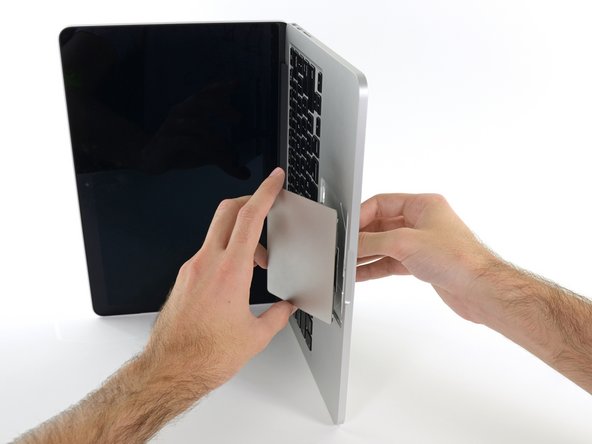
Inserisci l'estremità piatta di uno spudger per sollevare, staccandolo, il connettore del cavo del jack altoparlanti dal suo zoccolino sulla scheda logica.
-
-
-
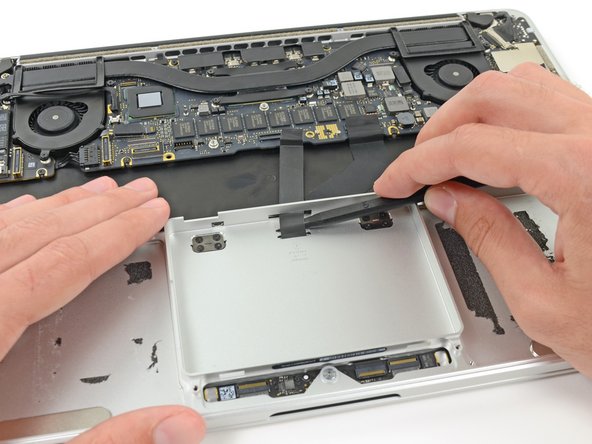
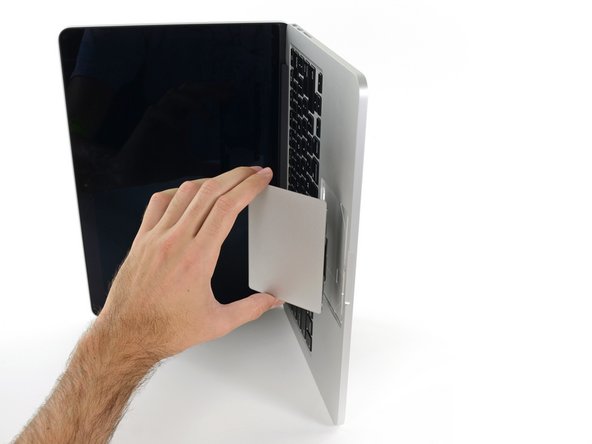
Usa il pollice o le dita per tenere piegata la barra a molla in plastica sul vassoio dell'SSD, liberando le due clip sul lato frontale del dispositivo.
-
Mentre tieni premuta la barra a molla, fai ruotare verso l'alto, fuori dalla sua cavità, il gruppo SSD.
-
-
-
Rimuovi le tre viti Torx T5 da 2,2 mm presenti su ogni lato della batteria (sei viti in totale).
-
-
-
Ora che il tuo MacBook Pro è stato preparato per l'intervento, è ora di preparare anche te.
-
Indossa occhiali protettivi quando maneggi e applichi l'antiadesivo (gli occhiali protettivi sono inclusi nel tuo kit).
-
Non indossare lenti a contatto senza gli occhiali protettivi.
-
Anche i guanti protettivi sono inclusi nel tuo kit. Se ti preoccupa un'eventuale irritazione alla pelle, mettiti subito i guanti.
-
-
-
Ripeti i passi precedenti per separare la cella adiacente dal suo adesivo:
-
Applica poche gocce di antiadesivo sotto la cella della batteria.
-
Attendi 2-3 minuti per lasciar penetrare l'antiadesivo e ammorbidire la colla.
-
Incunea con delicatezza, verso l'interno, uno spudger o una scheda di plastica, stando attento non danneggiare la batteria e separa la cella della batteria dall'adesivo che la fissa al tuo MacBook Pro.
-
-
-
Solleva in una volta sola l'intera batteria fuori dal case superiore e rimuovila.
-
Con un po' di fortuna, dovresti riuscire un po' alla volta a staccare ogni striscia di adesivo con le dita.
-
In caso contrario, bagna ogni striscia di adesivo con un po' di antiadesivo per 2-3 minuti e poi grattala via con uno strumento di plastica. Può essere richiesto abbastanza lavoro, quindi cerca di avere pazienza.
-
Elimina ogni traccia dell'adesivo rimanente e lascia asciugare all'aria il tuo MacBook Pro per qualche minuto.
-
Calibra la nuova batteria appena installata: carica al 100% e tieni in carica almeno altre 2 ore. Stacca il cavo e usa il laptop per farlo scaricare. All'avviso di batteria in esaurimento, salva il lavoro corrente e tieni acceso il MacBook finché non si iberna perché scarico. Aspetta almeno altre 5 ore, poi carica senza interruzioni fino al 100%.
-
-
Questo passaggio è privo di traduzione. Aiuta a tradurlo
-
Wedge the spudger between the trackpad ribbon cable and the upper case.
-
Run the spudger along the bottom to release the trackpad ribbon cable from the adhesive securing it to the upper case.
-
-
Questo passaggio è privo di traduzione. Aiuta a tradurlo
-
Insert the tip of a spudger in between the trackpad ribbon cable and the upper case inside the SSD assembly cavity to remove the last of the adhesive.
-
-
Questo passaggio è privo di traduzione. Aiuta a tradurlo
-
Using the tip of the spudger carefully thread the trackpad ribbon cable out of the notch near the top of the SSD assembly cavity.
-
-
Questo passaggio è privo di traduzione. Aiuta a tradurlo
-
Remove the following screws securing the trackpad brackets to the trackpad and upper case:
-
Four 1.9 mm Phillips #000 screws
-
Four 1.4 mm Phillips #000 screws
-
-
Questo passaggio è privo di traduzione. Aiuta a tradurlo
-
Use tweezers to remove the two trackpad mounting brackets from the upper case.
-
-
Questo passaggio è privo di traduzione. Aiuta a tradurlo
-
Guide the trackpad ribbon cable through the slot cut in the upper case. This will push the trackpad up out of its recess in the top of the upper case. Guide the trackpad out with your other hand, so it doesn't fall.
-
-
Questo passaggio è privo di traduzione. Aiuta a tradurlo
-
Gently pull the trackpad from the upper case, being careful not to snag the ribbon cable.
-


Annulla: non ho completato questa guida.
Altre 13 persone hanno completato questa guida.


12 Commenti
Hi!
I have a Macbook Pro Retina 15-Inch Early 2013. Is it a similar procedure for this laptop with a larger screen (15" versus yours 13")?
We've got guides for the 15" Early 2013, unfortunately, removing the battery in the 15" is significantly harder, you can follow the upper case guide to get most of the way and either replace the whole upper case (and get a new battery included), or use this guide to try to get the rest of the way. Best of luck!
I just wanted to say this worked for me, thank you for the walkthrough! My trackpad just suddenly died one day out of the blue. I thought it might be a lose cable, but ordered a replacement just in case. No loose cables, simple swap out did the trick. This walkthrough is very good. Only thing I'd warn the feint of heart is the removal of the batteries can be intense because they are glued in. You really need the right tool to work it free. I think the battery removal took at least 20 minutes alone!
Anyone, thanks again for your help!
Excellent write up. Three suggestions which i uncovered when i followed this procedure:
Step 5 - The silver shouldered screw was a T6 Torx, not a T7. On this basis, I didn't need a T7 Torx screwdriver for this procedure.
Step 15 & 19 - To remove the corner screws (the heads of which aren't immediately visible), you need to carefully remove the covering mesh with tweezers
Step 44 - Reposition of trackpad. I found that when putting the trackpad back in place during reassembly, it was tricky to get it in exactly the right position (perfectly centralised). I found that taking four small pieces of paper and folding them in half helped. I wedged a piece of folded paper in between the four sides of the trackpad and then tightened the screws. Once the screws are tightened, you can simply remove the paper.