Questa versione può contenere modifiche errate. Passa all'ultima istantanea verificata.
Cosa ti serve
-
-
Usa un cacciavite P5 Pentalobe per rimuovere le dieci viti che tengono in posizione il case inferiore, delle seguenti lunghezze:
-
Due viti da 9 mm
-
Otto viti da 2,6 mm
-
-
-
Afferra la piccola striscia di plastica trasparente attaccata al connettore della batteria e tirala parallelamente alla scheda verso il bordo anteriore dell'Air.
-
-
-
Usa la parte piatta di uno spudger per sollevare il connettore del cavo della scheda I/O e scollegarlo dalla presa sulla scheda I/O.
-
-
-
Usa la punta di uno spudger per ruotare attentamente verso l'alto l'aletta di bloccaggio del connettore ZIF del cavo della ventola.
-
-
-
-
Scollega la scheda I/O tirando il suo cavo d'alimentazione via dalla sua presa sulla scheda madre.
-
-
Questo passaggio è privo di traduzione. Aiuta a tradurlo
-
Use the flat end of a spudger to pry each of the antenna connectors up from their sockets on the AirPort/Bluetooth card.
-
-
Questo passaggio è privo di traduzione. Aiuta a tradurlo
-
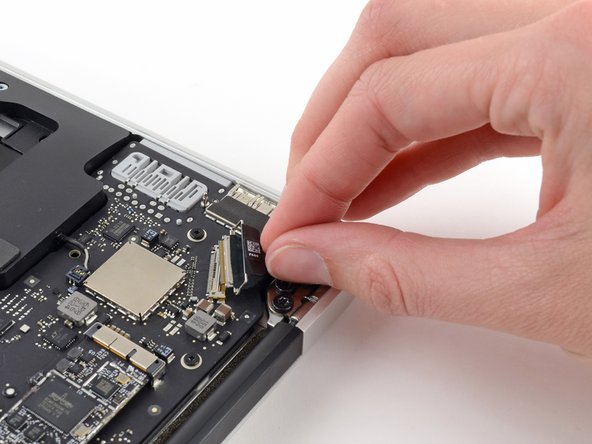
Disconnect the camera cable connector with the tip of a spudger.
-
Pull the camera cable parallel to the face of the I/O board toward the front edge of the Air to disconnect it from its socket.
-
-
Questo passaggio è privo di traduzione. Aiuta a tradurlo
-
Pull the plastic tab on the display data cable connector to unlock it.
-
-
Questo passaggio è privo di traduzione. Aiuta a tradurlo
-
Pull the display data cable connector straight out of its socket.
-
-
Questo passaggio è privo di traduzione. Aiuta a tradurlo
-
Remove the inner four (two on each side) 4.9 mm T8 Torx screws securing the right and left display hinges to the upper case.
-
-
Questo passaggio è privo di traduzione. Aiuta a tradurlo
-
Gently de-route the antenna cables out of the channel cut into the upper case.
-
-
Questo passaggio è privo di traduzione. Aiuta a tradurlo
-
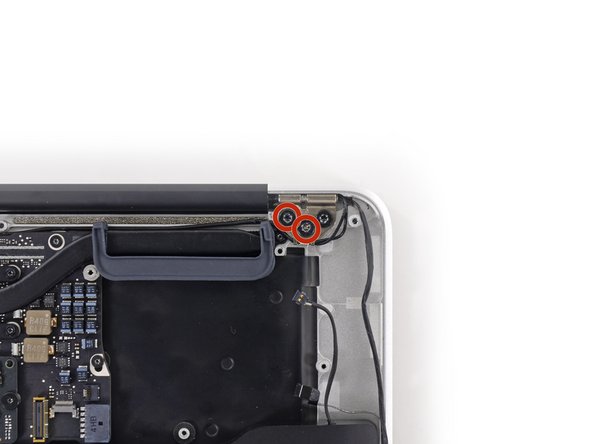
While holding the Air steady, remove the remaining 4.9 mm T8 Torx screw from the left display bracket.
-
-
Questo passaggio è privo di traduzione. Aiuta a tradurlo
-
Remove the last 4.9 mm T8 Torx screw securing the display to the upper case.
-
-
Questo passaggio è privo di traduzione. Aiuta a tradurlo
-
Open the Air slightly to allow room for the hinges to slide out of their notches.
-
Push the upper case slightly toward the display assembly, then push it back from the hinges.
-
Once the two display hinges have cleared the upper case, remove the display and set it aside.
-


Annulla: non ho completato questa guida.
Altre 77 persone hanno completato questa guida.

17 Commenti
Just a reminder that you DO NOT want to touch the battery with your hands or a screw driver you can compromise the integrity of the battery and possibly cause a thermal event. Always use proper battery cover kit.
When reassembling the device, keep in mind that the holes in the hinges are relatively big compared to the T8 screws, so there will be a certain play. Check if display and body are in line when the MacBook is closed, then tighten the screws.
When I noticed this (also similar issue when installing the trackpad), I thought "what an inferior engineering for such an expensive product".