Salta al contenuto principale
Unisciti alla Community delle riparazioni - Crea un account

MacBook Air 13" Mid 2012 Display Assembly Replacement

Cosa ti serve

  1. MacBook Air 13" Mid 2012 Display Assembly Replacement, Lower Case: passo 1, immagine 1 di 1
    Strumento utilizzato in questo passaggio:
    P5 Pentalobe Screwdriver Retina MacBook Pro and Air
    $5.99
    • Before proceeding, power down your MacBook. Close the display and lay it on a soft surface, top-side down.

    • Use a P5 Pentalobe driver to remove ten screws securing the lower case, of the following lengths:

    • Two 9 mm screws

    • Eight 2.6 mm screws

    Chiedi a FixBot
  2. MacBook Air 13" Mid 2012 Display Assembly Replacement: passo 2, immagine 1 di 1
    • Wedge your fingers between the display and the lower case and pull upward to pop the lower case off the Air.

    • Remove the lower case and set it aside.

    Chiedi a FixBot
  3. MacBook Air 13" Mid 2012 Display Assembly Replacement, Battery Connector: passo 3, immagine 1 di 2 MacBook Air 13" Mid 2012 Display Assembly Replacement, Battery Connector: passo 3, immagine 2 di 2
    • As a precaution against accidental discharge or shock, disconnect the battery connector from the logic board.

    • Grab the clear plastic pull tab attached to the battery connector and pull it toward the front edge of the Air to disconnect the battery from the logic board.

    • Be sure to pull the connector horizontally toward the battery, and not straight up from the Air, or you may damage the socket on the logic board.

    Chiedi a FixBot
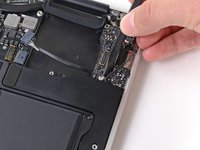
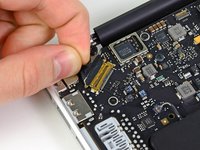
  4. MacBook Air 13" Mid 2012 Display Assembly Replacement, I/O Board Cable: passo 4, immagine 1 di 1
    • Use the flat end of a spudger to pry the I/O board cable connector upward out of its socket on the I/O board.

    Chiedi a FixBot
  5. MacBook Air 13" Mid 2012 Display Assembly Replacement: passo 5, immagine 1 di 1
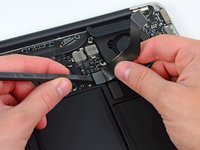
    • Carefully peel the I/O board cable from the top of the fan.

    Chiedi a FixBot
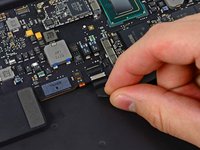
  6. MacBook Air 13" Mid 2012 Display Assembly Replacement: passo 6, immagine 1 di 2 MacBook Air 13" Mid 2012 Display Assembly Replacement: passo 6, immagine 2 di 2
    • The following connector has an especially deep socket. Use care when disconnecting it.

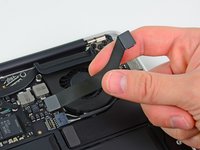
    • While gently pulling the I/O board cable upward near its connection to the logic board, use the tip of a spudger to pry upward on alternating sides of the connector to help "walk" it out of its socket.

    • Remove the I/O board cable.

    Chiedi a FixBot
  7. MacBook Air 13" Mid 2012 Display Assembly Replacement, Fan: passo 7, immagine 1 di 1
    • Use the tip of a spudger to carefully flip up the retaining flap on the fan cable ZIF socket.

    • Be sure you are prying up on the hinged retaining flap, not the socket itself.

    Chiedi a FixBot
  8. MacBook Air 13" Mid 2012 Display Assembly Replacement: passo 8, immagine 1 di 1
    • Peel the rubber gasket off the adhesive on the top of the fan.

    Chiedi a FixBot
  9. MacBook Air 13" Mid 2012 Display Assembly Replacement: passo 9, immagine 1 di 1
    • Remove the following three screws securing the fan to the upper case:

    • One 3.6 mm T5 Torx screw

    • One 2.7 mm T5 Torx screw

    • One 3.6 mm T5 Torx screw with a short head

    Chiedi a FixBot
  10. MacBook Air 13" Mid 2012 Display Assembly Replacement: passo 10, immagine 1 di 1
    • Lift the fan out of the upper case and carefully pull the fan ribbon cable out of its socket as you remove it from the Air.

    Chiedi a FixBot
  11. MacBook Air 13" Mid 2012 Display Assembly Replacement, I/O Board: passo 11, immagine 1 di 1
    • Disconnect the I/O board by pulling the power cable away from its socket on the logic board.

    • Pull the cable parallel to the face of the logic board toward the right edge of the Air.

    Chiedi a FixBot
  12. MacBook Air 13" Mid 2012 Display Assembly Replacement: passo 12, immagine 1 di 1
    • Pull the camera cable parallel to the face of the I/O board toward the hinge of the Air to disconnect it from its socket, using the tip of a spudger to help push the connector out of its socket.

    • Do not lift upward on this cable as you disconnect it, as its socket may break off the logic board.

    Chiedi a FixBot
  13. MacBook Air 13" Mid 2012 Display Assembly Replacement: passo 13, immagine 1 di 1
    • Use the flat end of a spudger to pry the left speaker cable connector up and out of its socket on the I/O board.

    • Pry up from beneath the wires.

    Chiedi a FixBot
  14. MacBook Air 13" Mid 2012 Display Assembly Replacement: passo 14, immagine 1 di 2 MacBook Air 13" Mid 2012 Display Assembly Replacement: passo 14, immagine 2 di 2
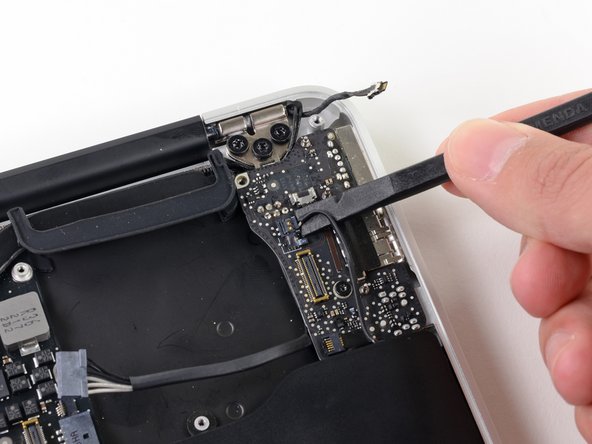
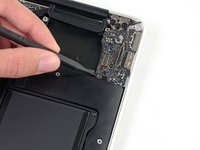
    • Use the tip of a spudger to flip up the retaining flap securing the microphone ribbon cable to the I/O board.

    • Use the tip of a spudger to remove the volume button ribbon cable from its ZIF connector on the I/O board.

    Chiedi a FixBot
  15. MacBook Air 13" Mid 2012 Display Assembly Replacement: passo 15, immagine 1 di 1
    • Remove the single 4.0 mm T5 Torx screw securing the I/O board to the upper case.

    Chiedi a FixBot
  16. MacBook Air 13" Mid 2012 Display Assembly Replacement: passo 16, immagine 1 di 1
    • Carefully lift the I/O board from its edge nearest the logic board and remove it from the upper case.

    Chiedi a FixBot
  17. MacBook Air 13" Mid 2012 Display Assembly Replacement, Battery: passo 17, immagine 1 di 1
    • Remove the following five screws securing the battery to the upper case:

    • Three 6.3 mm T5 Torx screws

    • Two 2.4 mm T5 Torx screws

    Chiedi a FixBot
  18. MacBook Air 13" Mid 2012 Display Assembly Replacement: passo 18, immagine 1 di 1
    • When handling the battery, avoid squeezing or touching the four exposed lithium polymer cells.

    • Lift the battery from its edge nearest the logic board and remove it from the upper case.

    Chiedi a FixBot
  19. MacBook Air 13" Mid 2012 Display Assembly Replacement, Logic Board: passo 19, immagine 1 di 2 MacBook Air 13" Mid 2012 Display Assembly Replacement, Logic Board: passo 19, immagine 2 di 2
    • Use the tip of a spudger or your fingernail to flip up the retaining flap on the trackpad ribbon cable ZIF socket.

    • Be sure you are prying up on the hinged retaining flap, not the socket itself.

    • Pull the trackpad ribbon cable straight out of its socket toward the front edge of the Air.

    Chiedi a FixBot
  20. MacBook Air 13" Mid 2012 Display Assembly Replacement: passo 20, immagine 1 di 2 MacBook Air 13" Mid 2012 Display Assembly Replacement: passo 20, immagine 2 di 2
    • Use the tip of a spudger to flip up the retaining flap on the keyboard backlight ribbon cable ZIF socket.

    • Be sure you are prying up on the hinged retaining flap, not the socket itself.

    • Use your spudger to help pull the cable out of its socket.

    Chiedi a FixBot
  21. MacBook Air 13" Mid 2012 Display Assembly Replacement: passo 21, immagine 1 di 1
    • Use the flat end of a spudger to pry the right speaker cable connector up and out of its socket on the logic board.

    • Pry up from beneath the cables.

    Chiedi a FixBot
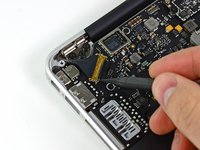
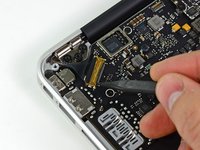
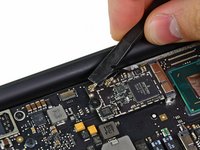
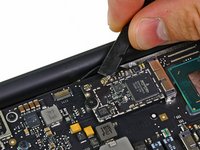
  22. MacBook Air 13" Mid 2012 Display Assembly Replacement: passo 22, immagine 1 di 3 MacBook Air 13" Mid 2012 Display Assembly Replacement: passo 22, immagine 2 di 3 MacBook Air 13" Mid 2012 Display Assembly Replacement: passo 22, immagine 3 di 3
    • Gently push the tip of a spudger under the black plastic flap stuck to the display data cable lock to make the lock pop upward and away from the socket.

    • While holding the lock away from the socket, use the tip of a spudger and your fingers to gently remove the display data cable from its socket.

    • Do not pull upward on the display data cable as you disconnect it, as its socket may break off the logic board.

    Chiedi a FixBot
  23. MacBook Air 13" Mid 2012 Display Assembly Replacement: passo 23, immagine 1 di 2 MacBook Air 13" Mid 2012 Display Assembly Replacement: passo 23, immagine 2 di 2
    • Use the flat end of a spudger to pry both antenna cable connectors up and off their sockets on the AirPort/Bluetooth card.

    Chiedi a FixBot
  24. MacBook Air 13" Mid 2012 Display Assembly Replacement: passo 24, immagine 1 di 1
    • Gently de-route the antenna cables from the slot cut into the logic board.

    Chiedi a FixBot
  25. MacBook Air 13" Mid 2012 Display Assembly Replacement: passo 25, immagine 1 di 1
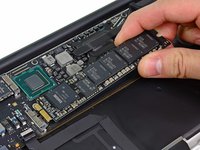
    • Remove the single 2.85 mm T5 Torx screw securing the SSD to the logic board.

    Chiedi a FixBot
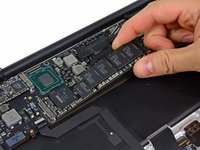
  26. MacBook Air 13" Mid 2012 Display Assembly Replacement: passo 26, immagine 1 di 2 MacBook Air 13" Mid 2012 Display Assembly Replacement: passo 26, immagine 2 di 2
    • To avoid damaging its socket, do not lift the end of the SSD excessively.

    • Pull the drive straight out of its socket and remove it from the logic board.

    • When reinstalling the SSD, be sure it is properly seated before reinstalling its retaining screw.

    Chiedi a FixBot
  27. MacBook Air 13" Mid 2012 Display Assembly Replacement: passo 27, immagine 1 di 1
    • Remove the six 6.3 mm T5 Torx screws securing the logic board to the upper case.

    Chiedi a FixBot
  28. MacBook Air 13" Mid 2012 Display Assembly Replacement: passo 28, immagine 1 di 1
    • Remove the inner two 4.9 mm T8 Torx screws securing the antenna cable retainer and left clutch hinge to the upper case.

    Chiedi a FixBot
  29. MacBook Air 13" Mid 2012 Display Assembly Replacement: passo 29, immagine 1 di 1
    • Push the antenna cable retainer away slightly and remove the 3 mm T5 Torx screw securing the end of the heat sink to the upper case.

    Chiedi a FixBot
  30. MacBook Air 13" Mid 2012 Display Assembly Replacement: passo 30, immagine 1 di 1
    • Carefully remove the logic board assembly from the upper case, minding any cables that may get caught.

    • Hold the antenna cables out of the way as you lift the heat sink end of the logic board out of the upper case.

    Chiedi a FixBot
  31. MacBook Air 13" Mid 2012 Display Assembly Replacement, Display Assembly: passo 31, immagine 1 di 1
    • Gently de-route the antenna cables out of the channel cut into the upper case.

    Chiedi a FixBot
  32. MacBook Air 13" Mid 2012 Display Assembly Replacement: passo 32, immagine 1 di 1
    • Remove the inner two 4.9 mm T8 Torx screws securing the right display hinge to the upper case.

    • We intentionally have you leave the third screw in to aid in future steps.

    Chiedi a FixBot
  33. MacBook Air 13" Mid 2012 Display Assembly Replacement: passo 33, immagine 1 di 1
    • Open the display until it is perpendicular to the upper case and place it on a table as shown.

    • While holding the MacBook Air steady, remove the remaining 4.9 mm T8 Torx screw from the lower display bracket.

    Chiedi a FixBot
  34. MacBook Air 13" Mid 2012 Display Assembly Replacement: passo 34, immagine 1 di 1
    • Before removing the last display screw, be sure to hold the display and upper case steady with your other hand. Failure to do so may allow the components to fall onto the table, causing potentially expensive damage.

    • Remove the last 4.9 mm T8 Torx screw securing the display to the upper case.

    Chiedi a FixBot
  35. MacBook Air 13" Mid 2012 Display Assembly Replacement: passo 35, immagine 1 di 1
    • Push the upper case slightly toward the display assembly, then rotate it away from the front of the display assembly.

    • Once the two display hinges have cleared the upper case, remove the display and set it aside.

    Chiedi a FixBot
Conclusione

To reassemble your device, follow these instructions in reverse order.

Altre 48 persone hanno completato questa guida.

Team

iFixit Membro di iFixit

Staff

123 Membri

25.720 guide realizzate

18Commenti sulla guida

I have just comletd this process and installed a new screen assembly to my macbook Air. It is now completely unresponsive. When I press the power button nothing happens.

I completed the process exactly as described, I had no troubles and all went very well.

Before I tear it down again I was wondering if there might be some very obvious thing I may be overlooking

Help?

John Mulvaney - Rispondi Condividi

Did you ever figure out the problem, I am having the same issue.

zshad - Rispondi Condividi

You did exactly as the instruction means you might mess up the board. There is about 20 steps you can skip just to change assembly. I will buy your dead mac and take the diodes and resistors from the board.

davidshanlay - Rispondi Condividi

Having performed this repair several times, most of these steps are completely unnecessary. After you take the back off, still disconnect the battery, but you can essentially skip from step 3 to step 31. Just add a note about unplugging the LCD cable, the Camera/Mic cable and the Antenna cables before unscrewing the 6 hinge screws and you are done. Removing everything else is a huge time sink that is not need and adds a ton of complication.

alex - Rispondi Condividi

There are a lot of extra steps not required to access display assembly. It make people think like rocket science and some might screw up their mac.

davidshanlay - Rispondi Condividi

Aggiungi Commento

Visualizza statistiche:

Ultime 24 ore: 7

Ultimi 7 giorni: 45

Ultimi 30 giorni: 209

Tutti i Tempi: 92,492