Questa versione può contenere modifiche errate. Passa all'ultima istantanea verificata.
Cosa ti serve
-
CompraAttrezzo utilizzato in questo passaggio:P5 Pentalobe Screwdriver Retina MacBook Pro and Air$5.99
-
Svita le seguenti dieci viti:
-
Due viti Pentalobe 5-Point da 8 mm
-
Otto viti Pentalobe 5-Point da 2,5 mm
-
-
-
Usa la parte piatta di uno spudger per fare leva su entrambi i lati del connettore della batteria per scollegarlo dalla sua presa sulla scheda madre.
-
Piega leggermente il cavo della batteria lontano dalla scheda madre in modo che non torni a far contatto con la sua presa.
-
-
Questo passaggio è privo di traduzione. Aiuta a tradurlo
-
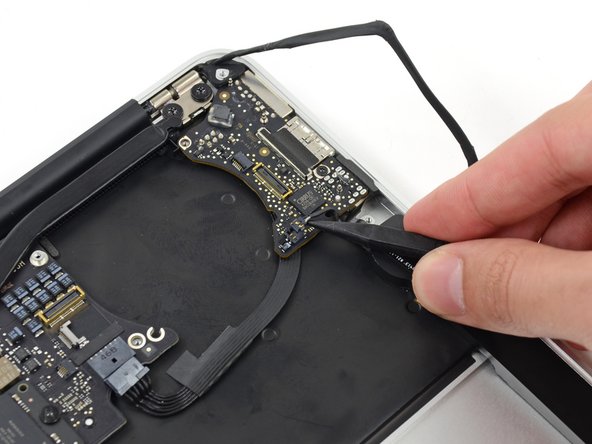
Use the flat end of a spudger to pry the left and right I/O board cable connectors up off their respective sockets on the I/O board.
-
-
Questo passaggio è privo di traduzione. Aiuta a tradurlo
-
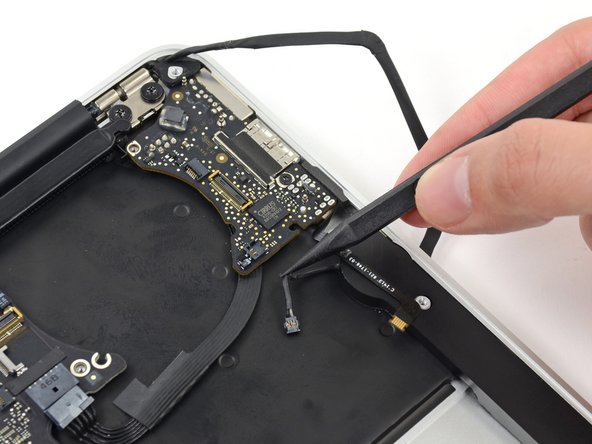
Use the tip of a spudger to carefully push on each side of the iSight camera cable connector to loosen it out of its socket on the logic board.
-
-
Questo passaggio è privo di traduzione. Aiuta a tradurlo
-
Peel the iSight camera cable up off the adhesive securing it to the fan.
-
-
-
Questo passaggio è privo di traduzione. Aiuta a tradurlo
-
Use the tip of a spudger to carefully flip up the retaining flap on the fan cable ZIF socket.
-
-
Questo passaggio è privo di traduzione. Aiuta a tradurlo
-
Remove the following three screws securing the fan to the upper case:
-
Two 5.5 mm T5 Torx screws
-
One 4.6 mm T5 Torx screw
-
-
Questo passaggio è privo di traduzione. Aiuta a tradurlo
-
Lift, but do not remove the fan out of its recess in the upper case.
-
Carefully pull the fan ribbon cable out of its socket as you remove the fan from the Air.
-
-
Questo passaggio è privo di traduzione. Aiuta a tradurlo
-
Remove the following five screws securing the battery to the upper case:
-
Two 5.2 mm T5 Torx screws
-
One 6 mm T5 Torx screw
-
Two 2.6 mm T5 Torx screws
-
-
Questo passaggio è privo di traduzione. Aiuta a tradurlo
-
Lift the battery from its edge nearest the logic board and remove it from the upper case.
-
-
Questo passaggio è privo di traduzione. Aiuta a tradurlo
-
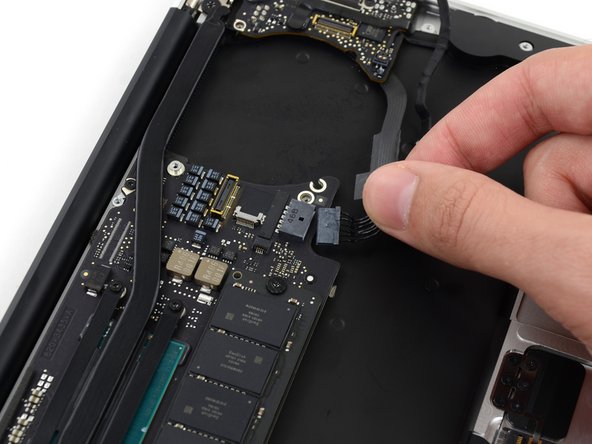
Disconnect the I/O board power cable from the logic board by pulling the cable out of its socket on the logic board.
-
-
Questo passaggio è privo di traduzione. Aiuta a tradurlo
-
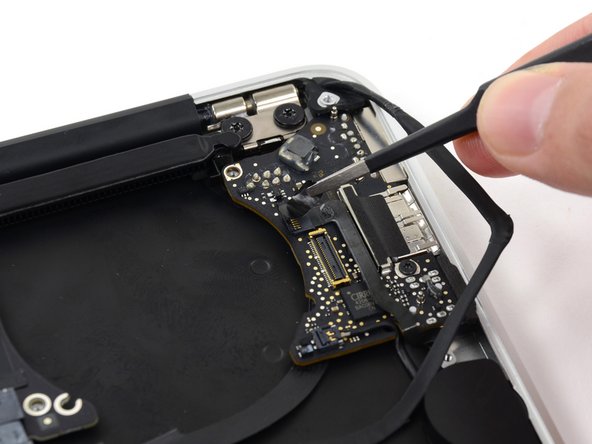
Use the tip of a spudger to carefully flip up the retaining flap on the microphone cable ZIF socket.
-
Pull the microphone ribbon cable straight out of its socket.
-
-
Questo passaggio è privo di traduzione. Aiuta a tradurlo
-
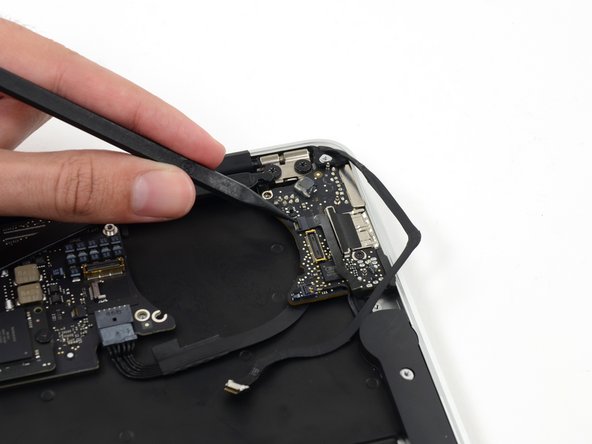
Use the tip of a spudger to pry under the speaker cable near the connector to lift the connector straight up out of its socket.
-
-
Questo passaggio è privo di traduzione. Aiuta a tradurlo
-
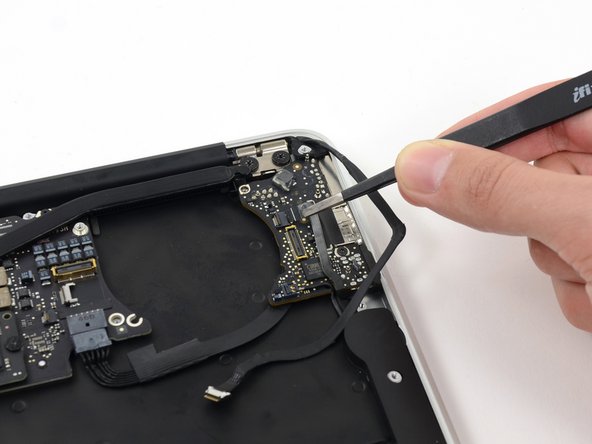
De-route the cable from its notch in the I/O board.
-
-
Questo passaggio è privo di traduzione. Aiuta a tradurlo
-
Remove the small rubber gasket from the corner of the upper case nearest the I/O board.
-
-
Questo passaggio è privo di traduzione. Aiuta a tradurlo
-
Remove the single 3.6 mm T5 Torx screw securing the I/O board to the upper case.
-
In some models this is a 3.1 mm T5 Torx screw.
-
-
Questo passaggio è privo di traduzione. Aiuta a tradurlo
-
Carefully lift the I/O board by its power cable and pull it away from the edge of the case.
-


Annulla: non ho completato questa guida.
Altre 21 persone hanno completato questa guida.


Un commento
Great tutorial. I may do this for sure. I get no audio and no microphone on my MacBook air. I took it to Apple and they told me it was hardware and not software. In Settins in Audio, there is no Audio Ouput available and No built in Mic available. Would you imagine this might be what is wrong with my Air?