Questa versione può contenere modifiche errate. Passa all'ultima istantanea verificata.
Cosa ti serve
-
CompraAttrezzo utilizzato in questo passaggio:P5 Pentalobe Screwdriver Retina MacBook Pro and Air$5.99
-
Svita le seguenti dieci viti:
-
Due viti Pentalobe 5-Point da 8 mm
-
Otto viti Pentalobe 5-Point da 2,5 mm
-
-
-
Usa la parte piatta di uno spudger per fare leva su entrambi i lati corti del connettore della batteria per scollegarlo dalla sua presa sulla scheda madre.
-
Piega il cavo della batteria lontano dalla scheda madre in modo che non faccia contatto accidentalmente con la sua presa.
-
-
-
Questo passaggio è privo di traduzione. Aiuta a tradurlo
-
Use the flat end of a spudger to pry the I/O board cable up from its socket on the I/O board.
-
-
Questo passaggio è privo di traduzione. Aiuta a tradurlo
-
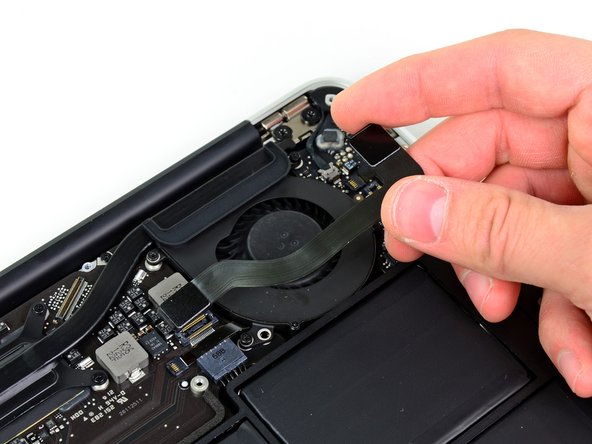
Peel the I/O board cable up from the adhesive securing it to the fan.
-
-
Questo passaggio è privo di traduzione. Aiuta a tradurlo
-
Use the flat end of a spudger to lift the I/O board connector up and out of its socket on the logic board
-
Remove the I/O board cable.
-
-
Questo passaggio è privo di traduzione. Aiuta a tradurlo
-
Use the tip of a spudger to carefully flip up the retaining flap on the fan cable ZIF socket.
-
-
Questo passaggio è privo di traduzione. Aiuta a tradurlo
-
Remove the following three screws securing the fan to the upper case:
-
Two 5.2 mm T5 Torx screws
-
One 3.6 mm T5 Torx screw
-
-
Questo passaggio è privo di traduzione. Aiuta a tradurlo
-
Lift the fan out of the upper case and carefully pull the fan ribbon cable out of its socket as you remove it from the Air.
-
-
Questo passaggio è privo di traduzione. Aiuta a tradurlo
-
Remove the four 2.5 mm T5 Torx screws securing the heat sink to the logic board.
-
-
Questo passaggio è privo di traduzione. Aiuta a tradurlo
-
Remove the heat sink from the logic board.
-
When reinstalling the heat sink, be sure to apply a new layer of thermal paste. If you have never applied thermal paste before, we have a guide that makes it easy.
-
Annulla: non ho completato questa guida.
Altre 19 persone hanno completato questa guida.
2 Commenti
Great guide. I repasted my Early 2011 15" MBP with the 2.2 QC i7 and my peak load temp is now 87C (it was well over 100, and I was having it shutdown on me sometimes before). Having done this now, I must say I consider this system much more difficult to work inside than HP, Dell, or Lenovo/IBM laptops (having worked on all the others before). If you're patient, take it slow, and are careful though, everything works out. Here's some pictures of parts of the process:
Macbook Air 2011...a few things are different on my computer than this guide, but everything is straightforward enough. Here are the differences I found.
1. battery plug is slightly different, but same thing you just pull it out with the plastic tab.
2. Need to unplug the wire underneath the fan to reveal the 3rd screw...it isn't where it's shown on the picture here, that's a screw for the logic board not the fan.
3. There is a 5th screw holding the heatsink in place on the right end under another wire that connects to the hinge & screen. Had to move the wire to the side and remove that extra screw to get the heatsink off.
My Macbook Air 2011 shut off and starting making 3 beeps on attempting startup. Read this 3 beeps on start up and thought it may be the heat sink. Haven't applied new paste yet, but the paste is definitely hardened after following this guide. Plan to reapply and hopefully it works again!


