Questa versione può contenere modifiche errate. Passa all'ultima istantanea verificata.
Cosa ti serve
-
Questo passaggio è privo di traduzione. Aiuta a tradurlo
-
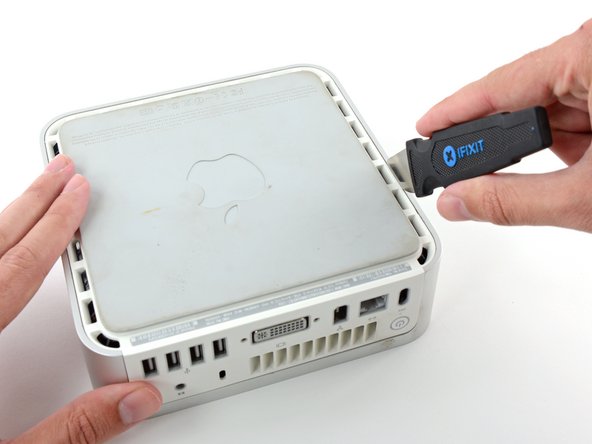
Power down your Mac mini, disconnect all of the cables, and flip it over.
-
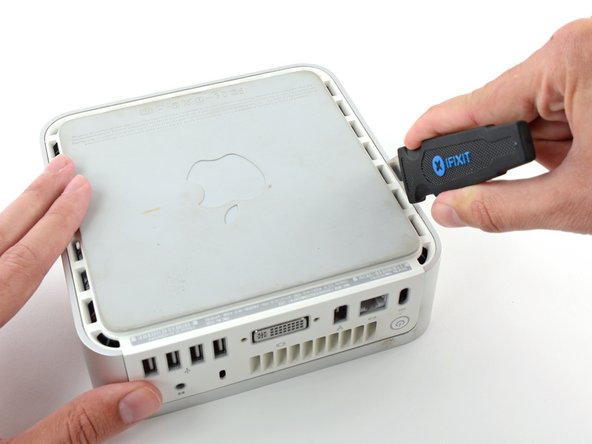
Insert the Jimmy into the crack between the aluminum top housing and the plastic lower housing.
-
The Jimmy should reach a stop about 3/8" down.
-
-
Questo passaggio è privo di traduzione. Aiuta a tradurlo
-
Gently bend the Jimmy outwards to pry the crack open a little larger and lift the lower housing up a small amount.
-
-
Questo passaggio è privo di traduzione. Aiuta a tradurlo
-
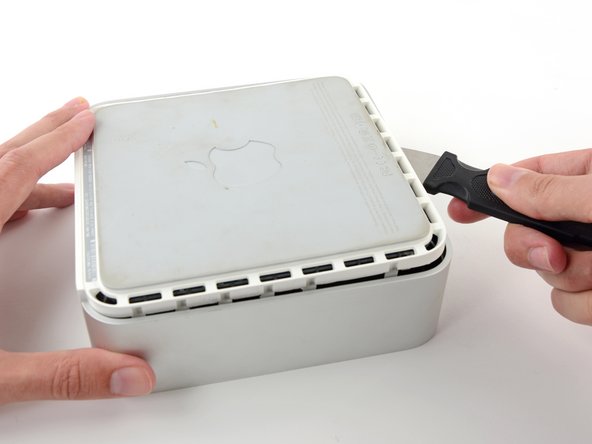
Once you have the first side free, rotate the Mac mini and start prying up on the front edge.
-
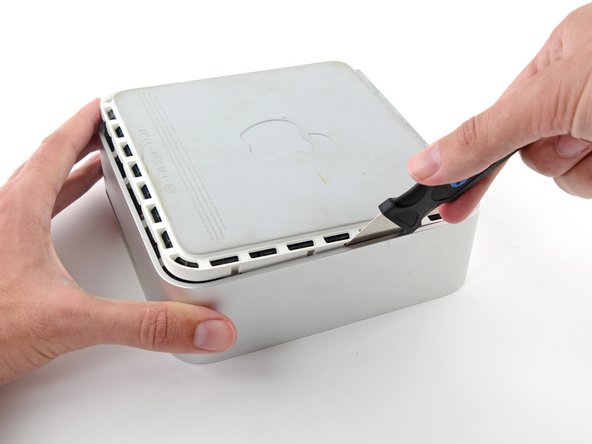
Use the same prying motion to both bend the clips inward and lift the lower housing up out of the top housing.
-
-
-
Questo passaggio è privo di traduzione. Aiuta a tradurlo
-
You may need to move the Jimmy along the edge to pry up all of the clips. Be patient and do a little bit at a time.
-
-
Questo passaggio è privo di traduzione. Aiuta a tradurlo
-
Keep working around the perimeter, freeing the clips along the final edge.
-
-
Questo passaggio è privo di traduzione. Aiuta a tradurlo
-
Flip the Mac mini back over and lift the top housing off of the lower housing.
-
-
Questo passaggio è privo di traduzione. Aiuta a tradurlo
-
Remove the single Phillips screw securing the Bluetooth board to the internal frame.
-
-
Questo passaggio è privo di traduzione. Aiuta a tradurlo
-
Disconnect the Bluetooth cable connector by pulling it straight away from its socket.
-
-
Questo passaggio è privo di traduzione. Aiuta a tradurlo
-
Use the flat end of a spudger to pry the Bluetooth antenna cable connector up off the Bluetooth board.
-
Annulla: non ho completato questa guida.
Altre 5 persone hanno completato questa guida.


