Questa versione può contenere modifiche errate. Passa all'ultima istantanea verificata.
Cosa ti serve
-
Questo passaggio è privo di traduzione. Aiuta a tradurlo
-
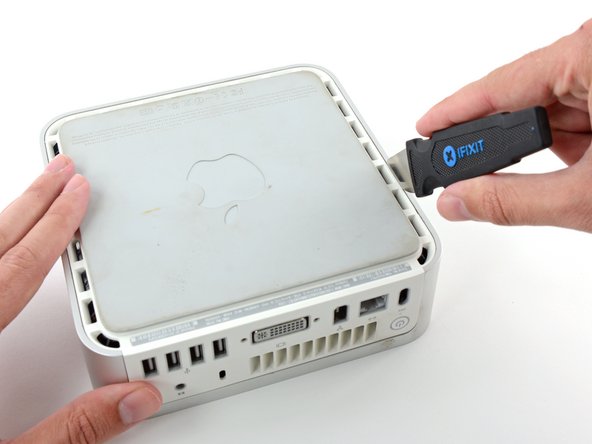
Power down your Mac mini, disconnect all of the cables, and flip it over.
-
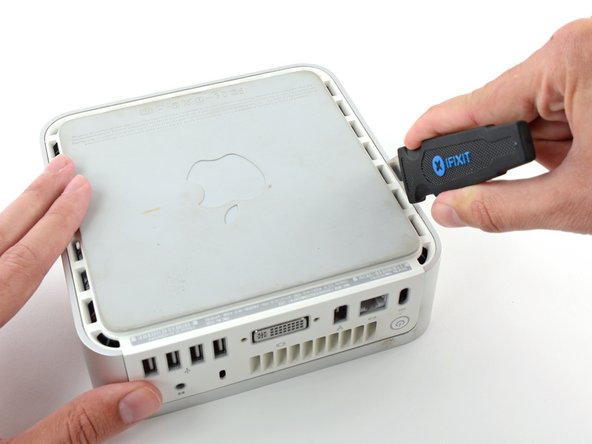
Insert the Jimmy into the crack between the aluminum top housing and the plastic lower housing.
-
The Jimmy should reach a stop about 3/8" down.
-
-
Questo passaggio è privo di traduzione. Aiuta a tradurlo
-
Gently bend the Jimmy outwards to pry the crack open a little larger and lift the lower housing up a small amount.
-
-
Questo passaggio è privo di traduzione. Aiuta a tradurlo
-
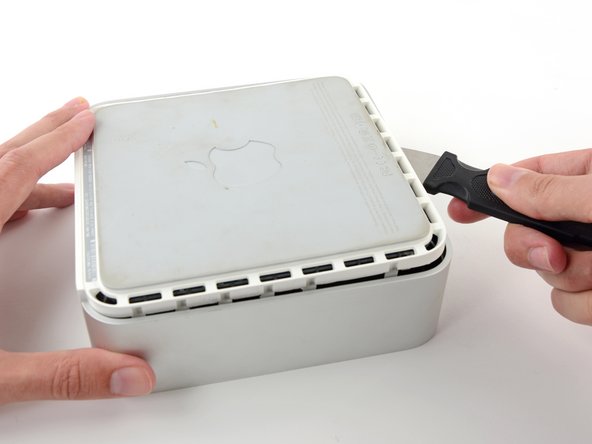
Once you have the first side free, rotate the Mac mini and start prying up on the front edge.
-
Use the same prying motion to both bend the clips inward and lift the lower housing up out of the top housing.
-
-
Questo passaggio è privo di traduzione. Aiuta a tradurlo
-
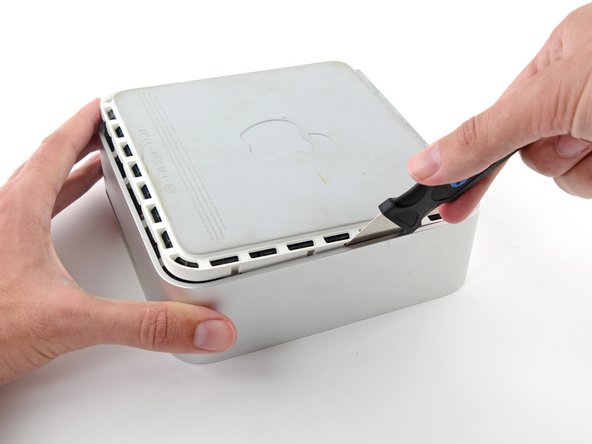
You may need to move the Jimmy along the edge to pry up all of the clips. Be patient and do a little bit at a time.
-
-
Questo passaggio è privo di traduzione. Aiuta a tradurlo
-
Keep working around the perimeter, freeing the clips along the final edge.
-
-
-
Questo passaggio è privo di traduzione. Aiuta a tradurlo
-
Flip the Mac mini back over and lift the top housing off of the lower housing.
-
-
Questo passaggio è privo di traduzione. Aiuta a tradurlo
-
Grasp the Airport antenna board and lift it off of the two plastic posts holding it in place. You may need to push back the black plastic tab jutting through the lower left corner of the board.
-
-
Questo passaggio è privo di traduzione. Aiuta a tradurlo
-
Remove the yellow tape securing the power button cable to the black plastic framework.
-
-
Questo passaggio è privo di traduzione. Aiuta a tradurlo
-
Remove the three black Phillips screws securing the plastic framework to the logic board and lower case.
-
-
Questo passaggio è privo di traduzione. Aiuta a tradurlo
-
Grasp the optical drive and mass storage unit in one hand and lift up enough so that you can see beneath it.
-
-
Questo passaggio è privo di traduzione. Aiuta a tradurlo
-
With your free hand, pull the Bluetooth cable up from Bluetooth board and unplug the Airport antenna cable from the right of the Airport card. Caution: both of these connections are very small. When re-assembling unit after repair, you may want to remove the two screws holding the airport card to the assembly and lift the card up and out to re-attach the cables.
-
-
Questo passaggio è privo di traduzione. Aiuta a tradurlo
-
Pull back the black plastic latches on either end of the RAM chip.
-
-
Questo passaggio è privo di traduzione. Aiuta a tradurlo
-
Grasp the RAM chip at the end opposite of the back ports, and pull directly up.
-
Annulla: non ho completato questa guida.
Altre 80 persone hanno completato questa guida.
Documenti Allegati
2 Commenti
Many thanks for giving me the confidence to do this, and the images make it soooo much easier.
My comment is that on my A1103 with Airport (but without the module above the RAM),I didn't even need to remove the HDD/CD assembly, thus cutting down upgrade time considerably. I was pleased to note that RAM replacement did not require the RAM module to be angled forward/backward as on some main boards,
Agreed. I didn't need to remove the assembly either. The RAM comes straight up.


