Introduzione
Recently I purchased a OWC Aura Pro X2 SSD / 480 GB1 x $229.99 through iFixit.com. I have noticed that while attending college my storage space has evaporated due to curriculum required installed programs. I will be creating a clone of the current hard drive onto the new hard drive before the install. Be sure to follow each step according to the outline in this tutorial to ensure success.
This will save you tons of time and hassle.
I had a clean install of OS High Sierra on a separate external drive. This helped me when I rebooted, as the new SSD was not found and could not be formatted or improved upon. Using the external I was able to get the drive recognized (due to a necessary Firmware update within High Sierra) and from there was able to install the new OS onto the new drive. Read that again, it might be helpful to you.
Cosa ti serve
-
-
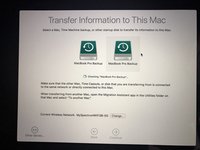
Don't take the back cover off until you finish a full back up. It may take a while but you will thank me later. Use a SSD back up drive at least once a week. You can use that same back up external drive to conduct this back up and restore later onto the new SSD drive. Suggesting the 2TB SSD from WD (Amazon) for $59.
-
-
-
Failure to make a back up will make it impossible to restore recent files/programs. My back up took 20 minutes to complete as I got a week behind and had to rebuild a virtual drive that VMware Fusion uses. I can make a tutorial for it if you need. Just ask here.
-
-
-
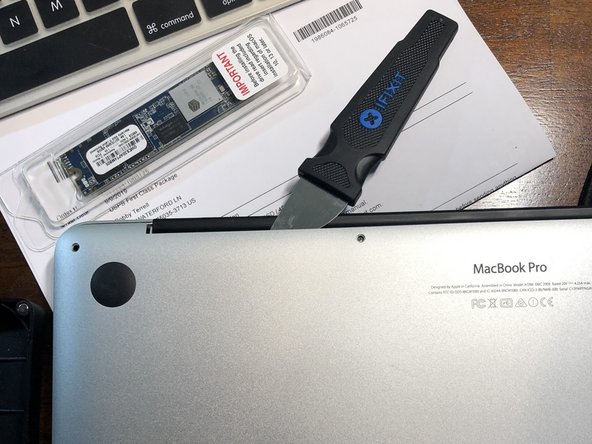
Don't remove from package until we are ready to install it. The lease amount of handling possible ensures no static discharge or other damage can occur.
-
-
-
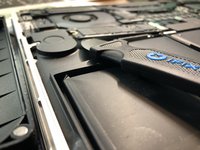
I got this tool kit from iFixit and its been a great kit.
-
-
-
-
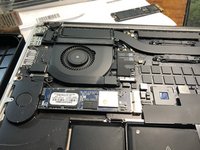
Shut computer down and flip over to remove back. Use the P5 star tip to remove screws. Place them in a safe, none slip container. These screws are really tiny. Also, the screws closest to the monitor are the shortest and must be separated to ensure they go back in same slot. Otherwise you will have screws stick out in these slots.
-
-
-
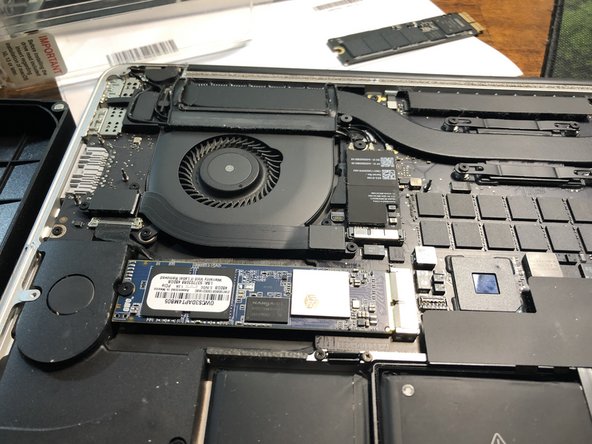
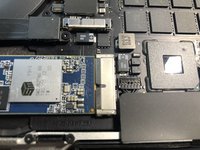
A Torx T4 bit is needed to remove the screw holding the current SSD card in. Only pry the SSD up this much to remove it. It will be harder to put the new one in vs taking the old one out. Don't worry, it is the right part. Also, be sure to fully seat the new SSD. Failure to do so will cause the drive not to show up in the next step. See pic.
-
-
-
I had to format the new SSD via terminal because I didn't have a special install kit. Disconnect all other external drives, In Terminal type the following command, then press the Return key: diskutil list
-
When using terminal it is important to type all the commands exactly as they appear in this guide. Making a typo could result in lost data and time.
-
A long list of disks will appear; we need to find our target disk from this list. An internal drive should be the very first or second drive in the list (see image below). The majority of the list is going to be ignorable disk images. To find the internal SSD, look for the following: ‘(internal, physical)’ which is disk1 in the image, second entry.
-
-
-
In Terminal type the following command using the identifier found in the previous step and hit the Return key. diskutil eraseDisk JHFS+ MacOS /dev/disk1 The process normally takes a minute or two to complete.
-
If your internal, physical disk isn't disk1 then use the identifier as appropriate to your computer. Mine is disk1 here in this example.
-
The process normally takes a minute or two to complete. When the process is complete, you will see the following message: “Finished erase on identifier” where identifier was the number you previously identified.
-
The SSD has now been formatted as a Mac OS Extended (journaled) volume named ‘MacOS’. Continue using this guide to format the disk as an AFPS volume, however if a Mac OS Extended (journaled) volume is desired you may now stop.
-
-
-
From the previous step we need to note the identifier of the new volume (red outlined box). It’ll be mentioned in the “Formatting identifier as Mac OS Extended (Journaled) with name MacOS.”
-
In Terminal type the following command and hit the Return key: diskutil apfs createContainer /dev/identifier The process normally takes a minute or two to complete. You’ll see the following message when done: “Finished APFS operation on identifier MacOS”
-
-
-
From the previous step, note the identifier from the newly created APFS Container (shown in the red box below) and use it in place of ‘identifier’ in the final Terminal command, shown below the screenshot.
-
In Terminal type the following command and hit the Return key: diskutil apfs addVolume identifier APFS MacOS The process normally takes a minute or two to complete. When the process is complete, you’ll see the following message: “Finished APFS operation on identifier.” The SSD is now formatted as APFS and is ready to use.
-


To reassemble your device, follow these instructions in reverse order. Ensure that you have firmly installed the new SSD drive and that you have a solid wifi connection.
Annulla: non ho completato questa guida.
Altre 5 persone hanno completato questa guida.
