Salta al contenuto principale

MSI GT62VR 6RD Dominator Cooling Fan Replacement

Cosa ti serve

  1. MSI GT62VR 6RD Dominator Cooling Fan Replacement, Cooling Fan: passo 1, immagine 1 di 2 MSI GT62VR 6RD Dominator Cooling Fan Replacement, Cooling Fan: passo 1, immagine 2 di 2
    • Remove the six 1.2mm screws on the bottom plate of the laptop using a JIS #0 screwdriver.

  2. MSI GT62VR 6RD Dominator Cooling Fan Replacement: passo 2, immagine 1 di 3 MSI GT62VR 6RD Dominator Cooling Fan Replacement: passo 2, immagine 2 di 3 MSI GT62VR 6RD Dominator Cooling Fan Replacement: passo 2, immagine 3 di 3
    • Insert the plastic opening tools into the seam on the back plate of the laptop.

    • A popping sound may come from your device while you remove the backplate.

    • Pry the back plate up.

    • Slide the plastic opening tool around the laptop's edge slowly until the backplate is completely removed.

  3. MSI GT62VR 6RD Dominator Cooling Fan Replacement: passo 3, immagine 1 di 2 MSI GT62VR 6RD Dominator Cooling Fan Replacement: passo 3, immagine 2 di 2
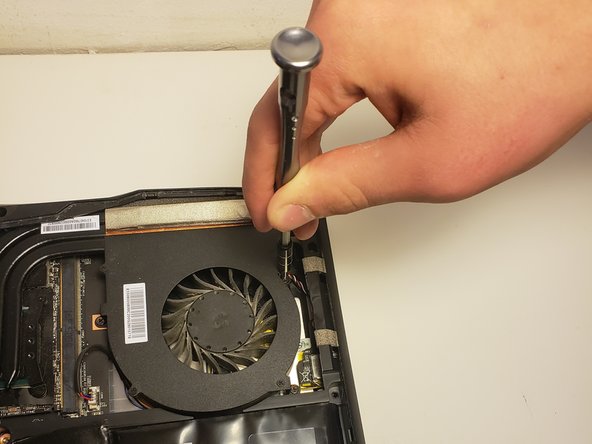
    • Remove the three 2.0mm screws using the JIS #0 screwdriver.

  4. MSI GT62VR 6RD Dominator Cooling Fan Replacement: passo 4, immagine 1 di 2 MSI GT62VR 6RD Dominator Cooling Fan Replacement: passo 4, immagine 2 di 2
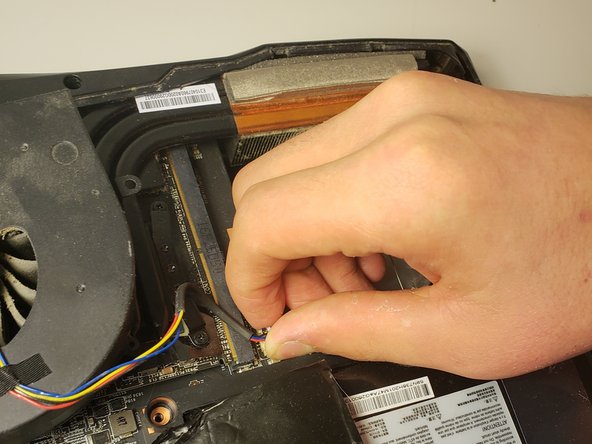
    • The white plastic clip secures the fan wires to the laptop.

    • Unplug the white clip by grasping it and wiggling it back and forth .

    • Do not pull the clip out by the wires themselves.

Conclusione

To reassemble your device, follow these instructions in reverse order.

Un'altra persona ha completato questa guida.

0 Commenti

Aggiungi Commento

Visualizza Statistiche:

Ultime 24 Ore: 0

Ultimi 7 Giorni: 1

Ultimi 30 Giorni: 18

Tutti i Tempi: 1,542