Questa versione può contenere modifiche errate. Passa all'ultima istantanea verificata.
Cosa ti serve
-
Questo passaggio è privo di traduzione. Aiuta a tradurlo
-
Use the spudger to separate the back plate from the rest of the computer with the screen up like in the picture.
-
Once the back plate is loose, close the screen for an easier time properly removing it.
-
-
Questo passaggio è privo di traduzione. Aiuta a tradurlo
-
Using a Phillips Head #1 screwdriver, unscrew the 15 screws on the bottom of the device
-
After all the screws are unscrewed, remove the bottom plate. If this is the first time that you are removing this back cover, the last screw is hidden under the "factory seal" label. You will need to break that label to reach that screw.
-
-
-
Questo passaggio è privo di traduzione. Aiuta a tradurlo
-
Locate the battery.
-
Wedge the spudger underneath the battery, and apply pressure to lift it away from the rest of the device.
-
Gently pull and wiggle the multiple colored wired connector out from the socket.
-
-
Questo passaggio è privo di traduzione. Aiuta a tradurlo
-
Locate the hard drive.
-
Using a spudger lift the ribbon cable connector.
-
-
Questo passaggio è privo di traduzione. Aiuta a tradurlo
-
Use the tweezers to lift the back tab and pull it back until the ribbon cable disconnects.
-
Wedge the spudger between the hard drive and the device and apply pressure to pry the two apart, and then remove the hard drive.
-
-
Questo passaggio è privo di traduzione. Aiuta a tradurlo
-
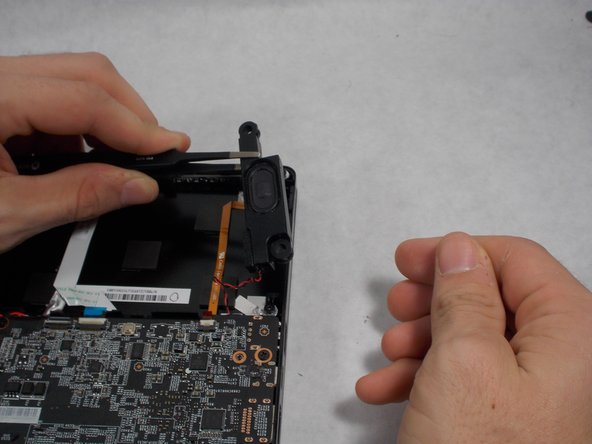
First locate the speaker(s).
-
Use the tweezers to lift the speaker from its position.
-
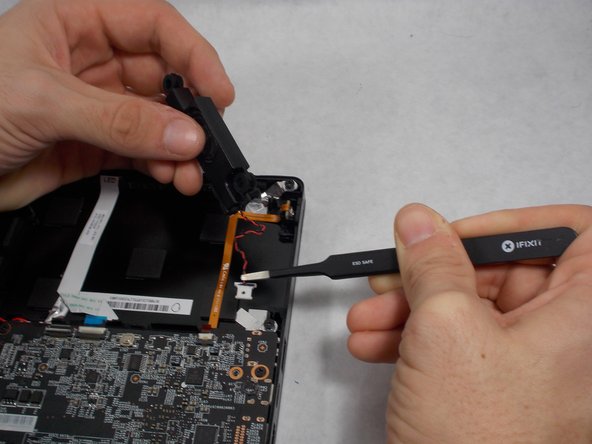
Grab the multi-colored wire with the tweezers and gently pull back until the speakers releases from its socket.
-


Annulla: non ho completato questa guida.
Un'altra persona ha completato questa guida.
Team

UMass Dartmouth, Team S2-G1, Julie Fall 2017 Membro di UMass Dartmouth, Team S2-G1, Julie Fall 2017
UMASSD-JULIE-F17S2G1
3 Membri
5 Guide realizzate
2 Commenti
Wondering the same.