Salta al contenuto principale
Unisciti alla Community delle riparazioni - Crea un account

MSI GE72 6QF Apache Pro RAM Replacement

Cosa ti serve

  1. MSI GE72 6QF Apache Pro RAM Replacement, Battery: passo 1, immagine 1 di 2 MSI GE72 6QF Apache Pro RAM Replacement, Battery: passo 1, immagine 2 di 2
    • Make sure the laptop is off and unplugged (not charging).

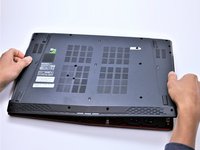
    • With the laptop closed and upside down, unscrew the nineteen 5.5mm Phillips #1 screws that keep the back cover in place.

    Chiedi a FixBot
  2. MSI GE72 6QF Apache Pro RAM Replacement: passo 2, immagine 1 di 1
    • Slide the optical drive out of the laptop.

    Chiedi a FixBot
  3. MSI GE72 6QF Apache Pro RAM Replacement: passo 3, immagine 1 di 1
    • Use a Phillips screwdriver to remove the three screws along the edge of the optical drive bay.

    Chiedi a FixBot
  4. MSI GE72 6QF Apache Pro RAM Replacement: passo 4, immagine 1 di 2 MSI GE72 6QF Apache Pro RAM Replacement: passo 4, immagine 2 di 2
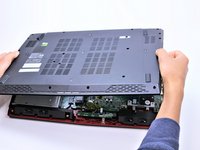
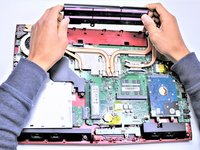
    • Using your fingers, gently loosen the edges of all four sides of the back cover.

    • Gently pull off the back cover.

    Chiedi a FixBot
  5. MSI GE72 6QF Apache Pro RAM Replacement: passo 5, immagine 1 di 2 MSI GE72 6QF Apache Pro RAM Replacement: passo 5, immagine 2 di 2
    • Unscrew the single 5.5mm Phillips #1 screw keeping the battery secure.

    Chiedi a FixBot
  6. MSI GE72 6QF Apache Pro RAM Replacement: passo 6, immagine 1 di 2 MSI GE72 6QF Apache Pro RAM Replacement: passo 6, immagine 2 di 2
    • Grab the battery with your fingers and gently pull it up and away from the rest of the laptop.

    Chiedi a FixBot
  7. MSI GE72 6QF Apache Pro RAM Replacement, RAM: passo 7, immagine 1 di 2 MSI GE72 6QF Apache Pro RAM Replacement, RAM: passo 7, immagine 2 di 2
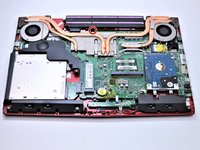
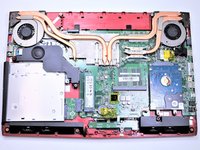
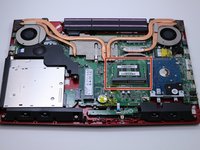
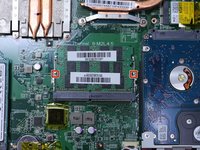
    • When you open the back cover, the RAM will be located as shown in the picture.

    Chiedi a FixBot
  8. MSI GE72 6QF Apache Pro RAM Replacement: passo 8, immagine 1 di 3 MSI GE72 6QF Apache Pro RAM Replacement: passo 8, immagine 2 di 3 MSI GE72 6QF Apache Pro RAM Replacement: passo 8, immagine 3 di 3
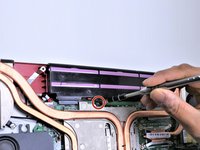
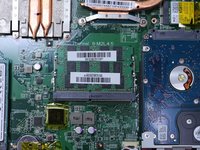
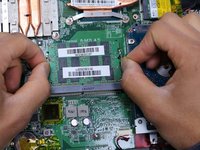
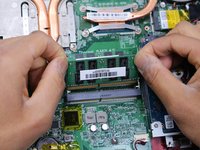
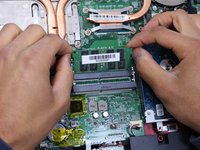
    • Press the hinges on the sides of the RAM chip as shown in the picture, in order to unlock it.

    • Carefully, slide it out at a 45 degree angle.

    • Don't press on the hinges too hard.

    • Be careful about the angle at which you're sliding out the chip.

    Chiedi a FixBot
  9. MSI GE72 6QF Apache Pro RAM Replacement: passo 9, immagine 1 di 3 MSI GE72 6QF Apache Pro RAM Replacement: passo 9, immagine 2 di 3 MSI GE72 6QF Apache Pro RAM Replacement: passo 9, immagine 3 di 3
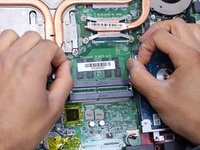
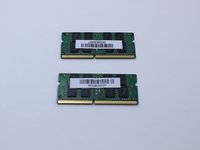
    • Similarly, press on the hinges on the sides of the other RAM chip, in order to unlock it.

    • Some laptop models might not come with two RAM chips, so if that is your case, you can skip this step.

    Chiedi a FixBot
Conclusione

To reassemble your device, follow these instructions in reverse order.

Un'altra persona ha completato questa guida.

Team

Cal Poly, Team S14-G4, Banghart Spring 2017 Membro di Cal Poly, Team S14-G4, Banghart Spring 2017

CPSU-BANGHART-S17S14G4

4 Membri

8 guide realizzate

1Commento della guida

Can you put more ram in this laptop like 32gb?

Can you put another ssd?

nojus.zibikas - Rispondi Condividi

Aggiungi Commento

Visualizza statistiche:

Ultime 24 ore: 5

Ultimi 7 giorni: 21

Ultimi 30 giorni: 100

Tutti i Tempi: 5,422