Introduzione
If your speaker does not turn on, does not charge through the usb port or the power dock, or if it does not hold charge like it should, it may be time to replace the battery. The following guide will show you how to replace the battery in the Logitech UE MegaBoom 3.
The battery is used the power the speaker, it is manufactured to hold power for 20 hours per full charge. The specific battery used in this speaker is a 7.2 Volt, 3130mAH/22.5Wh ion rechargeable battery.
Before starting this guide make sure that both charging ports are not working because if only one of them is not charging the device the issue at hand is most likely not the battery. It could be likely that the ports are clogged with debris which could be causing the battery not to charge. It does not take a lot of debris to cause the battery not to charge so be sure to inspect the ports very thoroughly. If the ports are clogged use air or a toothpick to remove the debris. If all of the ports are clear of debris, you will need to use this guide to remove the battery.
There are no special skills needed to complete this guide besides the knowledge of how to use a screwdriver and plyers.
Cosa ti serve
-
-
To access all internal components, first flip the speaker upwards to where you can see the base.
-
Place your blue iFixit opening picks inside the gap between the speaker and the base to act as a lever when opening the speaker.
-
-
-
-
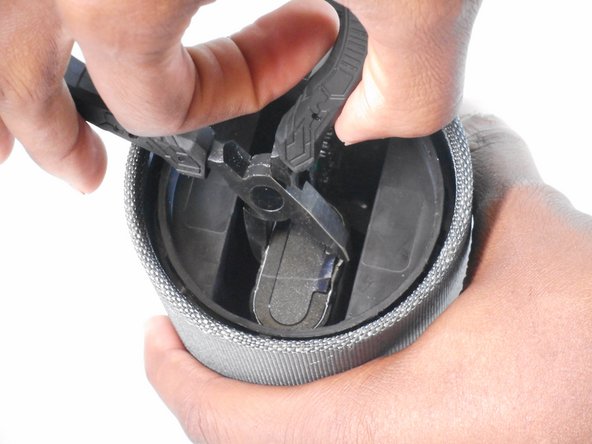
Remove the lithium-ion battery from the inside of the speaker by gripping the battery using the plyers.
-
The battery should slide out as you pull against it with the plyers.
-
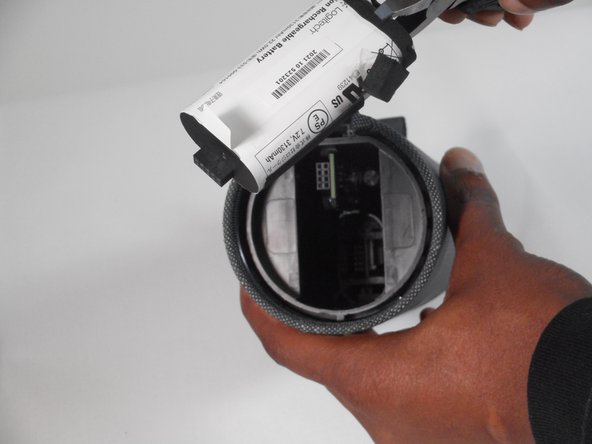
Remove the battery.
-


To reassemble your device, follow these instructions in reverse order.
To reassemble your device, follow these instructions in reverse order.
Annulla: non ho completato questa guida.
Altre 3 persone hanno completato questa guida.
Team

University of Memphis, Team 1-2, Sneed Fall 2023 Membro di University of Memphis, Team 1-2, Sneed Fall 2023
UM-SNEED-F23S1G2
4 Membri
7 Guide realizzate