Salta al contenuto principale

Logitech G29 Driving Force Buttons Replacement

Cosa ti serve

  1. Logitech G29 Driving Force Buttons Replacement, Buttons: passo 1, immagine 1 di 3 Logitech G29 Driving Force Buttons Replacement, Buttons: passo 1, immagine 2 di 3 Logitech G29 Driving Force Buttons Replacement, Buttons: passo 1, immagine 3 di 3
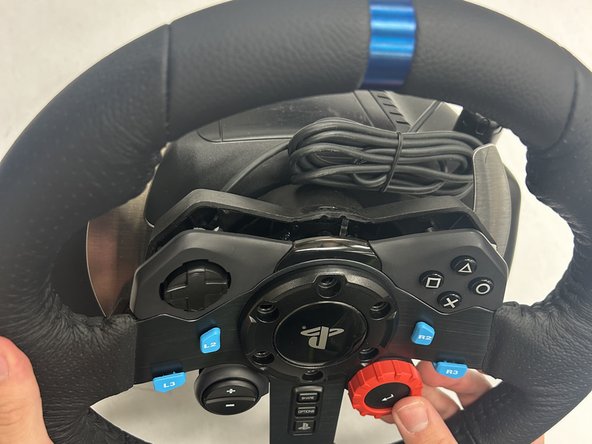
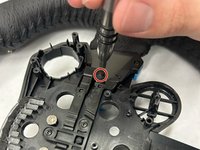
    • Remove the six black screws holding the Playstation center cap using the Hex 4.0 bit.

    • The outer diameter of these screws are 8.40mm with a length of 26mm.

    • The wheel is still attached the base via a bundled cable-connector.

  2. Logitech G29 Driving Force Buttons Replacement: passo 2, immagine 1 di 3 Logitech G29 Driving Force Buttons Replacement: passo 2, immagine 2 di 3 Logitech G29 Driving Force Buttons Replacement: passo 2, immagine 3 di 3
    • Gently lift the faceplate and wheel off the stand.

    • Pull the white 7-pin cable connector from the wheel PCB.

    • Use a spudger or plastic opening tool to help free the connector at its base. Do not pull on the wires.

  3. Logitech G29 Driving Force Buttons Replacement: passo 3, immagine 1 di 2 Logitech G29 Driving Force Buttons Replacement: passo 3, immagine 2 di 2
    • Use a Phillips #1 screwdriver to remove the seven 8 mm silver screws that secure the main wheel PCB.

    • Use a Phillips #00 screwdriver to remove the single 5 mm screw from the Share/Options/PlayStation button PCB.

  4. Logitech G29 Driving Force Buttons Replacement: passo 4, immagine 1 di 3 Logitech G29 Driving Force Buttons Replacement: passo 4, immagine 2 di 3 Logitech G29 Driving Force Buttons Replacement: passo 4, immagine 3 di 3
    Attrezzo utilizzato in questo passaggio:
    Tweezers
    $3.99
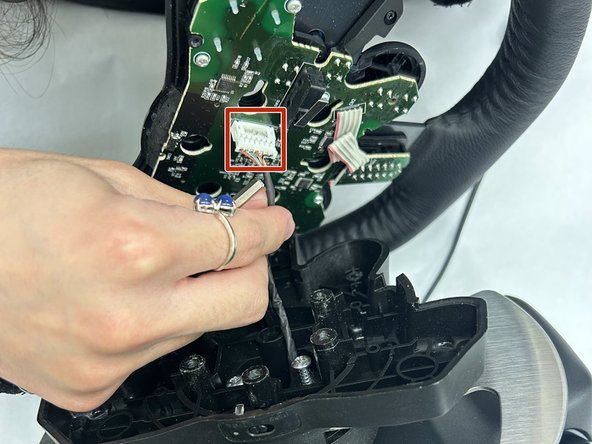
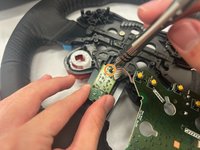
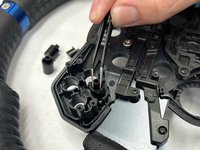
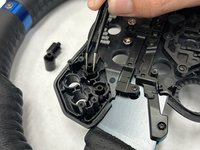
    • Once the PCB is out, the triangle, square, circle, x button will be exposed. Use the angled tweezers to remove all four buttons.

    • These buttons are keyed to where only a certain key will fit in a certain spot.

  5. Logitech G29 Driving Force Buttons Replacement: passo 5, immagine 1 di 1
    • Once the PCB is out, the D-PAD will fall out as well. Use the angled tweezers to remove the D-PAD.

    • This is also keyed to where it can only fit in a certain direction.

  6. Logitech G29 Driving Force Buttons Replacement: passo 6, immagine 1 di 3 Logitech G29 Driving Force Buttons Replacement: passo 6, immagine 2 di 3 Logitech G29 Driving Force Buttons Replacement: passo 6, immagine 3 di 3
    • Remove the four black 5 mm screws holding the four buttons in place using a Phillips #00 screwdriver. These are located directly under the buttons.

    • The whole housing is not required to come out since only the blue buttons need to come out. Once the screws are removed the buttons will fall out.

  7. Logitech G29 Driving Force Buttons Replacement: passo 7, immagine 1 di 1
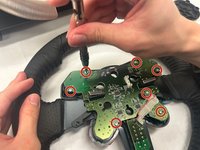
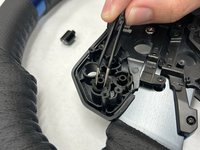
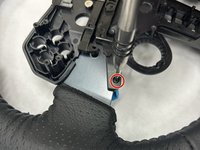
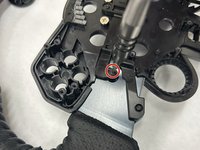
    • Remove the four black screws holding the four buttons in place using a Phillips #00 screwdriver. These are located directly under the buttons. The whole housing is not required to come out since only the blue buttons need to come out. Once the screws are removed the buttons will fall out.

Conclusione

To reassemble your device, follow these instructions in reverse order.

Ben varner

Membro da: 11/08/23

400 Reputazione

3 Guide realizzate

Team

IUPUI, Team 1-3, Harley Fall 2023 Membro di IUPUI, Team 1-3, Harley Fall 2023

IUPUI-HARLEY-F23S1G3

4 Membri

3 Guide realizzate

0Commenti sulla guida

Aggiungi Commento

Visualizza Statistiche:

Ultime 24 Ore: 5

Ultimi 7 Giorni: 47

Ultimi 30 Giorni: 194

Tutti i Tempi: 3,480