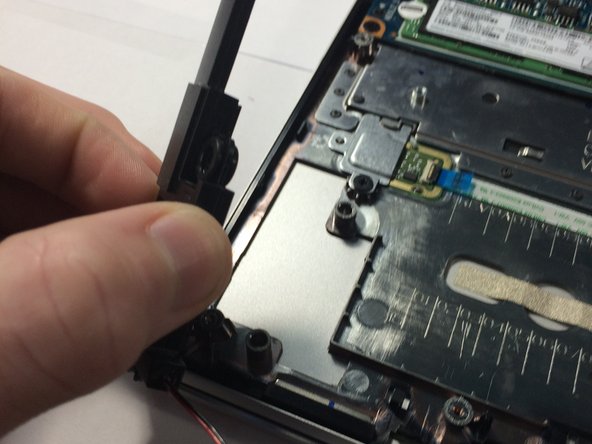
Salta al contenuto principale

Lenovo Yoga 720 Speaker Replacement

Cosa ti serve

  1. Lenovo Yoga 720 Speaker Replacement, Bottom Cover: passo 1, immagine 1 di 3 Lenovo Yoga 720 Speaker Replacement, Bottom Cover: passo 1, immagine 2 di 3 Lenovo Yoga 720 Speaker Replacement, Bottom Cover: passo 1, immagine 3 di 3
    Attrezzo utilizzato in questo passaggio:
    T5 Torx Screwdriver
    $5.49
    Compra
    • Before you begin, be sure to turn off your laptop and discharge the battery down to 25%.

    • Start by flipping the device over so that you see the screws.

    • Remove seven Torx T5 short screws.

    • Remove three Torx T5 long screws.

  2. Lenovo Yoga 720 Speaker Replacement: passo 2, immagine 1 di 3 Lenovo Yoga 720 Speaker Replacement: passo 2, immagine 2 di 3 Lenovo Yoga 720 Speaker Replacement: passo 2, immagine 3 di 3
    Attrezzo utilizzato in questo passaggio:
    iFixit Opening Tool
    $1.99
    Compra
    • Starting from the USB port, use your opening tool to gently pry up the case.

    • Make sure you are prying on the cover itself, not the metal shield around the USB port.

    • Pry along the laptop in the order shown by the arrows.

    • Do NOT pry along the top side, or you risk damaging the casing. Stay with the arrows.

  3. Lenovo Yoga 720 Speaker Replacement: passo 3, immagine 1 di 3 Lenovo Yoga 720 Speaker Replacement: passo 3, immagine 2 di 3 Lenovo Yoga 720 Speaker Replacement: passo 3, immagine 3 di 3
    • Lift the case from the bottom side. NOT the side with the hinges.

    • When you feel resistance, do NOT keep lifting or you will damage the housing.

    • Once you feel resistance, gently pull the case towards you. (away from the hinges.)

    • Remove the case.

  4. Lenovo Yoga 720 Speaker Replacement, Battery: passo 4, immagine 1 di 3 Lenovo Yoga 720 Speaker Replacement, Battery: passo 4, immagine 2 di 3 Lenovo Yoga 720 Speaker Replacement, Battery: passo 4, immagine 3 di 3
    Attrezzo utilizzato in questo passaggio:
    JIS Driver Set
    $19.99
    Compra
    • This is the battery. For guides that are for other parts, the battery is removed for the reason of it being a pain to connect or disconnect while screwed in.

    • Be careful not to short anything on the motherboard, as the battery cannot be disconnected before removal.

    • Remove four J1 Philips screws.

    • Remove one J1 philips screw.

    • Do not mix these screws up. If you put the longer screw where the shorter screw belongs, you will damage the shield around the keyboard.

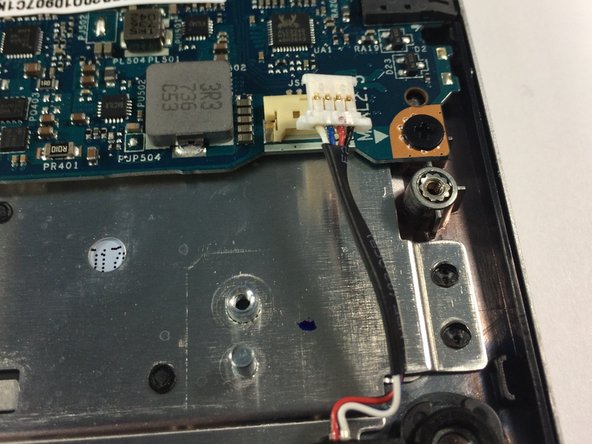
    • Lift the battery slightly using your plastic opening tool.

    • Do not lift the battery out all the way, as it is still connected to the motherboard.

    • Do NOT puncture or deform the battery or it may catch fire or even explode.

  5. Lenovo Yoga 720 Speaker Replacement: passo 5, immagine 1 di 3 Lenovo Yoga 720 Speaker Replacement: passo 5, immagine 2 di 3 Lenovo Yoga 720 Speaker Replacement: passo 5, immagine 3 di 3
    • Pull the battery towards you until the wire is accessible.

    • gently tug and wiggle on the wire until it pops out.

    • Remove the battery.

  6. Lenovo Yoga 720 Speaker Replacement, Speaker: passo 6, immagine 1 di 2 Lenovo Yoga 720 Speaker Replacement, Speaker: passo 6, immagine 2 di 2
    Attrezzo utilizzato in questo passaggio:
    Tweezers
    $3.99
    Compra
    • Disconnect the speakers.

  7. Lenovo Yoga 720 Speaker Replacement: passo 7, immagine 1 di 3 Lenovo Yoga 720 Speaker Replacement: passo 7, immagine 2 di 3 Lenovo Yoga 720 Speaker Replacement: passo 7, immagine 3 di 3
    • Remove the left speaker.

    • Remove the Adhesive.

    • Use this pull tab to remove it.

    • Remove the right speaker,

Conclusione

To reassemble your device, follow these instructions in reverse order.

Altre 5 persone hanno completato questa guida.

Aiden

Membro da: 09/19/15

17.429 Reputazione

21 Guide realizzate

0 Commenti

Aggiungi Commento

Visualizza Statistiche:

Ultime 24 Ore: 0

Ultimi 7 Giorni: 0

Ultimi 30 Giorni: 6

Tutti i Tempi: 1,781