Cosa ti serve
-
-
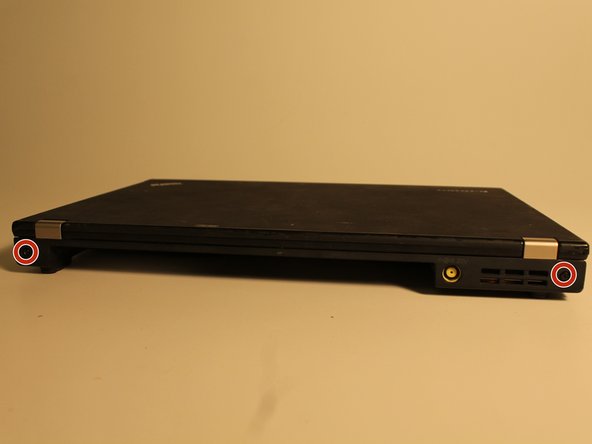
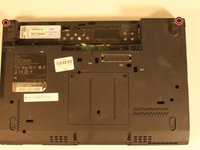
Turn laptop over to expose the battery.
-
Slide and unlock the sliders while removing the battery casing at the same.
-
Place battery in a safe spot.
-
-
-
Flip laptop over to battery side is facing down.
-
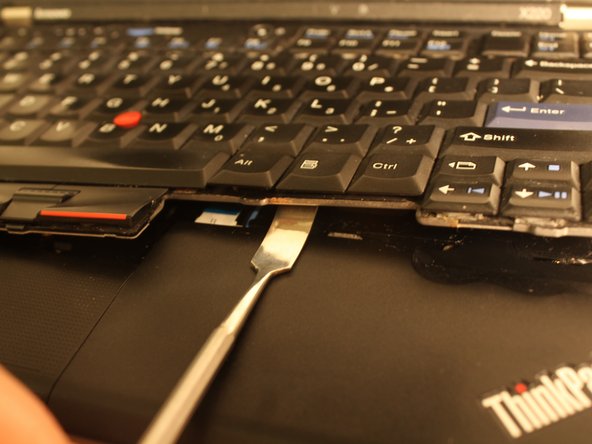
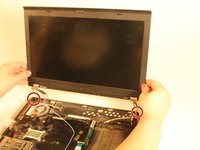
The screen needs to be open when separating the keyboard and trackpad from the base.
-
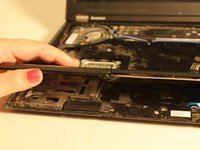
Using the Metal Spudger, place between the trackpad and the keyboard and lift up to remove the keyboard and trackpad.
-
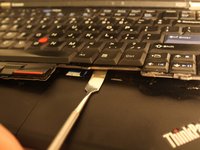
Pull keyboard towards yourself.
-
Grab the tab on the ribbon wire, pull off to release the keyboard.
-
-
-
-
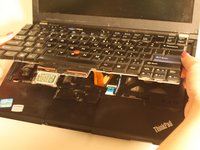
Now, you can get to the trackpad ribbon wire.
-
The trackpad ribbon wire in blue, unhinge the clamp to release the blue ribbon wire.
-
Get a hold of the trackpad and pull up and out of the laptop.
-
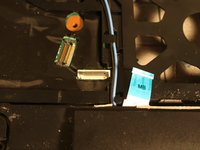
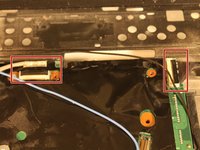
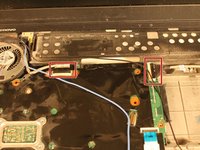
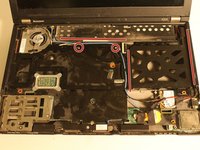
With the Metal Spudger gently remove the wires that are on the outline plate.
-
Disconnect the thin black and silver wire from the outline plate.
-
-
-
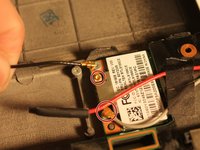
Re-attach the thin silver and black wires in the correct spots.
-
Put the thin red and silver wires a back into place.
-
Re-attach the blue and black wires to the outline plate.
-
Re-attach the black wire to its designated port.
-
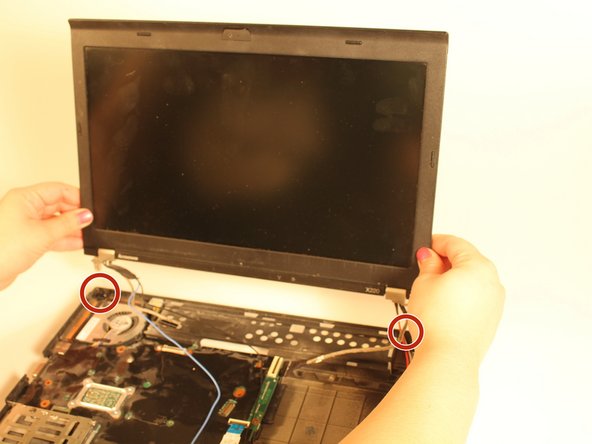
Close the screen, turn laptop back around and re screw screws into designated spots.
-
Re-insert the 2 silver screws into the outline plate
-
New screen is ready for regular use.
-


To reassemble your device, follow these instructions in reverse order.
Annulla: non ho completato questa guida.
Altre 8 persone hanno completato questa guida.

Team

Eastern Washington University, Team 2-4, Andersen Winter 2016 Membro di Eastern Washington University, Team 2-4, Andersen Winter 2016
EWU-ANDERSEN-W16S2G4
5 Membri
7 Guide realizzate
3Commenti sulla guida
This guide has more to do with replacing the whole upper half of your laptop (screen, frame, camera), which is not what I want or expect. Check out https://www.youtube.com/watch?v=7RwO6Zly... for a screen replacement only guide.
If you are just replacing your screen, you do not have to take out your keyboard, trackpad, et al.
This is a great guide for those who have purchased a whole screen/camera/antenna/microphone unit with the hinges attached. It worked great for me! My daughter has her laptop back for remote schoolwork due to COVID-19! Thanks!
The only part I’d add is that you really do have to take the outline plate out. It has plastic “snaps” on the left, top, and right sides. Once the outline plate has been removed, the hinges are free to be lifted out of the chassis. The snaps on the left and top were easy, but I wound up popping the right two snaps using a spudger. They survived the ordeal and were unbroken.
Also, kudos to Lenovo for building machines you can just repair with a screwdriver and spudger.
how to open LCD moniter near camera body.
because i want to clean my lapyop camera for good image result.
so please help me