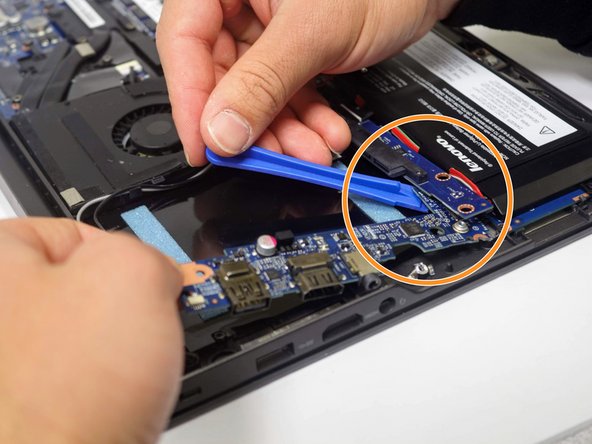
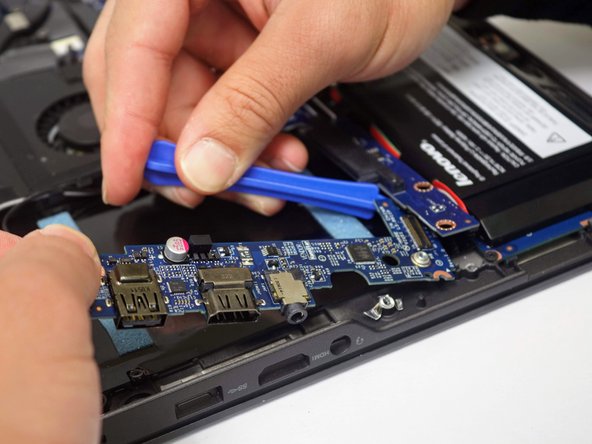
Salta al contenuto principale

Lenovo ThinkPad S431 HDMI-USB Jack assembly Replacement

Cosa ti serve

  1. Lenovo ThinkPad S431 HDMI-USB Jack assembly Replacement, Hard Disk Drive: passo 1, immagine 1 di 2 Lenovo ThinkPad S431 HDMI-USB Jack assembly Replacement, Hard Disk Drive: passo 1, immagine 2 di 2
    • Remove the 8 screws that hold down the back panel using the Phillips #000 screwdriver.

  2. Lenovo ThinkPad S431 HDMI-USB Jack assembly Replacement: passo 2, immagine 1 di 1
    • Remove the two M2 x 3 mm, wafer-head, nylon-coated screws that hold down the hard drive assembly using the Phillips #0 screwdriver.

  3. Lenovo ThinkPad S431 HDMI-USB Jack assembly Replacement: passo 3, immagine 1 di 1
    • Pull the hard drive assembly out with backside up.

  4. Lenovo ThinkPad S431 HDMI-USB Jack assembly Replacement: passo 4, immagine 1 di 1
    • Remove the four M3 x 3 mm, flat-head, nylon-coated screws on the side of the hard drive assembly using the Phillips #0 screwdriver.

  5. Lenovo ThinkPad S431 HDMI-USB Jack assembly Replacement: passo 5, immagine 1 di 1
    • Gently, remove the plastic cover with the blue strips.

  6. Lenovo ThinkPad S431 HDMI-USB Jack assembly Replacement, HDMI-USB Jack assembly: passo 6, immagine 1 di 2 Lenovo ThinkPad S431 HDMI-USB Jack assembly Replacement, HDMI-USB Jack assembly: passo 6, immagine 2 di 2
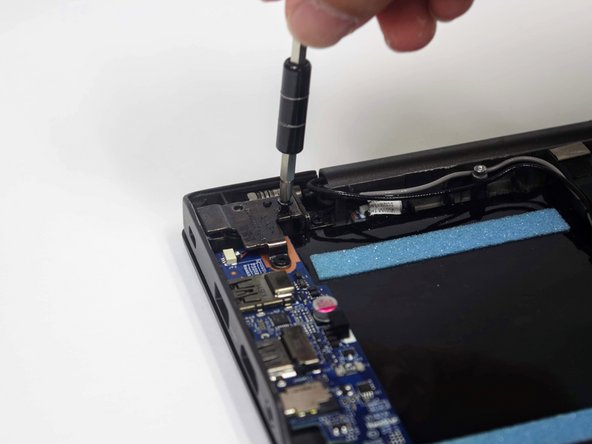
    • Remove the 3 screws holding down the T shaped cover using the Phillips head #1. Two of the screws are M2.5x 4 wafer head. The other is a M2x4MM.

    • The two similar screws have blue threading around them.

  7. Lenovo ThinkPad S431 HDMI-USB Jack assembly Replacement: passo 7, immagine 1 di 2 Lenovo ThinkPad S431 HDMI-USB Jack assembly Replacement: passo 7, immagine 2 di 2
    • Use the opening tool to lift up the T shaped cover.

    • Remove the M2x3MM wafer head screw.

  8. Lenovo ThinkPad S431 HDMI-USB Jack assembly Replacement: passo 8, immagine 1 di 3 Lenovo ThinkPad S431 HDMI-USB Jack assembly Replacement: passo 8, immagine 2 di 3 Lenovo ThinkPad S431 HDMI-USB Jack assembly Replacement: passo 8, immagine 3 di 3
    • Take off the 2 M2x3MM wafered screws holding down the chip top of assembly.

    • Lift the chip to release the HDMI-USB jack assembly

  9. Lenovo ThinkPad S431 HDMI-USB Jack assembly Replacement: passo 9, immagine 1 di 1
    • Detach the connector.

Conclusione

To reassemble your device, follow these instructions in reverse order.

0 Commenti

Aggiungi Commento

Visualizza Statistiche:

Ultime 24 Ore: 0

Ultimi 7 Giorni: 1

Ultimi 30 Giorni: 1

Tutti i Tempi: 276