Salta al contenuto principale

Lenovo Ideapad 330-15ARR Fan Assembly Replacement

Cosa ti serve

  1. Lenovo Ideapad 330-15ARR Fan Assembly Replacement, Lower Case: passo 1, immagine 1 di 1
    • Remove all Phillips #0 screws securing the case to the laptop.

  2. Lenovo Ideapad 330-15ARR Fan Assembly Replacement: passo 2, immagine 1 di 2 Lenovo Ideapad 330-15ARR Fan Assembly Replacement: passo 2, immagine 2 di 2
    • Pry all edges off of the laptop with the opening tool until the lower case releases.

    • Remove the lower case.

  3. Lenovo Ideapad 330-15ARR Fan Assembly Replacement, Fan Assembly: passo 3, immagine 1 di 2 Lenovo Ideapad 330-15ARR Fan Assembly Replacement, Fan Assembly: passo 3, immagine 2 di 2
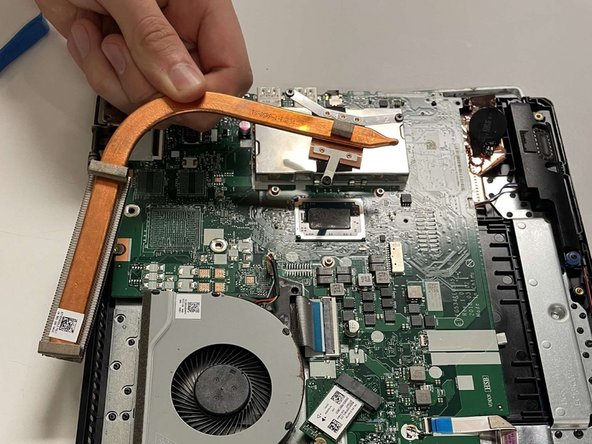
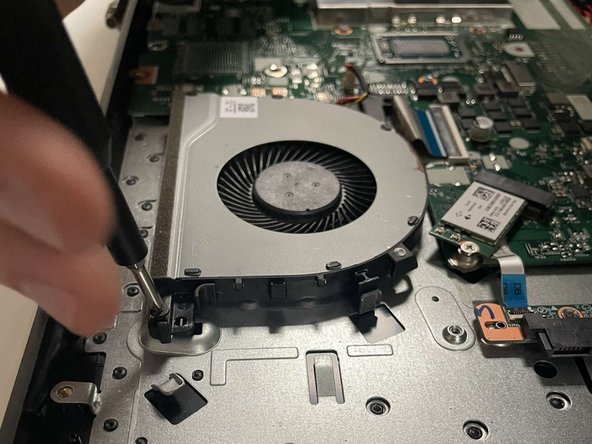
    • Unscrew all three captive screws attaching the heat sink to the motherboard with a Phillips #0 screwdriver.

    • These screws stay attached to the heatsink, so do not attempt to remove them.

  4. Lenovo Ideapad 330-15ARR Fan Assembly Replacement: passo 4, immagine 1 di 2 Lenovo Ideapad 330-15ARR Fan Assembly Replacement: passo 4, immagine 2 di 2
    • Remove the three Phillips #0 screws securing the fan assembly.

  5. Lenovo Ideapad 330-15ARR Fan Assembly Replacement: passo 5, immagine 1 di 3 Lenovo Ideapad 330-15ARR Fan Assembly Replacement: passo 5, immagine 2 di 3 Lenovo Ideapad 330-15ARR Fan Assembly Replacement: passo 5, immagine 3 di 3
    • Take the wires in your hand, and firmly but gently pull it out of its port.

    • Lift the fan assembly out of the device.

Conclusione

To reassemble your device, follow these instructions in reverse order.

0 Commenti

Aggiungi Commento

Visualizza Statistiche:

Ultime 24 Ore: 1

Ultimi 7 Giorni: 2

Ultimi 30 Giorni: 13

Tutti i Tempi: 306