Introduzione
Batteries in all devices sometimes fail due to usage overtime, water damage, and devices breaking. Rather than people fixing their devices they sometimes opt to buy a new one. Doing this can be expensive and people could save money if they choose to change the battery in devices. This guide will give instructions on how to replace a battery for your IdeaTab S2109A-F Speaker if its battery is not working at full capacity. Make sure that the speaker is off before starting to avoid any hazards during the process.
Strumenti
Parti
Nessuna parte specificata.
-
-
Place the tablet on its screen and use the opening tool to remove the back cover.
-
With the tool, place slight pressure on the tablet to pry the back panel off.
-
-
-
After the back panel is removed, all internal components should be visible.
-
The replaced battery is located above the other components.
-
-
-
Grab the battery and gently lift upwards. This will show a red and black coiled wire.
-
Pull the battery gently until the cord has no slack.
-
-
-
Carefully hold the battery in one hand while your other hand's index finger and thumb grab the two wires nearest to their connection point.
-
Use your fingers to give a firm tug to the black and red wires, but do not yank them hard enough to damage the tablet. With the cords out the batteries disconnected.
-
-
-
Locate the long, L-shaped system board copper foil runs most of its length.
-
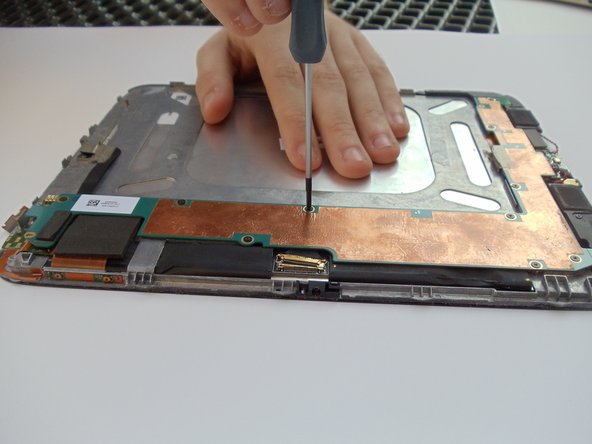
Remove the 10 2mm PH00 black screws on the edges of the system board with a PH00 screwdriver.
-
-
-
Disconnect the gold connector by lifting the latch with the plastic opening tool, pulling it use using the latch.
-
-
-
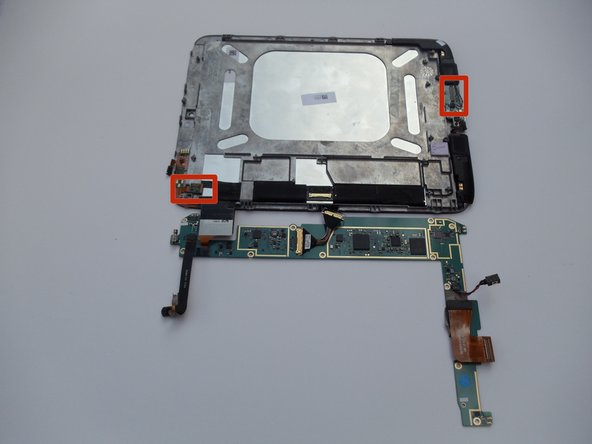
Pull up on the L shaped board.
-
The one bottom and one top connection points should disconnect.
-
-
-
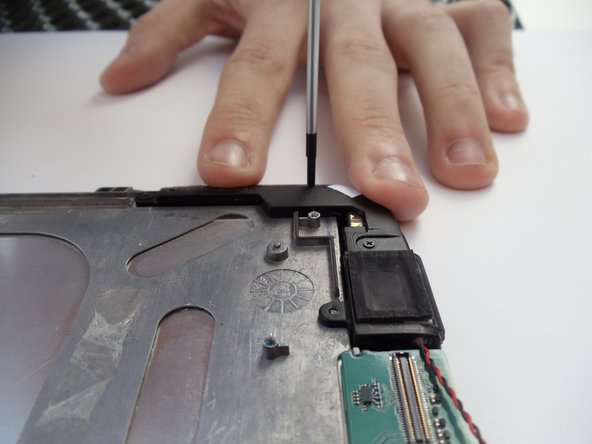
Unscrew the 7 2mm PH00 black screws connecting the speakers using the PH00 screwdriver.
-
-
-
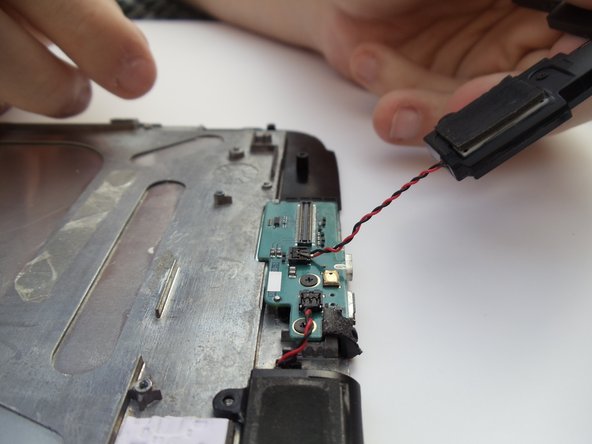
Lift the disconnected speakers from their resting position.
-
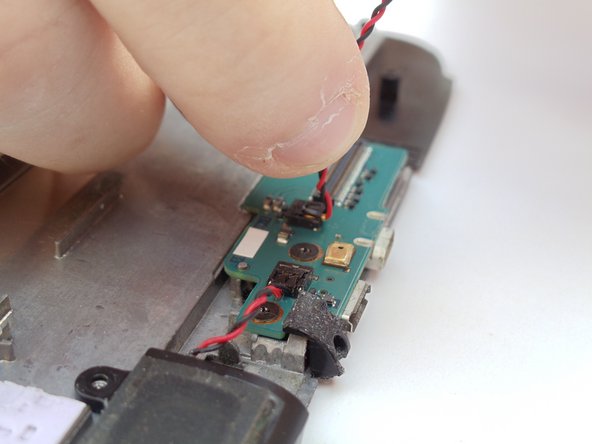
Grab the red and black cable with your index finger and thumb.
-
-
To reassemble your device, follow these instructions in reverse order.