Questa versione può contenere modifiche errate. Passa all'ultima istantanea verificata.
Cosa ti serve
-
Questo passaggio è privo di traduzione. Aiuta a tradurlo
-
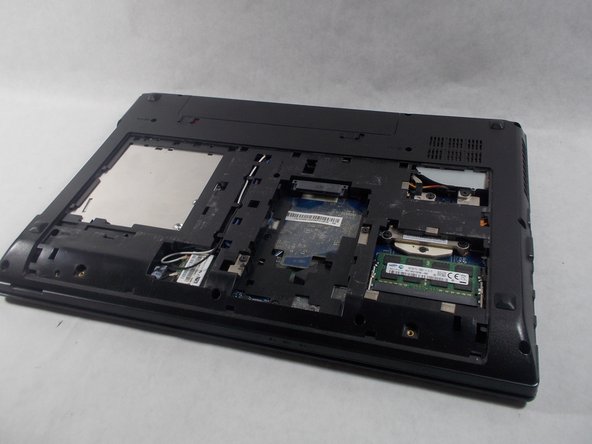
Turn over the device so that the bottom is facing up. Make sure the hinged side is facing you.
-
-
Questo passaggio è privo di traduzione. Aiuta a tradurlo
-
Move the right switch towards the right until it clicks in place. You should then see the color red reveal from where the switch was originally.
-
-
Questo passaggio è privo di traduzione. Aiuta a tradurlo
-
Now take your left hand and slide the left switch to the left.
-
-
-
Questo passaggio è privo di traduzione. Aiuta a tradurlo
-
Take your free hand and place it on the battery. Gently slide it away from its slot.
-
-
Questo passaggio è privo di traduzione. Aiuta a tradurlo
-
Rotate the laptop so that now the hinge is facing away from you.
-
Remove the two 2.5 x 4.0 mm Phillips #0 screws from the underside of the laptop.
-
-
Questo passaggio è privo di traduzione. Aiuta a tradurlo
-
Slide the bottom panel towards you until it stops, and then carefully lift it off.
-
-
Questo passaggio è privo di traduzione. Aiuta a tradurlo
-
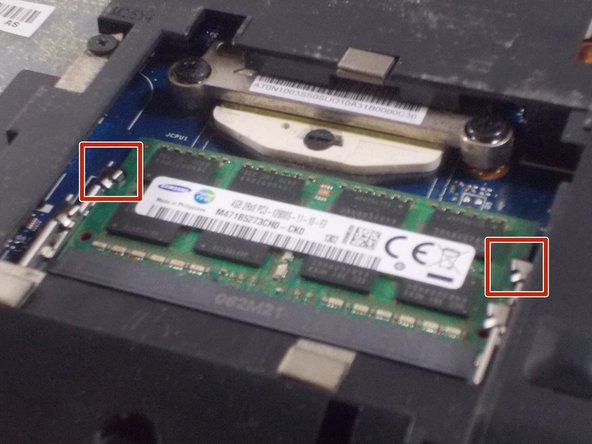
The RAM sticks can be found at the bottom right of the laptop.
-
Carefully press the two silver buttons on either side of the stick outwards. This will cause the RAM to “pop” up.
-
-
Questo passaggio è privo di traduzione. Aiuta a tradurlo
-
Carefully slide the RAM straight out of its socket.
-


Annulla: non ho completato questa guida.
Un'altra persona ha completato questa guida.
Team

UMass Dartmouth, Team S5-G2, Peak Spring 2018 Membro di UMass Dartmouth, Team S5-G2, Peak Spring 2018
UMASSD-PEAK-S18S5G2
2 Membri
5 Guide realizzate