Salta al contenuto principale

Questa versione può contenere modifiche errate. Passa all'ultima istantanea verificata.

Cosa ti serve

  1. Questo passaggio è privo di traduzione. Aiuta a tradurlo

    : passo 1, immagine 1 di 1
    • Power off your Lenovo Ideapad Flex4-1130 before beginning disassembly.

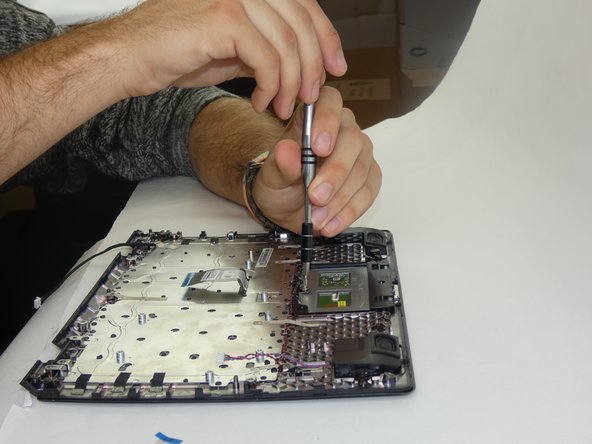
    • Remove the ten 4mm screws from the back panel.

  2. Questo passaggio è privo di traduzione. Aiuta a tradurlo

    : passo 2, immagine 1 di 1
    • Insert the spudger into the groove work your way around the laptop to separate the bottom from the case.

    • Do not insert the spudger too deep! This could potentially damage a device part.

  3. Questo passaggio è privo di traduzione. Aiuta a tradurlo

    : passo 3, immagine 1 di 1
    • Remove the connector attaching the battery to the motherboard.

  4. Questo passaggio è privo di traduzione. Aiuta a tradurlo

    : passo 4, immagine 1 di 1
    • Remove the four 4mm screws on the battery.

  5. Questo passaggio è privo di traduzione. Aiuta a tradurlo

    : passo 5, immagine 1 di 1
    • Lift the battery with a spudger and remove.

  6. Questo passaggio è privo di traduzione. Aiuta a tradurlo

    : passo 6, immagine 1 di 1
    • Remove eleven 6mm screws.

  7. Questo passaggio è privo di traduzione. Aiuta a tradurlo

    : passo 7, immagine 1 di 1
    • Lift up black flap on the ZIF connector and pull the ribbon cable out.

  8. Questo passaggio è privo di traduzione. Aiuta a tradurlo

    : passo 8, immagine 1 di 1
    • Lift up on the black tab on the ZIF connector and pull the ribbon cable out.

  9. Questo passaggio è privo di traduzione. Aiuta a tradurlo

    : passo 9, immagine 1 di 1
    • Remove connector cable.

  10. Questo passaggio è privo di traduzione. Aiuta a tradurlo

    : passo 10, immagine 1 di 1
    • Remove one last connector cable.

    • Motherboard should now be completely disconnected and can be lifted off the cover to be replaced.

  11. Questo passaggio è privo di traduzione. Aiuta a tradurlo

    : passo 11, immagine 1 di 1
    • Due to the amount of force required to remove the screws holding the touchpad, we recommend removing the motherboard before attempting this replacement to reduce the chances of damaging any components.

    • Lift up the black tab on the ZIF connector and pull the ribbon cable out.

  12. Questo passaggio è privo di traduzione. Aiuta a tradurlo

    : passo 12, immagine 1 di 2 : passo 12, immagine 2 di 2
    • Remove three 8mm screws.

  13. Questo passaggio è privo di traduzione. Aiuta a tradurlo

    : passo 13, immagine 1 di 1
    • Push the touchpad outwards to remove it.

Linea Traguardo

Team

USF Tampa, Team S17-G5, Boczar Spring 2018 Membro di USF Tampa, Team S17-G5, Boczar Spring 2018

USFT-BOCZAR-S18S17G5

3 Membri

5 Guide realizzate

0 Commenti

Aggiungi Commento

Visualizza Statistiche:

Ultime 24 Ore: 0

Ultimi 7 Giorni: 0

Ultimi 30 Giorni: 13

Tutti i Tempi: 667