Questa versione può contenere modifiche errate. Passa all'ultima istantanea verificata.
Cosa ti serve
-
Questo passaggio è privo di traduzione. Aiuta a tradurlo
-
Unscrew the three 6mm Phillips #1 screws from the upper back cover.
-
-
-
Questo passaggio è privo di traduzione. Aiuta a tradurlo
-
Place the opening tool's head under any edge of the keyboard.
-
Pull upwards to unsnap the keyboard.
-
Use your fingers and the opening tool to pop the keyboard out of its place.
-
-
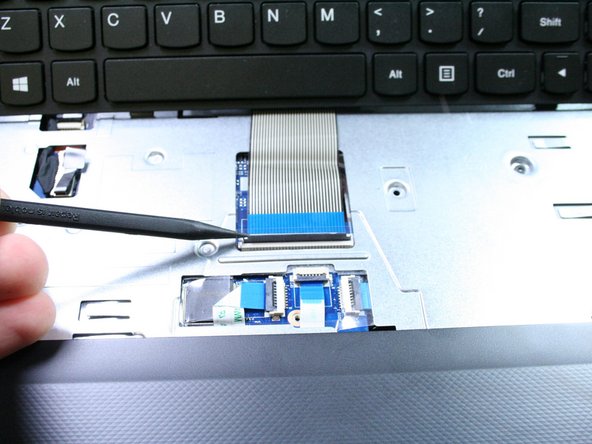
Questo passaggio è privo di traduzione. Aiuta a tradurlo
-
Push the keyboard connector latch upwards with the spudger.
-
The keyboard connector cable should slide right out.
-


Annulla: non ho completato questa guida.
Altre 3 persone hanno completato questa guida.
Team

UC Davis, Team 1-3, Rodger Winter 2017 Membro di UC Davis, Team 1-3, Rodger Winter 2017
UCD-RODGER-W17S1G3
4 Membri
6 Guide realizzate