Salta al contenuto principale

Lenovo Flex 6-11IGM Heat Sink Replacement

Cosa ti serve

  1. Lenovo Flex 6-11IGM Heat Sink Replacement, Back Panel: passo 1, immagine 1 di 1
    • Flip the device over and lay it down with the underside facing upwards.

  2. Lenovo Flex 6-11IGM Heat Sink Replacement: passo 2, immagine 1 di 2 Lenovo Flex 6-11IGM Heat Sink Replacement: passo 2, immagine 2 di 2
    • Remove the ten screws with a Phillips #00 screwdriver.

  3. Lenovo Flex 6-11IGM Heat Sink Replacement: passo 3, immagine 1 di 1
    • Using a plastic opening tool, make your way around the edge of the laptop.

  4. Lenovo Flex 6-11IGM Heat Sink Replacement: passo 4, immagine 1 di 2 Lenovo Flex 6-11IGM Heat Sink Replacement: passo 4, immagine 2 di 2
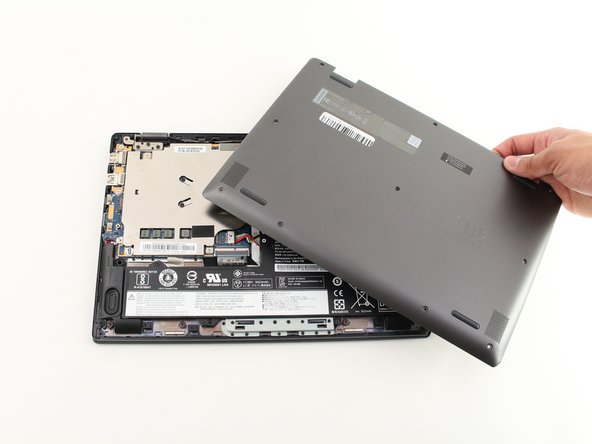
    • After making sure the back panel is completely free from the body, remove the back panel.

  5. Lenovo Flex 6-11IGM Heat Sink Replacement, Battery: passo 5, immagine 1 di 2 Lenovo Flex 6-11IGM Heat Sink Replacement, Battery: passo 5, immagine 2 di 2
    • Remove the five 3.9 mm Phillips #00 black screws holding the battery in place.

  6. Lenovo Flex 6-11IGM Heat Sink Replacement: passo 6, immagine 1 di 3 Lenovo Flex 6-11IGM Heat Sink Replacement: passo 6, immagine 2 di 3 Lenovo Flex 6-11IGM Heat Sink Replacement: passo 6, immagine 3 di 3
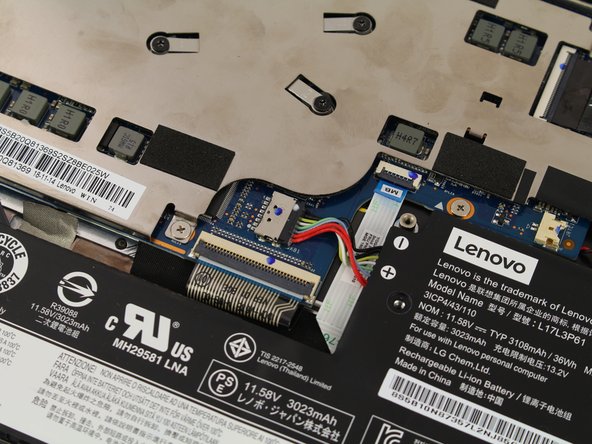
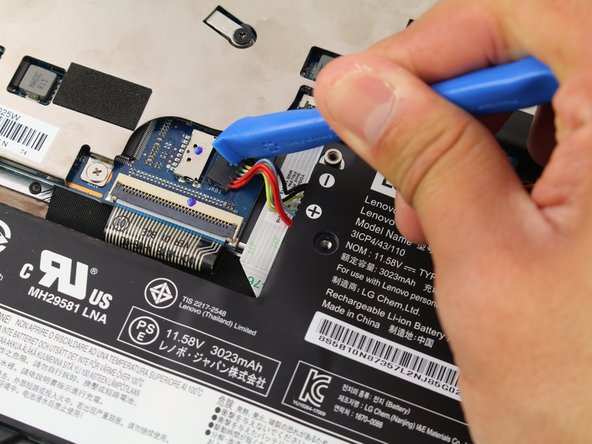
    • Pull out the multicolored connecting cables using an iFixit opening tool.

  7. Lenovo Flex 6-11IGM Heat Sink Replacement: passo 7, immagine 1 di 1
    • Remove the now disconnected battery from the laptop.

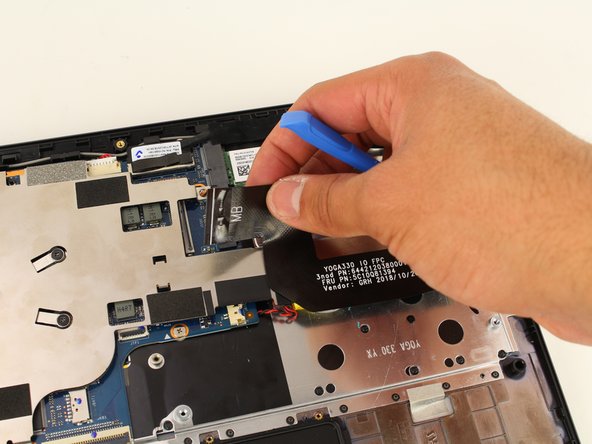
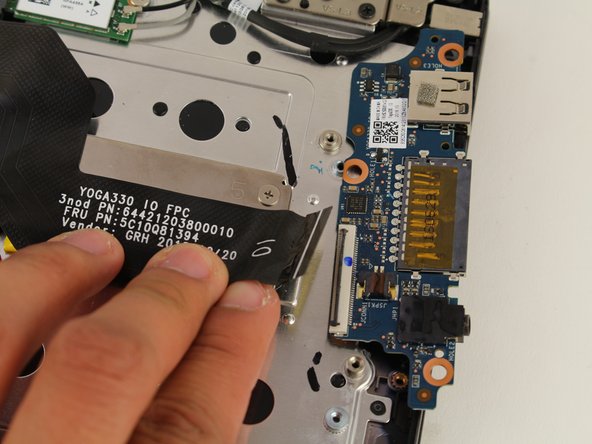
  8. Lenovo Flex 6-11IGM Heat Sink Replacement, Heat Sink: passo 8, immagine 1 di 3 Lenovo Flex 6-11IGM Heat Sink Replacement, Heat Sink: passo 8, immagine 2 di 3 Lenovo Flex 6-11IGM Heat Sink Replacement, Heat Sink: passo 8, immagine 3 di 3
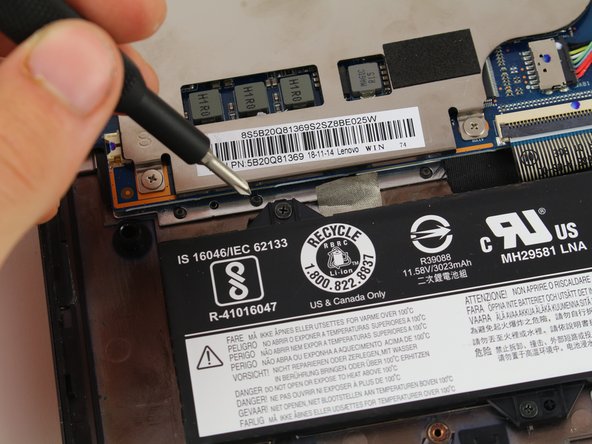
    • Disconnect the ribbon connector from both ends by disengaging the black latch and pulling it directly from its port.

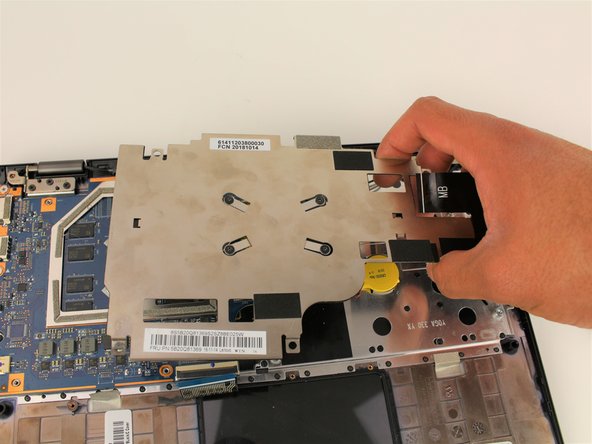
  9. Lenovo Flex 6-11IGM Heat Sink Replacement: passo 9, immagine 1 di 2 Lenovo Flex 6-11IGM Heat Sink Replacement: passo 9, immagine 2 di 2
    • Remove the 3.5 mm length screws in the numbered order from 1-10 using the Phillips #00 screwdriver (not all are shown in the first image).

    • Remove the heat sink.

Conclusione

To reassemble your device, follow these instructions in reverse order.

Rie Kuraoka

Membro da: 01/23/20

886 Reputazione

7 Guide realizzate

Team

Cal Poly, Team S7-G10, Paton Spring 2020 Membro di Cal Poly, Team S7-G10, Paton Spring 2020

CPSU-PATON-S20S7G10

2 Membri

9 Guide realizzate

0 Commenti

Aggiungi Commento

Visualizza Statistiche:

Ultime 24 Ore: 0

Ultimi 7 Giorni: 0

Ultimi 30 Giorni: 1

Tutti i Tempi: 282