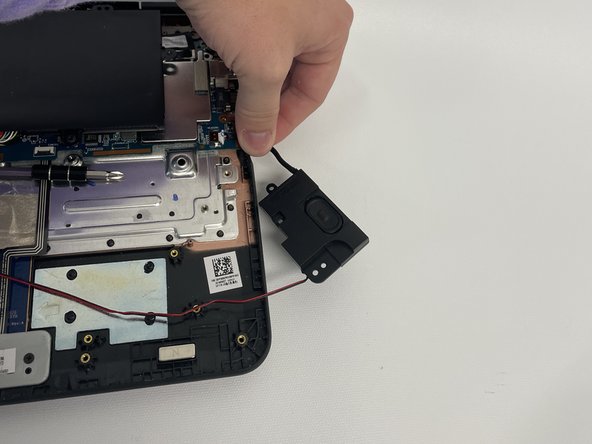
Salta al contenuto principale

Lenovo 300e Chromebook Speakers Replacement

Cosa ti serve

  1. Lenovo 300e Chromebook Speakers Replacement, Back Cover: passo 1, immagine 1 di 3 Lenovo 300e Chromebook Speakers Replacement, Back Cover: passo 1, immagine 2 di 3 Lenovo 300e Chromebook Speakers Replacement, Back Cover: passo 1, immagine 3 di 3
    • Remove eleven 5 mm screws from the back of the computer using a Phillips #2 screwdriver.

  2. Lenovo 300e Chromebook Speakers Replacement: passo 2, immagine 1 di 3 Lenovo 300e Chromebook Speakers Replacement: passo 2, immagine 2 di 3 Lenovo 300e Chromebook Speakers Replacement: passo 2, immagine 3 di 3
    • Use a spudger along the edge of the Chromebook to gently remove the back cover of the laptop.

  3. Lenovo 300e Chromebook Speakers Replacement, Battery: passo 3, immagine 1 di 3 Lenovo 300e Chromebook Speakers Replacement, Battery: passo 3, immagine 2 di 3 Lenovo 300e Chromebook Speakers Replacement, Battery: passo 3, immagine 3 di 3
    • Remove six 3 mm screws from the battery with a Phillips #2 screwdriver.

  4. Lenovo 300e Chromebook Speakers Replacement: passo 4, immagine 1 di 3 Lenovo 300e Chromebook Speakers Replacement: passo 4, immagine 2 di 3 Lenovo 300e Chromebook Speakers Replacement: passo 4, immagine 3 di 3
    • Disconnect the wiring harness that connects the battery to the motherboard.

    • Lift the battery up and out of the laptop.

  5. Lenovo 300e Chromebook Speakers Replacement, Speakers: passo 5, immagine 1 di 3 Lenovo 300e Chromebook Speakers Replacement, Speakers: passo 5, immagine 2 di 3 Lenovo 300e Chromebook Speakers Replacement, Speakers: passo 5, immagine 3 di 3
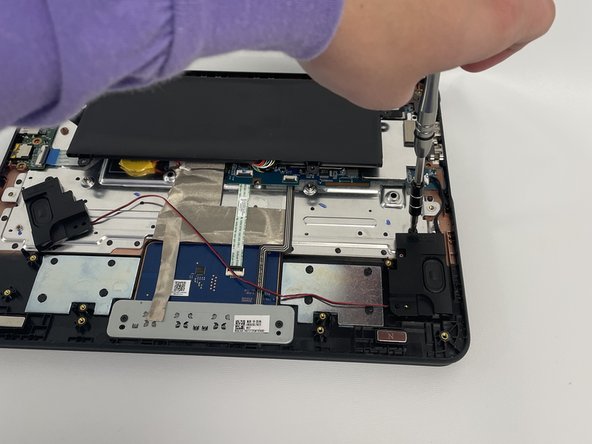
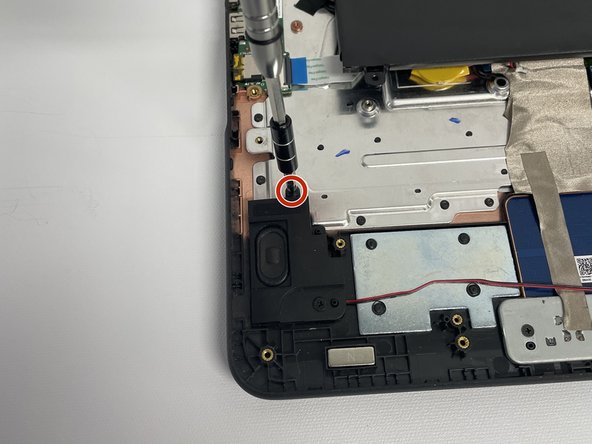
    • Remove a single 5 mm screw from each speaker using a Phillips #2 screwdriver.

  6. Lenovo 300e Chromebook Speakers Replacement: passo 6, immagine 1 di 3 Lenovo 300e Chromebook Speakers Replacement: passo 6, immagine 2 di 3 Lenovo 300e Chromebook Speakers Replacement: passo 6, immagine 3 di 3
    • Disconnect the speaker cable from the motherboard.

    • Remove the speakers from the laptop.

Conclusione

To reassemble your device, follow these instructions in reverse order.

0 Commenti

Aggiungi Commento

Visualizza Statistiche:

Ultime 24 Ore: 1

Ultimi 7 Giorni: 1

Ultimi 30 Giorni: 3

Tutti i Tempi: 169