Salta al contenuto principale

Lenovo 300e Chromebook Motherboard Replacement

Cosa ti serve

  1. Lenovo 300e Chromebook Motherboard  Replacement, Back Cover: passo 1, immagine 1 di 3 Lenovo 300e Chromebook Motherboard  Replacement, Back Cover: passo 1, immagine 2 di 3 Lenovo 300e Chromebook Motherboard  Replacement, Back Cover: passo 1, immagine 3 di 3
    • Remove eleven 5 mm screws from the back of the computer using a Phillips #2 screwdriver.

  2. Lenovo 300e Chromebook Motherboard  Replacement: passo 2, immagine 1 di 3 Lenovo 300e Chromebook Motherboard  Replacement: passo 2, immagine 2 di 3 Lenovo 300e Chromebook Motherboard  Replacement: passo 2, immagine 3 di 3
    • Use a spudger along the edge of the Chromebook to gently remove the back cover of the laptop.

  3. Lenovo 300e Chromebook Motherboard  Replacement, Battery: passo 3, immagine 1 di 3 Lenovo 300e Chromebook Motherboard  Replacement, Battery: passo 3, immagine 2 di 3 Lenovo 300e Chromebook Motherboard  Replacement, Battery: passo 3, immagine 3 di 3
    • Remove six 3 mm screws from the battery with a Phillips #2 screwdriver.

  4. Lenovo 300e Chromebook Motherboard  Replacement: passo 4, immagine 1 di 3 Lenovo 300e Chromebook Motherboard  Replacement: passo 4, immagine 2 di 3 Lenovo 300e Chromebook Motherboard  Replacement: passo 4, immagine 3 di 3
    • Disconnect the wiring harness that connects the battery to the motherboard.

    • Lift the battery up and out of the laptop.

  5. Lenovo 300e Chromebook Motherboard  Replacement, Motherboard: passo 5, immagine 1 di 2 Lenovo 300e Chromebook Motherboard  Replacement, Motherboard: passo 5, immagine 2 di 2
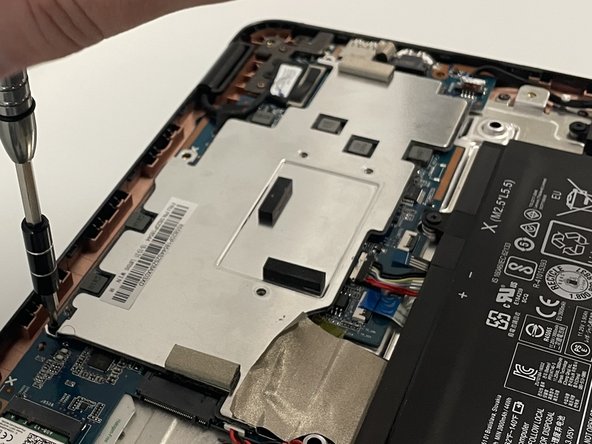
    • Remove the three silver 3 mm screws from the center of the metal cover using a Phillips #00 screwdriver.

  6. Lenovo 300e Chromebook Motherboard  Replacement: passo 6, immagine 1 di 3 Lenovo 300e Chromebook Motherboard  Replacement: passo 6, immagine 2 di 3 Lenovo 300e Chromebook Motherboard  Replacement: passo 6, immagine 3 di 3
    • Remove two 3 mm screws from the top of the metal cover using a Phillips #2 screwdriver.

    • Remove the metal cover from the laptop.

  7. Lenovo 300e Chromebook Motherboard  Replacement: passo 7, immagine 1 di 3 Lenovo 300e Chromebook Motherboard  Replacement: passo 7, immagine 2 di 3 Lenovo 300e Chromebook Motherboard  Replacement: passo 7, immagine 3 di 3
    • Remove the nine 3 mm screws from the motherboard using a Phillips #2 screwdriver.

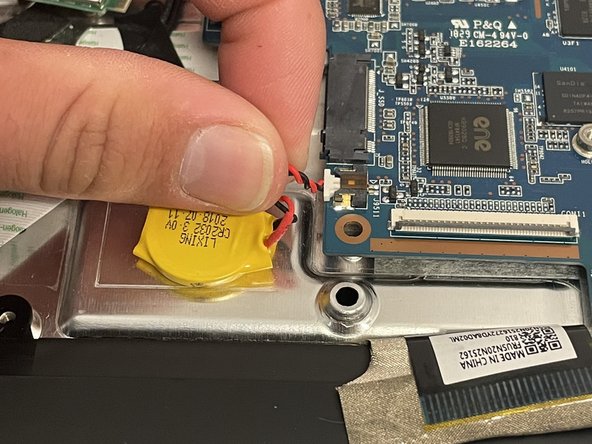
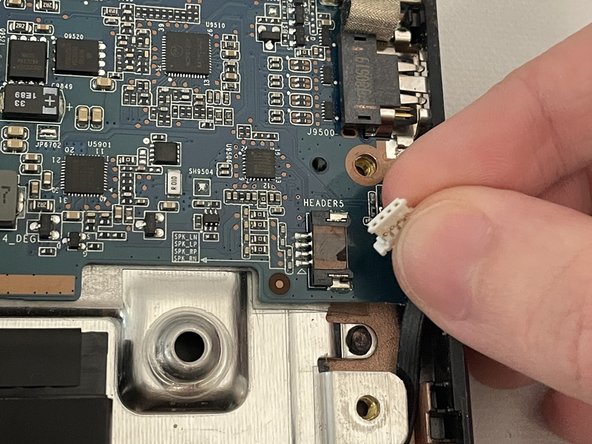
    • Detach all the connectors from the motherboard.

  8. Lenovo 300e Chromebook Motherboard  Replacement: passo 8, immagine 1 di 3 Lenovo 300e Chromebook Motherboard  Replacement: passo 8, immagine 2 di 3 Lenovo 300e Chromebook Motherboard  Replacement: passo 8, immagine 3 di 3
    • Remove the tape using a spudger.

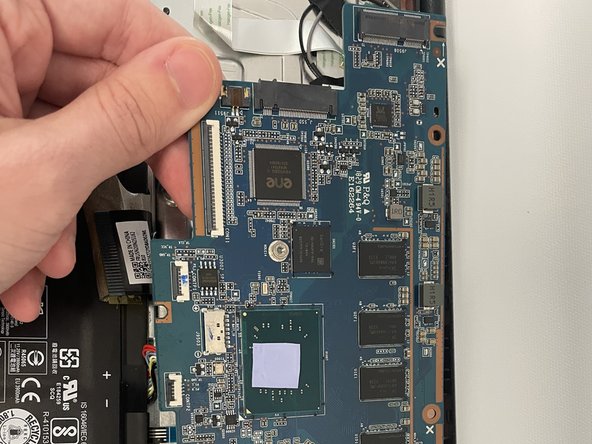
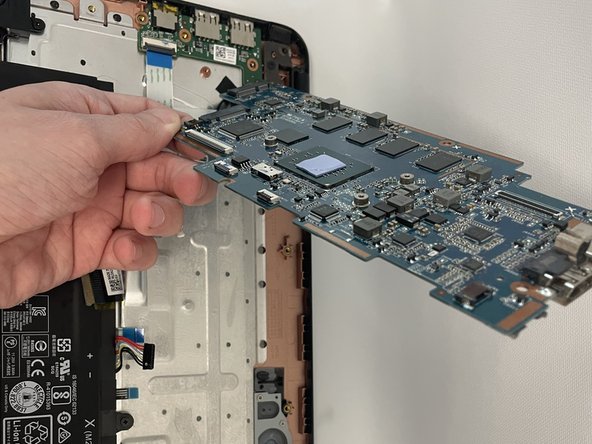
    • Disconnect the large cable connector.

    • Remove the motherboard from the laptop.

Conclusione

To reassemble your device, follow these instructions in reverse order.

Un commento

where is the write protect screw located im trying to install windows on this model

Harvey Willis - Replica

Aggiungi Commento

Visualizza Statistiche:

Ultime 24 Ore: 0

Ultimi 7 Giorni: 11

Ultimi 30 Giorni: 45

Tutti i Tempi: 1,201