Introduzione
This guide will show the steps needed to take out and replace the battery in the Lenovo Chromebook 100e 2nd gen. The battery gives the Chromebook power and is a necessity to a computer as it allows the computer to run properly. Batteries in any device can get worn out, degrade, and eventually stop working over time. This is why the replacement of a battery is very important to keep your device running for longer periods and in good condition. If your Lenovo Chromebook seems to be losing battery quickly or doesn't feel like it's getting enough charge, then you need a battery replacement and this guide is just for you!
Be aware of the following before getting started:
- Go over the owner's manual for any safety precautions here
- Consider using gloves and/or eye protection as battery acid is a possibility and can harm your skin
- Make sure the Chromebook is fully dead and the battery has no charge left ensuring a safe replacement
Does my Chromebook need a new battery?
- Your laptop takes a long time to charge.
- Your laptop dies unexpectedly.
- Your laptop battery looks bloated.
- Your laptop overheats.
- Your laptop tells you.
Finally, there are no special skills required and anyone can do this replacement with a few easy steps.
Cosa ti serve
-
-
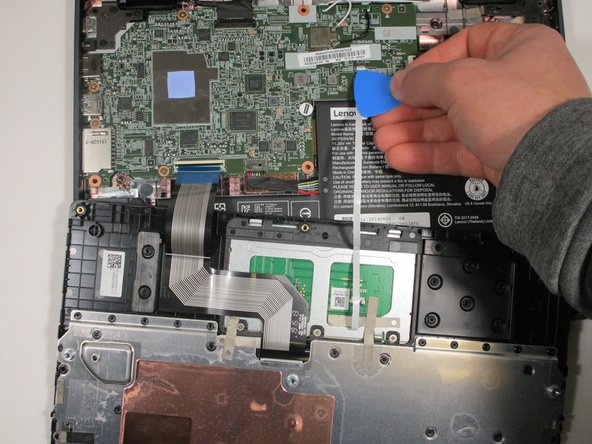
Remove the nine 6 mm screws from the back of the laptop using a Phillips #0 screwdriver.
-
-


To reassemble your device, follow these instructions in reverse order.
To reassemble your device, follow these instructions in reverse order.

Team

Illinois Wesleyan University, Team S1-G4, Bullock Spring 2021 Membro di Illinois Wesleyan University, Team S1-G4, Bullock Spring 2021
IWU-BULLOCK-S21S1G4
4 Membri
14 Guide realizzate