Salta al contenuto principale

LeapFrog LeapPad Ultra Repair Speaker Replacement

Cosa ti serve

  1. LeapFrog LeapPad Ultra Repair Speaker Replacement, Battery: passo 1, immagine 1 di 1
    • Remove the barcode covering the two screws on the lower back of the Leap Pad.

  2. LeapFrog LeapPad Ultra Repair Speaker Replacement: passo 2, immagine 1 di 1
    • Remove the two 5 mm screws that were covered by the sticker.

  3. LeapFrog LeapPad Ultra Repair Speaker Replacement: passo 3, immagine 1 di 1
    • Using a plastic opening tool, pry off the outer protective child proof casing, starting from the bottom.

  4. LeapFrog LeapPad Ultra Repair Speaker Replacement: passo 4, immagine 1 di 1
    • Remove the 7 mm screw to the right of the cartridge dock, two 8 mm screws in the top left, and the nine 8 mm screws holding the the green shell.

  5. LeapFrog LeapPad Ultra Repair Speaker Replacement: passo 5, immagine 1 di 1
    • Remove the hard plastic casing, exposing the motherboard and battery.

  6. LeapFrog LeapPad Ultra Repair Speaker Replacement: passo 6, immagine 1 di 2 LeapFrog LeapPad Ultra Repair Speaker Replacement: passo 6, immagine 2 di 2
    Attrezzo utilizzato in questo passaggio:
    Tweezers
    $4.99
    Compra
    • Disconnect the battery using tweezers or your fingernails.

    • The battery is glued down, if available put some isopropyl alcohol around the edges of the battery to soften the glue.

    • Gently pry of the battery lose using a spudger or another thin prying tool.

    • Be careful, damaging/puncturing the battery may cause an explosion.

  7. LeapFrog LeapPad Ultra Repair Speaker Replacement, Speaker: passo 7, immagine 1 di 1
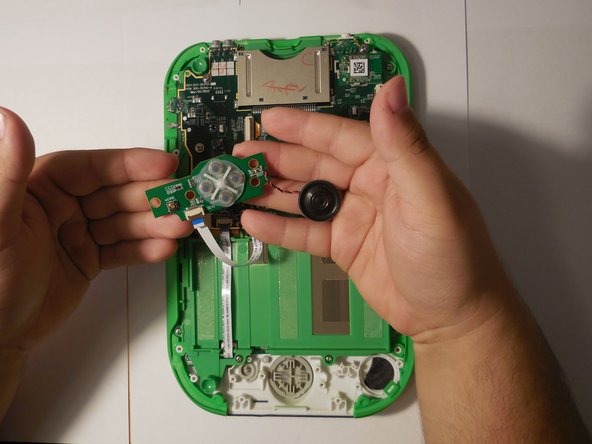
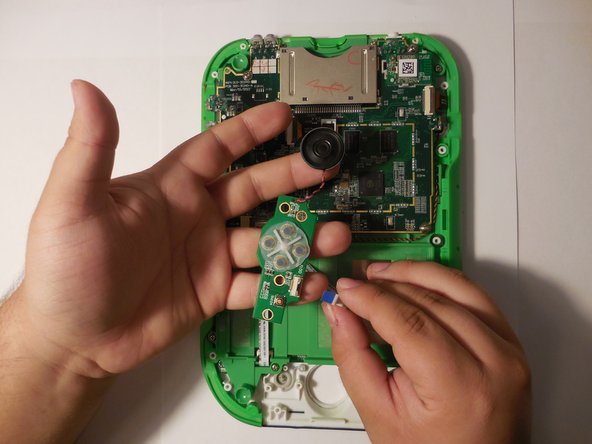
    • Find the screws on the bottom of the device holding down the button and speakers board.

  8. LeapFrog LeapPad Ultra Repair Speaker Replacement: passo 8, immagine 1 di 2 LeapFrog LeapPad Ultra Repair Speaker Replacement: passo 8, immagine 2 di 2
    • There should be a plastic covering over the speaker, carefully pull on the opposite side from the plastic clip holding it in place.

    • Excessive force can break the plastic clip, only use enough for to remove it gently

  9. LeapFrog LeapPad Ultra Repair Speaker Replacement: passo 9, immagine 1 di 2 LeapFrog LeapPad Ultra Repair Speaker Replacement: passo 9, immagine 2 di 2
    • Lift the button and speaker board, and turn it over, revealing the other side of the board.

  10. LeapFrog LeapPad Ultra Repair Speaker Replacement: passo 10, immagine 1 di 2 LeapFrog LeapPad Ultra Repair Speaker Replacement: passo 10, immagine 2 di 2
    • Find the ribbon cable connection and with a small plastic tool flip the plastic holding it down up.

    • You can now safely remove the ribbon cable by gently pulling it out of the slot.

    • Trying to remove the cable with brute force will damage the cable.

Conclusione

To reassemble your device, follow these instructions in reverse order.

Carlos Ortiz

Membro da: 08/24/15

219 Reputazione

1 Guida realizzata

Team

USF Tampa, Team 4-99, Meier Fall 2015 Membro di USF Tampa, Team 4-99, Meier Fall 2015

USFT-MEIER-F15S4G99

4 Membri

10 Guide realizzate

Un commento

Where can i buy a replacement speaker at to do this?

anthonydesiato2002 - Replica

Aggiungi Commento

Visualizza Statistiche:

Ultime 24 Ore: 0

Ultimi 7 Giorni: 0

Ultimi 30 Giorni: 8

Tutti i Tempi: 1,003