Salta al contenuto principale

Le Pan II Motherboard Replacement

Cosa ti serve

  1. Le Pan II Motherboard Replacement, Screen: passo 1, immagine 1 di 2 Le Pan II Motherboard Replacement, Screen: passo 1, immagine 2 di 2
    • Insert metal spudger between front and back panel to pry apart.

    • Continue to pry while moving the metal spudger along the crevice to completely separate two panels.

    • Avoid using metal when opening devices, as it can damage or crack the screen.

  2. Le Pan II Motherboard Replacement: passo 2, immagine 1 di 2 Le Pan II Motherboard Replacement: passo 2, immagine 2 di 2
    • Use the plastic opening tool to disconnect the flat ribbon cable from the motherboard connector.

    • Disconnect the flat ribbon by gently pulling it out from its connecting port.

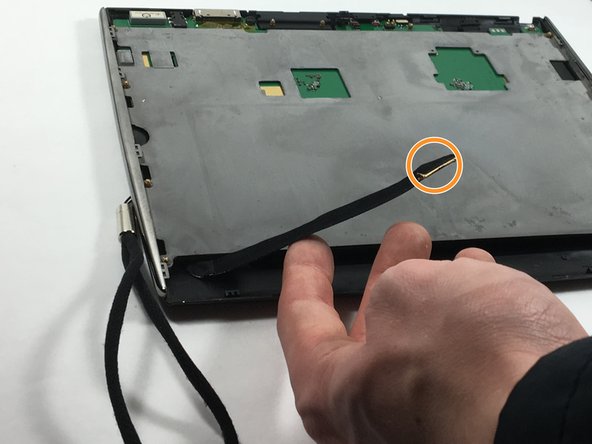
  3. Le Pan II Motherboard Replacement: passo 3, immagine 1 di 2 Le Pan II Motherboard Replacement: passo 3, immagine 2 di 2
    • Use the plastic opening tool to disconnect the display cable from its motherboard connector.

    • Disconnect the display cable by gently pulling it out from its connecting port.

  4. Le Pan II Motherboard Replacement: passo 4, immagine 1 di 1
    • Remove grey metal backing from screen.

  5. Le Pan II Motherboard Replacement: passo 5, immagine 1 di 1
    • Flip the tablet so the screen is facing upward, and use the metal spudger to pry apart the screen from the side pieces.

  6. Le Pan II Motherboard Replacement: passo 6, immagine 1 di 1
    • Lift and carefully remove the LCD display from the front cover.

  7. Le Pan II Motherboard Replacement, Battery: passo 7, immagine 1 di 1
    • Use the plastic opening tool to push out the wires connecting the battery to the motherboard and put battery aside.

  8. Le Pan II Motherboard Replacement, Motherboard: passo 8, immagine 1 di 1
    • Use the Plillips 00 screwdriver head to unscrew the screws to the motherboard.

    • Reminder: There should 8 (3.5mm) screws

  9. Le Pan II Motherboard Replacement: passo 9, immagine 1 di 1
    • Use the Phillips 00 screwdriver head to unscrew the screws to the fan.

    • Reminder: There should be 4 (1 mm) screws for the fan.

    • Note: From here, you can simply lift and remove the motherboard from the rest of the device.

Conclusione

To reassemble your device, follow these instructions in reverse order.

Kelly Moniz

Membro da: 10/20/16

513 Reputazione

5 Guide realizzate

Team

UMass Dartmouth, Team 6-3, Martin Fall 2016 Membro di UMass Dartmouth, Team 6-3, Martin Fall 2016

UMASSD-MARTIN-F16S6G3

3 Membri

10 Guide realizzate

0 Commenti

Aggiungi Commento

Visualizza Statistiche:

Ultime 24 Ore: 0

Ultimi 7 Giorni: 0

Ultimi 30 Giorni: 1

Tutti i Tempi: 167