Questa versione può contenere modifiche errate. Passa all'ultima istantanea verificata.
Cosa ti serve
-
Questo passaggio è privo di traduzione. Aiuta a tradurlo
-
Pry back cover with finger in the crease.
-
Remove back casing.
-
-
Questo passaggio è privo di traduzione. Aiuta a tradurlo
-
With your finger, pry the battery out through the crease made for removal.
-
-
Questo passaggio è privo di traduzione. Aiuta a tradurlo
-
Remove all 11 (4mm) screws with the JIS #000 screwdriver
-
There are three screws on top, three above the battery, one next to the battery, one under the battery and three at the bottom of the phone.
-
-
-
Questo passaggio è privo di traduzione. Aiuta a tradurlo
-
Use the plastic opening tool to remove the back housing from the frame of the phone.
-
-
Questo passaggio è privo di traduzione. Aiuta a tradurlo
-
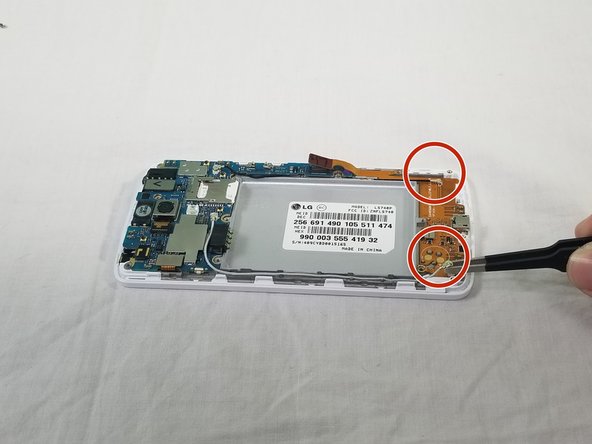
Lift copper tab located on the right side of the device.
-
-
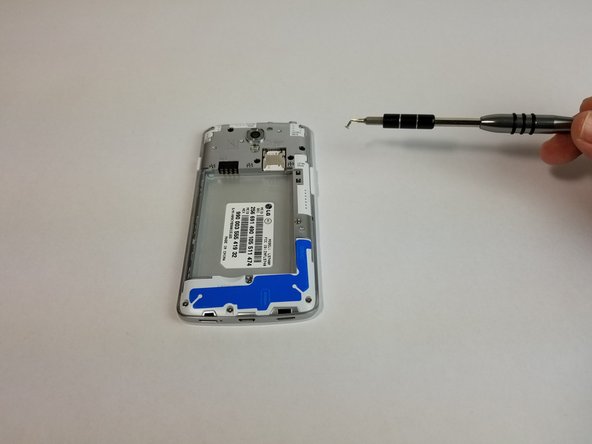
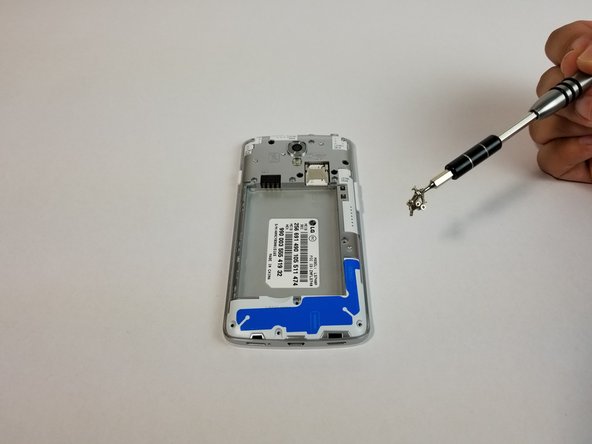
Questo passaggio è privo di traduzione. Aiuta a tradurlo
-
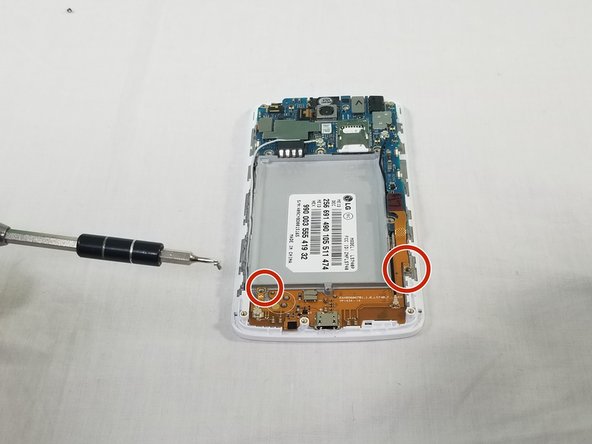
Use a JIS #000 screwdriver to remove the 1 screw (4mm) on right side under copper tab.
-
Use a JIS #000 screwdriver to remove the screw (4mm) on bottom left under battery tray.
-
-
Questo passaggio è privo di traduzione. Aiuta a tradurlo
-
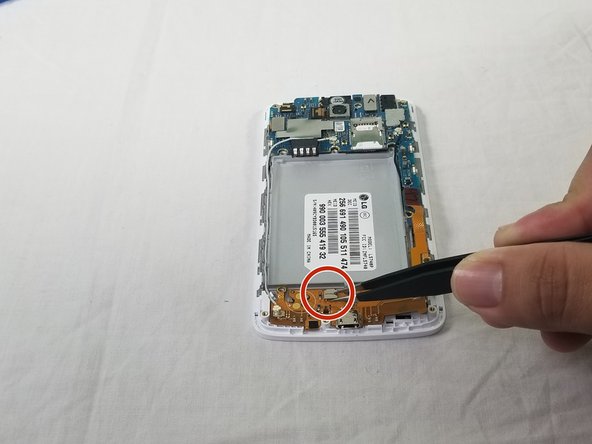
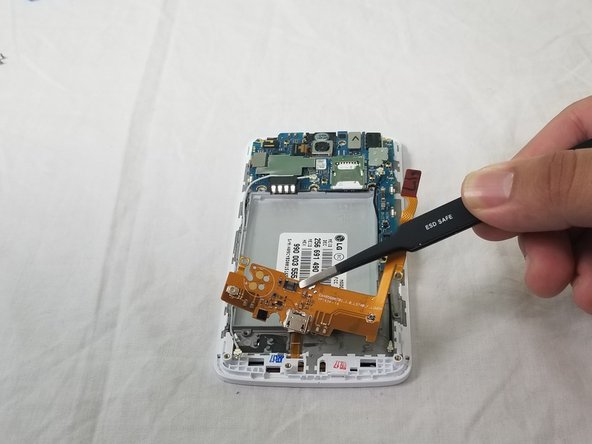
Disconnect the white and black cables as indicated.
-
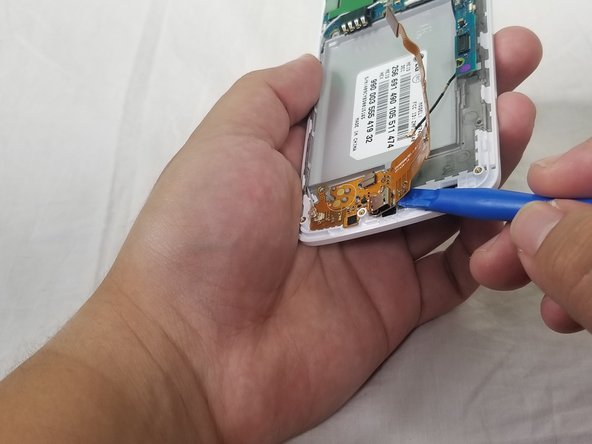
Lift indicated flap as shown.
-
-
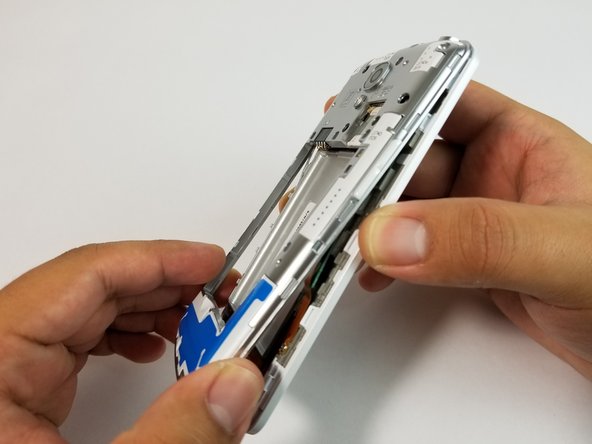
Questo passaggio è privo di traduzione. Aiuta a tradurlo
-
Use the plastic opening tool to carefully lift the charger assembly from the phone.
-
Start from the copper tab and continue in a clockwise direction.
-
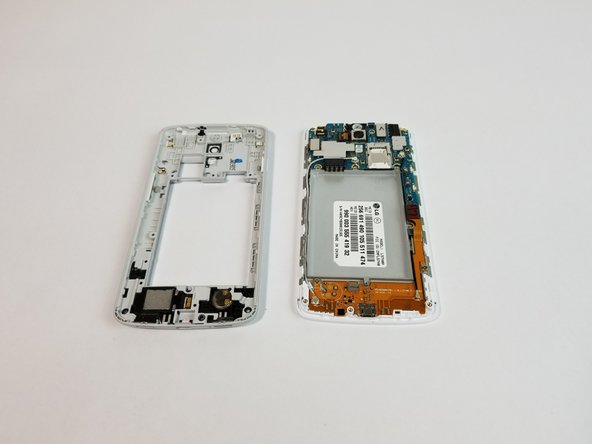
Once it is loose remove the assembly from the phone.
-
-
Questo passaggio è privo di traduzione. Aiuta a tradurlo
-
Put a new charging port in place of old charging port.
-
Follow steps 8 through 1 in that order for reassembly.
-


Annulla: non ho completato questa guida.
Un'altra persona ha completato questa guida.

Team

USF Tampa, Team S3-G3, Cannon Fall 2017 Membro di USF Tampa, Team S3-G3, Cannon Fall 2017
USFT-CANNON-F17S3G3
3 Membri
8 Guide realizzate
2 Commenti
Great guide with excellent pictures
Hi, I replaced mine, but I don’t think it’s working - what voltages should be present on which pins (at the battery connection) when it’s plugged in?