Questa versione può contenere modifiche errate. Passa all'ultima istantanea verificata.
Cosa ti serve
-
-
Posiziona la scheda grigio scuro sul retro del telefono verso l'alto. Premi la scheda verso l'alto del telefono per rilasciare la batteria.
-
-
Questo passaggio è privo di traduzione. Aiuta a tradurlo
-
Pull out the two rubber cushions located on the top of the phone using tweezers.
-
-
-
Questo passaggio è privo di traduzione. Aiuta a tradurlo
-
Unscrew the six screws seen on the back using a Phillips 00 Screwdriver.
-
Remove screws and carefully place on an uncluttered surface or in a small container.
-
-
Questo passaggio è privo di traduzione. Aiuta a tradurlo
-
Carefully remove the back of the phone gently using your fingernails or tweezers.
-
-
Questo passaggio è privo di traduzione. Aiuta a tradurlo
-
Carefully peel off the adhesive tab as shown in the photo
-
-
Questo passaggio è privo di traduzione. Aiuta a tradurlo
-
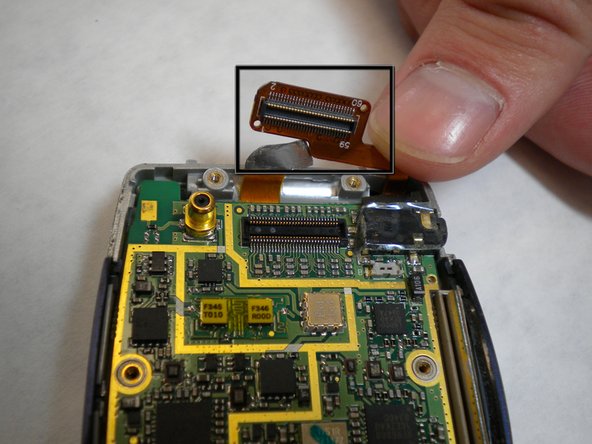
Locate the yellow connection towards the top of the phone. This is directly connected to the screen.
-
Remove the connector by carefully prying it away from the motherboard and lifting it away from the phone
-
-
Questo passaggio è privo di traduzione. Aiuta a tradurlo
-
Gently lift a corner of the motherboard away from the casing to remove.
-


